
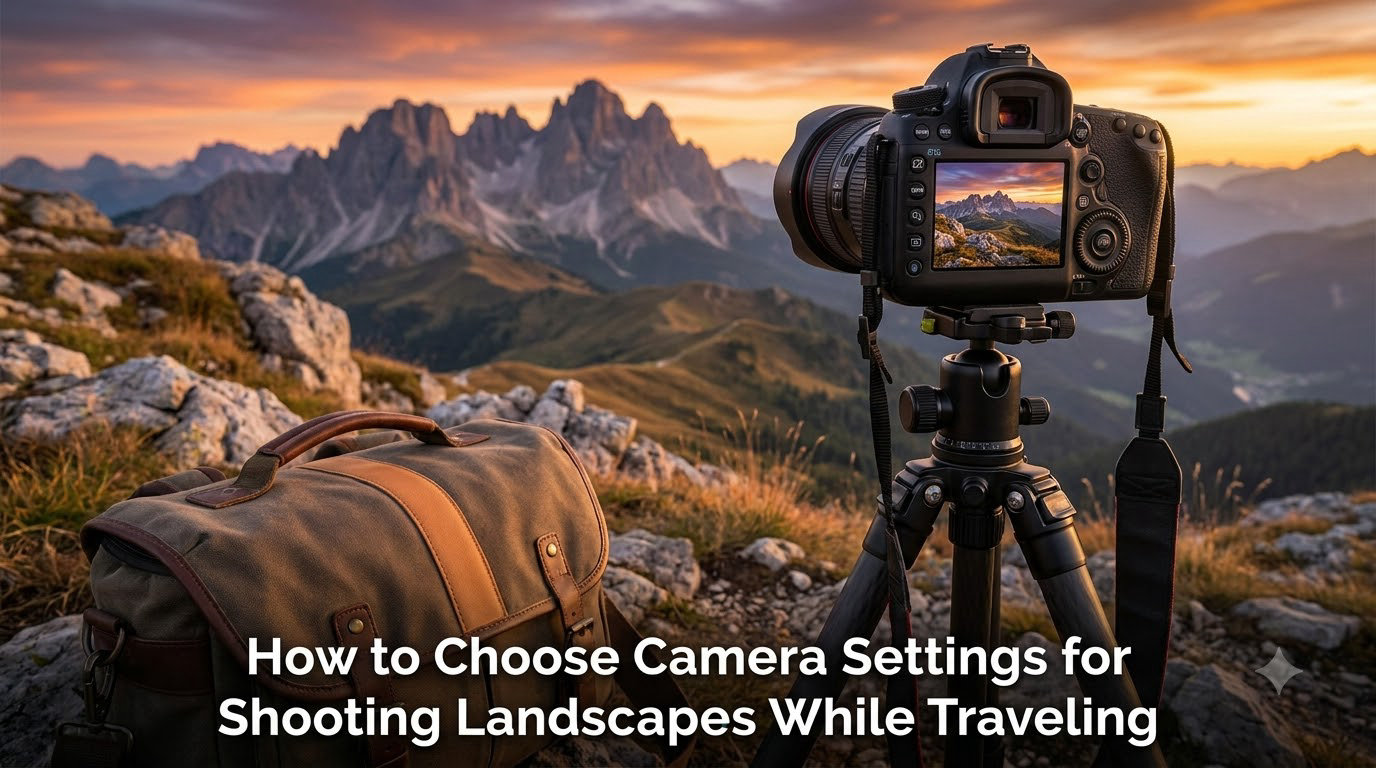
The best camera settings for shooting landscapes while traveling are RAW format, an aperture between f/8 and f/11, ISO 100 or 200, and a shutter speed fast enough to avoid blur (or a tripod when light drops). This combination keeps the entire scene sharp from foreground to horizon while protecting image quality.
If you have ever returned from a trip only to find your mountain shots soft, your skies blown out, or your foregrounds lost in noise, the problem is almost always your settings, not your camera. Learning how to choose camera settings for shooting landscapes while traveling is the single fastest way to transform disappointing travel photos into images you actually want to print.
I have spent the last several years photographing landscapes across deserts, coastlines, and high mountain passes, often with limited gear and unpredictable weather. The system I am about to share is the same one I use on every trip, refined through thousands of frames and a long list of mistakes I will help you avoid.
This guide is built for travel photographers who want a reliable, repeatable process rather than a list of menus to memorize. You will learn exactly which mode to shoot in, what aperture and ISO to pick, how to handle tricky travel lighting, and how to adapt when conditions change by the minute. By the end, you will have a quick reference you can pull up on your phone while standing in front of the scene.
Table of Contents
Quick Reference: How to Choose Camera Settings for Shooting Landscapes While Traveling
Before we go deep, here is the short version you can screenshot and keep on your phone. These are the settings I default to for 80 percent of travel landscape shots.
Mode: Aperture Priority (A or Av on most cameras). Manual mode only when light is consistent or for long exposures.
Aperture: f/8 to f/11 for most scenes. Drop to f/11 to f/16 when you need maximum front-to-back sharpness.
ISO: 100, or 200 if your camera’s base ISO is 200. Raise it only when shutter speed drops too low to handhold.
Shutter speed: Whatever the camera picks in Aperture Priority. Switch to Manual if you need a specific long exposure.
File format: RAW, 14-bit if your camera offers it. JPEG only when you need to share immediately.
White balance: Auto (AWB) is fine for RAW. Set Daylight or Kelvin 5500K when you want predictable colors.
Focus: Single-shot AF, single point, placed about one-third into the scene. Use manual focus with magnification for tripod work.
Metering: Matrix or Evaluative for most scenes. Spot metering when the sky is much brighter than the land.
Drive mode: Single shot, or 2-second self-timer when on a tripod to reduce shake.
That cheat sheet covers nine out of ten travel landscape situations. The rest of this guide explains why each setting matters and how to adapt it when conditions change.
Understanding the Exposure Triangle
Every landscape photo is built on three controls: aperture, shutter speed, and ISO. They form the exposure triangle, and once you understand how they interact, choosing settings becomes a series of small, confident decisions instead of guesswork.
Aperture controls how wide the lens opens. A smaller opening (higher f-number like f/16) lets in less light but keeps more of the scene sharp. A wider opening (lower f-number like f/2.8) lets in more light but blurs the background. For landscapes, you usually want everything sharp, so you lean toward smaller apertures.
Shutter speed controls how long the sensor is exposed to light. A fast shutter (1/500 second) freezes motion. A slow shutter (several seconds) blurs moving water or clouds into smooth streaks. The trade-off is that slow shutter speeds require a tripod or a stable surface to avoid camera shake.
ISO controls how sensitive the sensor is to light. Low ISO (100) gives the cleanest image with the least noise. High ISO (3200 and above) brightens the image but adds grain and reduces dynamic range. For landscapes, where you want maximum detail and color, you almost always keep ISO as low as possible.
The catch is that you cannot have all three at once. If you choose a small aperture for sharpness and a low ISO for clean images, you will need a slower shutter speed, which means a tripod. That is the constant balancing act of landscape photography, and travel makes it more interesting because you rarely have time to set up a perfect shot.
Once you accept that every setting is a trade-off, choosing them gets easier. You decide what matters most for the scene in front of you, lock that in, and let the other two compensate.
How to Choose Your Camera Mode
For travel landscape photography, Aperture Priority is the mode I recommend most. In Aperture Priority (labeled A on Nikon and Sony, Av on Canon), you set the aperture and ISO, and the camera picks the shutter speed automatically. This lets you control depth of field, the most important creative choice for landscapes, while the camera handles the exposure math.
Aperture Priority is fast. You can move from a bright ridge to a dark canyon and the camera adjusts without you fumbling through three dials. When you are traveling with limited time at each location, that speed matters more than the perfect control of Manual mode.
Manual mode is the right choice in two situations. The first is when you are shooting long exposures with a tripod and a neutral density filter, because the camera’s meter often gets confused by extreme light levels. The second is when light is stable and you want to lock every setting, such as a panorama or a focus-stacked sequence.
Avoid full Auto and Scene modes for landscapes. They tend to open the aperture too wide for sharper backgrounds, raise ISO too aggressively, and remove the creative decisions that make your travel photos look intentional rather than snapshot-style.
If your camera has a Program mode, treat it as a fallback. It gives the camera control over aperture and shutter speed while letting you adjust ISO and exposure compensation. Useful when something unexpected happens and you need a usable shot in seconds.
Aperture Settings for Shooting Landscapes While Traveling
Aperture is the setting that defines a landscape photo. It controls depth of field, which is how much of your scene is sharp from foreground to background, and for most landscapes you want all of it sharp.
The sweet spot for landscape aperture is usually between f/8 and f/11. At these settings, most lenses produce their sharpest images with the largest depth of field before optical problems start to appear. This range works for the vast majority of travel scenes, from coastal cliffs to desert mesas.
When you need maximum front-to-back sharpness, push to f/11 or f/16. A wide-angle lens at f/11 will keep everything from a foreground rock a meter away to distant mountains crisp. This is the range I default to when a strong foreground element is part of the composition.
Be careful pushing beyond f/16. A phenomenon called diffraction starts to soften images at very small apertures. Most lenses are noticeably softer at f/22 than at f/11, even though f/22 gives a larger nominal depth of field. The practical sweet spot for full-frame cameras is around f/8 to f/11, and for crop-sensor cameras, around f/8.
Wide apertures like f/2.8 or f/4 still have a place in travel landscape photography. Use them when you want to isolate a subject, such as a single tree against a blurred mountain backdrop, or when light is low and you are shooting handheld without a tripod. Just understand you are trading depth of field for that wider opening.
If you find the foreground is sharp but the distant mountains are slightly soft, you have two options. Stop down to f/11 or f/16 for more depth of field, or focus slightly farther into the scene. The latter is faster and avoids diffraction, but the former is more reliable when traveling and you want to be sure.
A concept worth knowing is hyperfocal distance, which is the focus point that keeps everything from half that distance out to infinity acceptably sharp. Many landscape apps calculate it for you. For a 24mm lens at f/11 on a full-frame camera, hyperfocal distance is around 2 meters, meaning everything from 1 meter to infinity is sharp when focused there.
ISO Settings for Clean Landscape Images
For landscapes, ISO is the setting you set once and forget. Your goal is the lowest ISO your camera offers, usually 100, sometimes 200 on certain models. This is called base ISO, and it delivers the maximum image quality your sensor can produce.
At base ISO, your camera captures the widest dynamic range, the cleanest shadows, and the most accurate colors. Every stop you raise ISO reduces all three. That is why landscape photographers treat ISO as a last resort, raised only when aperture and shutter speed cannot do the job.
The basic workflow is this. Set ISO to base. Set aperture for the depth of field you want. Check the resulting shutter speed. If it is fast enough to handhold without blur, take the shot. If it drops too low, raise ISO only as much as needed to get a usable shutter speed.
What counts as too low depends on your lens and whether image stabilization is active. A general rule is to keep shutter speed faster than 1 divided by the focal length, so 1/50 second for a 50mm lens. Image stabilization can buy you two to four stops, letting you shoot at much slower speeds handheld.
When you are on a tripod, ISO stays at base almost always. If the shutter speed becomes several minutes, that is fine for static landscapes. The only reason to raise ISO on a tripod is to keep shutter speed short enough to freeze moving subjects like grass in wind or people walking through the frame.
Avoid Auto ISO for serious landscape work. It will sometimes raise ISO unnecessarily, especially in dim morning light, which adds noise you could have avoided by waiting a few minutes for the sun to climb. If you must use Auto ISO, set a maximum of 800 or 1600 so it never gets out of hand.
Shutter Speed for Travel Landscapes
Shutter speed is the setting you usually let the camera handle in Aperture Priority. But understanding how it affects your landscape photos helps you decide when to take control.
Fast shutter speeds freeze motion. If you are photographing waves crashing against rocks and want every droplet sharp, you need 1/500 second or faster. The same applies to wind-blown grass, foliage, or fast-moving clouds. Fast shutter speeds are essential when motion is part of the story.
Slow shutter speeds blur motion. A 1-second exposure turns crashing waves into a soft mist. A 30-second exposure smooths water into glass and streaks clouds across the sky. These long exposures are where landscape photography gets creative, and they require a tripod or a very stable surface.
The trade-off for slow shutter speeds is camera shake. Even pressing the shutter button can blur a 1-second exposure. Use a 2-second self-timer, a remote release, or your camera’s mirror lock-up function to eliminate shake on a tripod.
For handheld travel landscape photography, aim for shutter speeds above 1/125 second with a wide-angle lens. Image stabilization lets you push lower, but the rule of thumb above remains a safe baseline. If you cannot achieve that shutter speed at base ISO, raise ISO in stops until you can.
One scenario that catches travelers off guard is fast-changing light during golden hour. The sun is low and moving, and the correct exposure can shift dramatically within seconds. Aperture Priority handles this automatically, which is another reason it is the preferred travel mode.
RAW vs JPEG: Why Format Matters
For landscapes, RAW is the right format. RAW files contain all the data your sensor captured, including detail in bright skies and dark shadows that JPEG throws away. When the dynamic range of a scene exceeds what your camera can show in one shot, RAW gives you the headroom to recover it later.
RAW files are larger and require post-processing, but the quality difference is dramatic. A blown-out sky that looks pure white in JPEG often contains recoverable highlight detail in a RAW file. A shadow area that looks pure black in JPEG often holds real information in RAW. For landscapes with bright skies and dark land, this is the difference between a usable photo and a lost one.
If your camera supports 14-bit RAW, use it. The extra bit depth gives you 16,384 brightness levels per channel instead of 4,096 in 12-bit. That sounds technical, but it translates to noticeably smoother gradients in skies and more flexibility when you push or pull exposure in editing.
JPEG has a place when you need to share a photo immediately, like posting from your phone at a viewpoint. For anything you might print or edit later, RAW is non-negotiable. Many cameras let you shoot RAW plus JPEG simultaneously, which is the best of both worlds at the cost of storage space.
Travel tip: carry enough memory cards. A two-week trip can generate hundreds of gigabytes of RAW files, and running out of storage mid-trip is a costly mistake.
White Balance and Metering
White balance determines the color temperature of your image. Cool tones feel like shade or overcast days. Warm tones feel like sunrise or sunset. Getting white balance right in-camera saves editing time and prevents color drift across a series of shots.
For RAW shooters, white balance is fully adjustable later, so Auto White Balance (AWB) is the most practical choice. The camera’s guess is usually close, and you can refine the exact Kelvin temperature in your editing software. AWB also adapts automatically as light changes, which is helpful during fast-changing golden hour.
If you want predictable, repeatable colors, set a fixed Kelvin value. Daylight, around 5500K, matches midday sun. Cloudy, around 6500K, warms up overcast scenes. Shade, around 7500K, warms up subjects lit by open sky. Choose these deliberately when color consistency matters, like focus stacking or panorama sequences.
Metering mode controls how the camera measures light to choose exposure. Matrix or Evaluative metering, called Multi on some cameras, reads the entire frame and is the best default for landscapes. It handles most scenes well, balancing bright skies and dark land.
Spot metering reads light from a small area, usually the focus point. Use it when the sky is much brighter than the foreground, like shooting into a sunset. Meter on a mid-tone area of the land, lock that exposure, recompose, and shoot. The sky may blow out, but the land will be properly exposed and you can recover highlights from RAW.
Center-weighted metering is a middle ground, reading mostly the center of the frame. Useful when your subject fills the center of the composition, like a single mountain peak against a featureless sky.
Exposure compensation is your best friend in Aperture Priority. If the scene looks too bright or too dark on the histogram, dial in -0.3 to -1.0 EV for bright scenes (snow, beaches) or +0.3 to +1.0 EV for dark scenes (dark rock, dense forest). The camera adjusts shutter speed to match.
Focus Mode Selection for Sharp Landscapes
Focus is where many landscape photos fail silently. The image looks fine on the camera’s small screen but reveals softness when viewed on a computer. Getting focus right in the field saves disappointment later.
Use single-shot autofocus, called One-Shot on Canon, AF-S on Nikon and Sony. This mode locks focus when you half-press the shutter, which is exactly what you want for static landscapes. Avoid continuous autofocus (AI Servo, AF-C), which is designed for moving subjects and can drift on a still scene.
Choose a single autofocus point rather than auto-area or multi-point. Place that point about one-third of the way into the scene, on a clear edge or texture with good contrast. This placement, combined with a smaller aperture, usually achieves good depth of field for landscapes.
For maximum precision on a tripod, switch to manual focus and use your camera’s magnification feature to zoom in on the live view image. Focus carefully on the key subject, then leave focus set. This eliminates any autofocus error and is the standard approach for serious landscape work.
Back-button focus is a technique worth learning. It separates focusing from the shutter button by assigning focus to a button on the back of the camera. Once you focus, you can recompose freely without losing focus. Most landscape photographers use it because it removes the risk of the camera refocusing between shots.
One pitfall travelers face is autofocus struggling in low light or low contrast. At dawn or dusk, or in fog, the camera may hunt without locking. Switching to manual focus with magnification solves this. With practice, it takes only a few seconds.
Travel-Specific Challenges and Solutions
Travel landscape photography differs from studio or local landscape work. You often have one chance at a location, unpredictable weather, limited gear, and no time to experiment. Your settings system needs to handle all of this on the fly.
The biggest challenge is light that changes faster than you can adjust. A sunrise can move from darkness to full daylight in 15 minutes, and the right exposure at the start is wrong at the end. Aperture Priority handles this automatically, which is why it remains the best travel mode.
Weather is the second challenge. Rain, dust, and salt spray can damage gear, but they also affect image quality. A lens hood protects the front element and reduces flare, both useful in harsh conditions. A microfiber cloth in your pocket is essential for wiping drops off the glass between shots.
Packing light means choosing the right lenses. A single wide-angle zoom, like a 16-35mm or 18-55mm equivalent, covers most travel landscape needs. A standard zoom, like a 24-70mm, handles scenes that need a tighter composition. Traveling with one or two lenses forces you to focus on composition rather than gear swapping.
Not having a tripod is a common travel constraint. Tripods are bulky, often restricted in tourist areas, and annoying to carry. When you cannot use one, lean on image stabilization, raise ISO as needed, and brace the camera against a rock, wall, or your bag. Many cameras and phones now produce excellent results handheld in low light.
If you want long exposures without a tripod, look for stable surfaces. A wall, a fence post, or a tightly rolled jacket on a rock can serve as a makeshift support. Use the 2-second self-timer to trigger the shutter without touching the camera. This trick has saved more than one of my travel shots.
Battery management is critical in cold or high-altitude environments where batteries drain faster. Carry at least two spares and keep them in an inner pocket close to your body. A dead battery at a once-in-a-lifetime viewpoint is a painful lesson.
Finally, accept that some scenes will not work. Travel photography involves compromise. A shot you envisioned at golden hour might happen at noon instead. Your settings system exists to make the best of whatever conditions you get, not to force every scene into a single ideal.
Scenario-Based Settings for Travel Conditions
Different scenes need different settings. Here are starting points for the most common travel landscape situations. Treat them as defaults to refine based on the light in front of you.
Golden Hour Sunrise or Sunset
Mode: Aperture Priority. Aperture: f/8 to f/11. ISO: 100. White balance: Daylight or Cloudy for warm tones. Metering: Matrix, with exposure compensation dialed down by -0.3 to -0.7 EV to protect highlight detail in the sky.
This is the most rewarding light for landscapes, but the exposure changes every few minutes. Aperture Priority keeps up automatically. Bracket exposures if the sky is much brighter than the land, shooting one shot at the metered value and others at -1 and +1 EV. You can blend them later in HDR or exposure fusion.
Blue Hour Before Sunrise or After Sunset
Mode: Manual. Aperture: f/8. ISO: 100 or 200. Shutter speed: 2 to 30 seconds. Tripod required. White balance: Daylight to preserve the cool blue tones, or Kelvin 5000K.
Blue hour rewards long exposures and produces deep, saturated colors. The light is too dim for handheld work, so a tripod or stable surface is essential. Use a 2-second self-timer or remote release to avoid shake.
Bright Midday Sun
Mode: Aperture Priority. Aperture: f/8. ISO: 100. White balance: Daylight. Metering: Matrix with -0.3 EV compensation for snow, sand, or water scenes.
Midday light is harsh and creates strong shadows, but it works for scenes with strong textures or reflections. Avoid shooting into the sun, which creates flare and lost highlights. Polarizing filters can deepen blue skies and reduce reflections on water, useful at this time of day.
Mountains at Altitude
Mode: Aperture Priority. Aperture: f/8 to f/11. ISO: 100. White balance: Daylight or Cloudy. Metering: Matrix, with exposure compensation reduced by -0.3 to -1.0 EV because snow and bright skies fool the meter into underexposing.
Altitude increases UV light, which can add a blue cast. A UV filter or a small white balance adjustment in editing handles this. Watch your histogram closely, as bright snow and dark rock exceed the dynamic range of most sensors.
Coastal Scenes with Moving Water
Mode: Manual for long exposures, Aperture Priority otherwise. Aperture: f/11 to f/16. ISO: 100. Shutter speed: 1/250 second to freeze waves, or 1 to 30 seconds to smooth them. Tripod strongly recommended for slow speeds.
An ND filter lets you achieve long exposures even in daylight, smoothing waves into mist and streaking clouds across the sky. A 6-stop or 10-stop ND filter is the standard travel choice for this effect.
Forest and Waterfall Scenes
Mode: Manual or Aperture Priority. Aperture: f/8 to f/11. ISO: 100. Shutter speed: 1 to 5 seconds for silky water. Tripod required. White balance: Cloudy or Shade for warmer tones in green foliage.
Forest light is often dim and high in contrast. A tripod lets you use long shutter speeds at base ISO for clean images. Watch for wind moving leaves, which can soften foliage during long exposures.
Handheld Travel Snapshot
Mode: Aperture Priority. Aperture: f/5.6 to f/8. ISO: 100 in good light, raised as needed in dim conditions. Image stabilization on. Shutter speed above 1/125 second for sharp handheld images.
When you cannot use a tripod and need to capture a scene quickly, prioritize a usable shutter speed over perfect settings. A sharp photo with slight noise beats a blurry photo with no noise every time.
Common Mistakes to Avoid
Most landscape photography problems come down to a handful of avoidable mistakes. Here are the ones I see most often in beginner and intermediate work, drawn from forum discussions and my own early errors.
Shooting JPEG only. JPEG throws away highlight and shadow detail you cannot recover later. Switch to RAW, even if your storage fills faster.
Raising ISO unnecessarily. Beginners often push ISO to 800 or 1600 out of habit, even in daylight. Keep ISO at base unless you cannot achieve a usable shutter speed any other way.
Using too wide an aperture. Shooting at f/2.8 because the lens can do it leaves the background soft. For landscapes, default to f/8 or smaller.
Using too small an aperture. The opposite mistake, shooting everything at f/22, introduces diffraction that softens the entire image. The sweet spot is f/8 to f/11.
Forgetting the histogram. The camera’s LCD lies. It shows a brightened, processed preview that hides blown highlights. Check the histogram to confirm your exposure is actually correct.
Ignoring focus placement. Defaulting to center autofocus and recomposing can shift the plane of focus. Place your focus point deliberately, about one-third into the scene.
Not using a tripod when needed. Handholding in low light produces blurry images no amount of editing can fix. A cheap, lightweight travel tripod is one of the best investments you can make.
Overprocessing in editing. Pushing saturation, clarity, and HDR sliders too far creates an artificial look. Subtle adjustments preserve the natural feel that makes travel landscapes compelling.
Conclusion
Learning how to choose camera settings for shooting landscapes while traveling is less about memorizing numbers and more about understanding trade-offs. Aperture controls sharpness, ISO controls image quality, and shutter speed controls motion. You set the one that matters most for the scene and let the others compensate.
Start with Aperture Priority, f/8 to f/11, ISO 100, and RAW format. That baseline handles most travel landscape situations. Adapt from there based on the light, the motion, and the depth of field your scene demands.
The system is simple, but it takes practice. Run through it before your next trip so the decisions become automatic. By the time you are standing in front of a mountain at sunrise, you want your attention on the composition, not the menus.
FAQs
What camera settings are needed for landscape photography?
The core landscape settings are Aperture Priority mode, an aperture of f/8 to f/11 for depth of field, ISO 100 for clean images, RAW file format for maximum detail, and single-shot autofocus with a single focus point placed one-third into the scene. Use a tripod whenever shutter speed drops below what you can handhold without blur.
What should my F stop be for landscape photography?
For most landscapes, use f/8 to f/11. This range delivers the sharpest images on most lenses and gives enough depth of field to keep foreground and background crisp. Push to f/11 or f/16 when you need maximum front-to-back sharpness, but avoid going beyond f/16 because diffraction starts to soften the image.
Is 35mm or 50mm better for travel photography?
A 35mm lens is generally better for travel landscapes because its wider field of view captures more of a scene, which suits sweeping vistas and tight spaces. A 50mm is useful for tighter compositions, isolating subjects, and street-style scenes. Many travelers carry a zoom that covers both ranges, such as a 24-70mm, to handle either situation without changing lenses.
What is the 20 60 20 rule in photography?
The 20 60 20 rule is a guideline for achieving front-to-back sharpness in landscape photos. Focus roughly one-third of the way into the scene rather than at the foreground or infinity. Combined with an aperture around f/11, this placement typically keeps everything from a nearby foreground element to distant mountains acceptably sharp without resorting to focus stacking.
Should I use Aperture Priority or Manual mode for landscapes?
Aperture Priority is the better choice for most travel landscapes because it lets you control depth of field while the camera handles exposure automatically as light changes. Switch to Manual mode for long exposures with neutral density filters, panoramas, focus-stacked sequences, or any situation where the camera’s meter gets confused by extreme contrast.
Do I need a tripod for landscape photography while traveling?
A tripod is strongly recommended for landscape photography, especially in low light like golden hour or blue hour, or for long exposures of water and clouds. If you cannot carry one, lean on image stabilization, raise ISO as needed, and brace the camera against a stable surface like a wall or rock with a 2-second self-timer.