
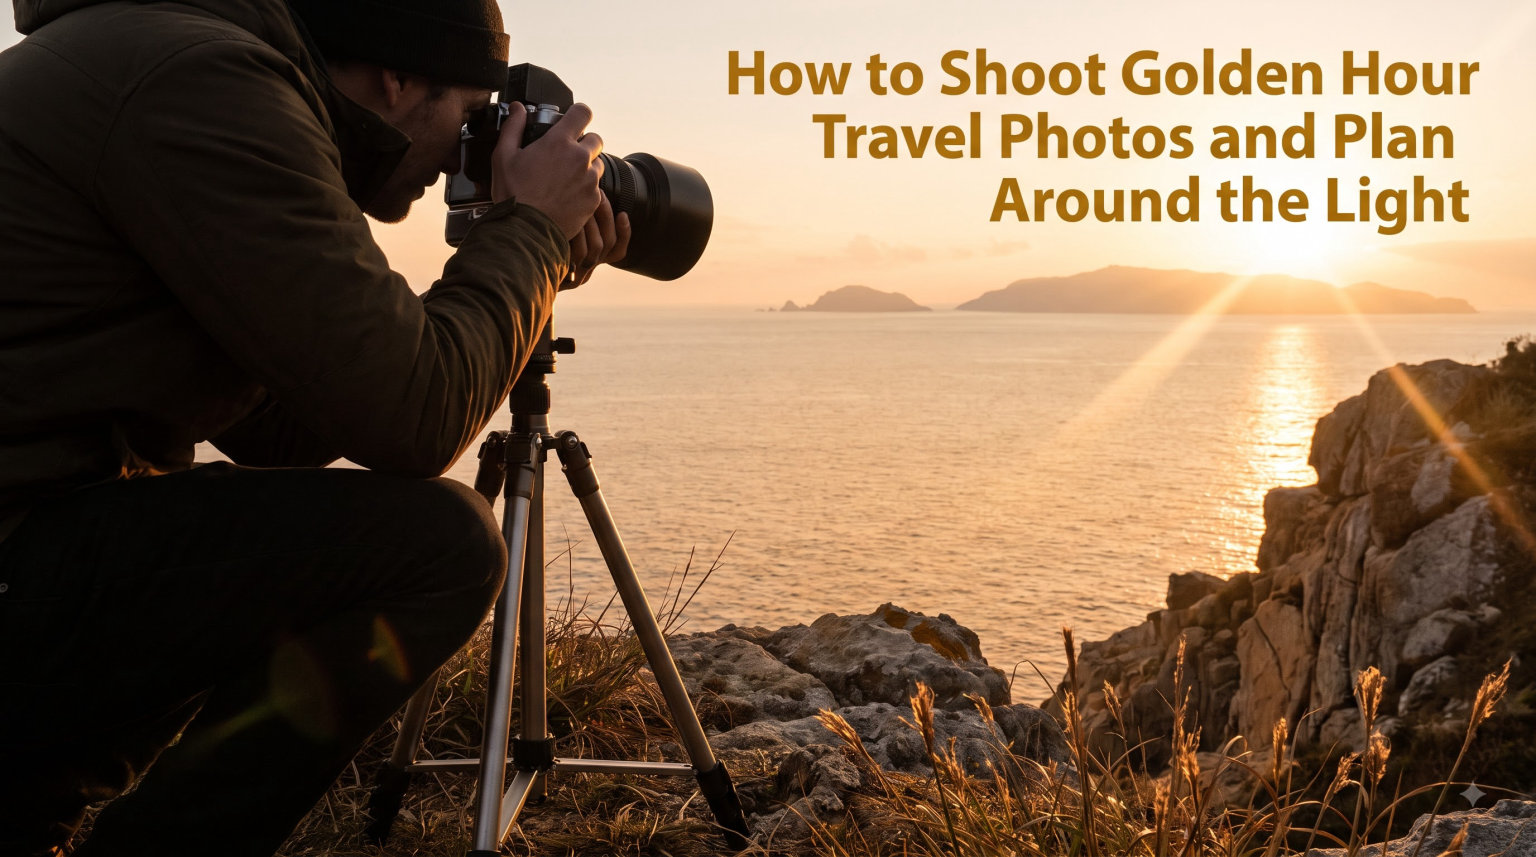
I still remember my first golden hour travel photo. I was in Lisbon, sunburned and tired from a full day of sightseeing, but I dragged myself to a viewpoint about 40 minutes before sunset.
The light hit the tiled rooftops and turned the whole city into molten copper. That single hour of shooting produced the best images of my entire two-week trip.
Golden hour travel photography is one of those rare cases where planning beats gear, timing beats skill, and a free hour of soft light beats a full afternoon of harsh midday sun. In this guide, I’ll walk you through exactly how to shoot golden hour travel photos and how to plan an entire trip around the light.
I’ve tested these techniques across five continents over the last six years, and I’ll share the specific apps, settings, and mistakes I wish I had avoided. You’ll learn what golden hour actually is, when it happens in different locations, the camera settings I use for portraits and landscapes, five lighting techniques that work in any destination, and how to build a travel itinerary that puts you in the right spot at the right time.
Whether you shoot with a full-frame mirrorless camera or just your iPhone, this guide will help you bring home better travel photos in 2026.
Table of Contents
What Is Golden Hour in Travel Photography?
Golden hour is the period shortly after sunrise and shortly before sunset when the sun sits low on the horizon, producing soft, warm, directional light that flatters almost any subject.
The most ideal, golden light is about 30 to 60 minutes before sunset and continues for roughly 10 to 20 minutes after the sun dips below the horizon. The exact window shifts depending on your latitude and the time of year, but the visual signature is the same: long shadows, warm golden tones, and a sky that goes from yellow to pink to deep orange.
When Does Golden Hour Happen?
Golden hour happens twice a day, every day, in nearly every location on Earth. In the morning, it begins about 15 to 30 minutes after sunrise and lasts roughly 45 minutes.
In the evening, it starts around 60 minutes before sunset and ends about 10 to 20 minutes after the sun disappears below the horizon. The exact timing shifts by latitude.
Near the equator, golden hour is shorter and the sun drops fast. Closer to the poles, the window stretches out and the color shifts last longer.
I always check the timing for my exact destination the night before I shoot. Apps like PhotoPills, Golden Hour One, and Sun Surveyor give you a precise start and end time to the minute.
If you only remember one rule, remember this: arrive at your spot at least 30 minutes before the listed golden hour start time. The best light often shows up before the official window begins, and you’ll want time to set up.
Why Golden Hour Light Looks the Way It Does
The science is simple, but the effect on your photos is dramatic. When the sun is low on the horizon, sunlight has to travel through more atmosphere to reach your subject.
That atmosphere scatters the blue wavelengths and lets the warmer red, orange, and yellow wavelengths pass through. The color temperature drops from around 5500K at noon to roughly 3000K to 3500K during golden hour, which is why everything takes on that warm honey glow.
There’s also a second reason golden hour light is so flattering. Because the sun is at a low angle, shadows stretch out and become soft. Light wraps around your subject’s face instead of hitting it from above.
Wrinkles soften, skin tones warm up, and the dynamic range between highlights and shadows becomes much smaller. That last point matters a lot for travel photographers because it means your camera has an easier time exposing the scene correctly.
Golden Hour vs Blue Hour
Blue hour is the period that comes just before sunrise and just after sunset, when the sun is below the horizon but still illuminates the sky indirectly. The color temperature shifts to roughly 8000K to 10000K, producing cool blue tones rather than warm golden ones.
Blue hour is excellent for cityscapes because the sky is dark enough that artificial lights stand out, but light enough that you can still see the buildings. Most travel photographers shoot golden hour first, then keep the camera rolling as blue hour begins.
The transition takes about 20 to 30 minutes, and you can capture both warm and cool tones in a single session. If you only have time for one, choose golden hour for portraits, landscapes with sunlit subjects, and travel scenes with people. Choose blue hour for skylines, harbor shots, and city streets.
How to Plan Golden Hour Travel Photography Around the Light
The biggest mistake I see in golden hour travel photography is treating the light as an afterthought. Photographers plan their itinerary around restaurants, hotels, and tourist attractions, then hope the light shows up at the right time.
It almost never does. The photographers who come home with the best images plan the trip around the light first, then fit everything else around it. Here’s the exact process I use.
Step 1: Pick Your Location and Date
Start by choosing your destination and travel dates, then immediately check the sunrise and sunset times for every day of your trip. You can find this in any weather app, on Google, or in a dedicated planning app.
Note the golden hour start and end times for each day. Write them down or save them in your phone’s calendar with an alarm set for 60 minutes before the start of each session.
If you have flexibility on dates, choose dates when the sunrise or sunset aligns with the direction you want to shoot. In Kyoto, for example, you want to be facing west in the evening to catch the light filtering through the torii gates of Fushimi Inari.
In Santorini, you want to face east in the morning for the blue-domed churches against the rising sun. Apps like PhotoPills show the sun’s position on a map for any date, which makes this kind of planning much easier.
Step 2: Use Golden Hour Apps
I use three apps on every trip. PhotoPills is the most powerful, with sun and moon position planning, a depth-of-field calculator, and a hyperfocal distance tool.
Golden Hour One is simpler, with a clean interface that shows you the next sunrise, sunset, and golden hour times for your location. Sun Surveyor is great for visualizing the sun and moon paths on a 3D map, which helps when scouting new locations.
All three apps cost a few dollars, but they pay for themselves on the first day. I’ve found that simply having the exact minute golden hour starts keeps me from wandering around looking at my watch instead of looking at the light.
Set the app to remind you 30 minutes before each session and you’ve eliminated the most common golden hour mistake: showing up late.
Step 3: Scout the Spot in Advance
Before you commit to a shooting location, scout it during daylight or, ideally, on the day before your golden hour session. I usually spend 15 to 30 minutes walking around the spot during the middle of the day.
I look for compositions, check for obstacles like power lines and locked gates, and identify backup positions in case the light doesn’t behave the way I expect.
Google Maps street view is a great tool for scouting, but it doesn’t show you the exact angle of the light. For that, I use PhotoPills’ Sun Planner or Sun Surveyor’s 3D view.
Both let you stand virtually in any spot on Earth and see exactly where the sun will rise or set on any given day. That kind of planning saved me an entire afternoon in Iceland when I realized my chosen waterfall faced the wrong direction for sunset.
Step 4: Check Weather and Cloud Cover
Clear skies are not always the best golden hour skies. A few high clouds catch the warm light and turn pink and orange. A completely clear sky often produces a flat golden hour with less drama.
Heavy clouds, on the other hand, will block the light entirely and leave you with grey, undramatic conditions.
I check two forecasts before each shoot. First, a general weather forecast for precipitation and overall cloud cover. Second, a more detailed hourly cloud forecast from sites like Clear Outside or Windy.
Both show you the percentage of cloud cover at each hour, which helps you predict whether the light will break through. If the forecast shows heavy clouds during golden hour, I shift my shoot to a different day or pick a new location with a more open sky.
Step 5: Arrive 30 Minutes Early
Arrive at least 30 minutes before the listed golden hour start time. That gives you time to find your exact spot, set up your tripod if you’re using one, double-check your camera settings, and watch how the light is shifting.
Some of my favorite golden hour images were captured in those 30 minutes before the official window, when the sky is just starting to warm up but the harshest light hasn’t arrived yet.
Being early also gives you time to deal with practical issues. Finding parking, walking through crowds, picking a clean composition, and adjusting to local rules about tripods or drones all take longer than you think.
I’d rather stand around for 15 minutes with my camera ready than rush in at the last second and miss the best light of the day.
Camera Settings for Golden Hour Travel Photography
Golden hour gives you more flexibility than almost any other lighting condition. The light is soft and even, the dynamic range is manageable, and you can usually shoot handheld.
That said, the specific settings you choose will depend on whether you’re shooting portraits, landscapes, or a mix of both. Here are the exact settings I use on my full-frame mirrorless camera, plus the smartphone equivalents.
Aperture for Portraits and Landscapes
For travel portraits during golden hour, I shoot wide open at f/1.8 to f/2.8. That shallow depth of field separates your subject from the background and creates that creamy bokeh that makes golden hour portraits so beautiful.
A 50mm or 85mm prime lens on a full-frame body is the classic travel portrait combo, but a 35mm f/1.8 works just as well if you want to include more of the background for context.
For travel landscapes during golden hour, I stop down to f/8 to f/11. That gives you front-to-back sharpness across the scene, which matters when you’re shooting a mountain range or a city skyline.
Be careful going past f/16, because diffraction starts to soften your image. For smartphone photographers, use Portrait Mode for portraits and the standard wide lens for landscapes, since most phones can’t manually adjust aperture.
Shutter Speed and Stabilization
Golden hour gives you plenty of light, so you usually don’t need a tripod. I keep my shutter speed at 1/250s or faster for portraits with moving subjects, and 1/125s or faster for landscapes where everything is still.
If I’m shooting long exposures of water or clouds, I’ll drop to 1s to 30s on a tripod and use a remote shutter or the camera’s self-timer.
Image stabilization helps when you need to shoot handheld in low light. Most modern cameras and lenses have in-body or optical stabilization that gives you 4 to 5 stops of shake reduction.
If you have a fast enough lens and image stabilization, you can shoot at 1/30s handheld and still get sharp results. For smartphones, use the volume button as a shutter release to avoid camera shake, and brace your elbows against your body for extra stability.
ISO Settings and Noise Control
Keep your ISO as low as possible. During golden hour, I usually shoot between ISO 100 and ISO 400. That’s well within the noise-free range of any modern camera.
If I’m shooting handheld in deep shade or during the last 10 minutes of golden hour, I’ll bump up to ISO 800 or ISO 1600 without worrying about it.
On a smartphone, ISO is automatic, but you can still help the camera. Tap on your subject to lock focus and exposure, then slightly drag down on the brightness slider to underexpose by about a third of a stop.
That keeps highlights from blowing out and reduces noise in the shadows. Modern phones handle high ISO very well, so don’t be afraid to let the camera push it up if the light is fading.
White Balance and Shooting RAW
Always shoot RAW during golden hour. The warm tones are part of the appeal, but you might want to adjust the intensity in post. RAW files capture far more color information than JPGs.
That means you can dial the warmth up or down without losing image quality. If you’re shooting JPG only, set your white balance to “cloudy” or “shade” to enhance the warm tones, or leave it on auto and correct in post.
For a more precise approach, set your white balance manually using Kelvin. I usually set my camera to around 5500K to 6000K during the early part of golden hour, then drop to 4500K to 5000K as the sun gets closer to the horizon.
That keeps the colors accurate to what I see in the field. If you want more drama, push the Kelvin higher toward 7000K to exaggerate the warm tones.
Metering Mode and Exposure Compensation
For backlit subjects, switch to spot metering and meter for the face. That prevents the bright background from tricking your camera into underexposing your subject.
If your subject is front-lit or side-lit, evaluative metering works fine. I also use exposure compensation in almost every golden hour shot.
Setting exposure compensation to +0.3 to +0.7 stops slightly brightens the shadows and keeps skin tones looking natural. When shooting directly into the sun, drop exposure compensation to -0.7 to -1.0 stops to preserve highlight detail in the sky.
Watch the histogram, not the LCD screen, because the bright sunlight makes LCDs hard to read accurately.
Five Lighting Techniques for Golden Hour Travel Photography
Once you’ve nailed your timing and settings, the next step is choosing how to position your subject relative to the sun. Each of the five techniques below produces a different mood.
Most travel photos work best when you combine two or three of them in a single session. I switch between these constantly during a golden hour shoot, depending on where the light is and what story I want to tell.
1. Front Light
Front light is when the sun is behind you, lighting your subject’s face evenly. This is the simplest and most flattering technique for travel portraits.
The light is warm and golden, skin tones look healthy, and you don’t have to worry about squinting or harsh shadows. Front light is also the easiest to expose because the sun is not in your frame.
Use this technique when you want clean, well-lit portraits, family photos, or any situation where clarity matters more than drama. The downside is that front light can look flat and lacks the artistic punch of backlighting.
2. Backlight
Backlight is when the sun is behind your subject, pointing toward your camera. This creates a glowing rim around your subject’s hair and shoulders, and it produces those warm, dreamy travel portraits you see in magazines.
Backlight is my favorite golden hour technique because it feels magical and creates separation from the background.
The challenge with backlight is exposure. The bright sun behind your subject will trick your camera into underexposing the face. Use spot metering on the face, add +1 to +2 stops of exposure compensation, or use a reflector to bounce light back into the face.
If you don’t have a reflector, a white shirt or even a piece of white cardboard works in a pinch. Smartphone photographers should tap on the face to expose for the subject and use the shadow adjustment slider if available.
3. Rim Light
Rim light is a specific kind of backlight that outlines your subject with a thin glowing edge. It happens when the sun is just out of frame and slightly to the side, catching the edges of your subject’s hair, shoulders, or arms.
Rim light is most dramatic during the last 10 minutes of golden hour, when the sun is almost touching the horizon. To get rim light, position your subject so the sun is just behind their shoulder and out of your frame.
Expose for the face, then watch as the warm glow outlines them. Rim light works especially well for travel portraits with messy hair, hats with brims, or any subject with strong textures on the edges.
4. Sun Flare
Sun flare happens when you shoot directly into the sun and the light bounces around inside your lens. Some photographers hate it, but I think golden hour sun flare adds warmth and atmosphere to a travel photo.
The trick is to control the flare so it enhances the image rather than overwhelming it. To get attractive sun flare, partially hide the sun behind your subject, a tree branch, a building, or any other object in the scene.
Use a wide aperture like f/2.8 to f/4 to encourage the flare pattern. Older lenses and lenses without modern coatings produce more dramatic flare. If you want to reduce flare, use a lens hood or your hand to shade the front element.
Don’t use a UV filter, as it makes flare worse.
5. Silhouette
Silhouette photography happens when your subject is completely dark against a bright, colorful sky. You expose for the sky and let the subject fall into shadow.
Golden hour is the perfect time for silhouettes because the sky has those warm colors that make the silhouette pop. To shoot a silhouette, point your camera at the sky, lock exposure on the brightest part, then recompose with your subject in the lower half of the frame.
Make sure your subject has a clear, recognizable outline. People standing on a hilltop, palm trees against the sky, or a fisherman on a beach all make great silhouettes. Drop your exposure compensation to -1 to -2 stops to deepen the shadow.
Travel Planning Tips to Maximize Golden Hour Opportunities
The biggest advantage of golden hour travel photography is that the light is predictable. Sunrise and sunset happen at the same time every day, anywhere on Earth, which means you can plan your entire trip around them.
Here are the specific strategies I use when I’m planning a multi-day trip focused on golden hour photography.
Build Your Trip Around the Light
When I’m planning a 7 to 14 day trip, I start by mapping out the golden hour times for each destination. Then I work backward, scheduling tourist activities and meals in the middle of the day when the light is too harsh to shoot.
That leaves my mornings and evenings free for photography. It feels backwards at first, but you’ll come home with dramatically better images if you treat the light as the priority.
I also leave one full day at the start of the trip for jet lag recovery. That day usually ends up being my best for golden hour shooting, because I’m awake before sunrise from the time change and I have nothing else planned.
If you’re crossing six or more time zones, plan to spend the first two days doing golden hour shoots rather than trying to push through and burn out.
Prioritize Sunrise in Busy Locations
Sunset is more popular than sunrise, but sunrise is almost always a better golden hour for travel photography. The light is softer because the air is cooler and there’s less dust and pollution in the atmosphere.
Famous viewpoints are usually empty at sunrise, while they are packed at sunset. I’ve had iconic locations like the Taj Mahal, Machu Picchu, and the Matterhorn almost entirely to myself at sunrise, then returned at sunset to find crowds 50 people deep.
The trade-off is that sunrise means waking up at 4:30 to 5:30 AM, which is brutal on a vacation. I try to alternate: sunrise shoot on day one, sunset shoot on day two, rest day in the middle. That rhythm keeps me sharp without exhausting me. Bring a headlamp and a thermos of coffee.
Adjust for Latitude and Season
Golden hour duration changes dramatically by latitude and season. Near the equator, golden hour lasts about 45 minutes and the sun drops fast. Closer to the poles during summer, golden hour can stretch to two hours or more.
In winter at high latitudes, golden hour might only last 20 minutes. I always check the duration when I’m planning a trip.
A 20-minute golden hour in Iceland in December means I have to be perfectly set up the moment the light begins. A two-hour golden hour in Norway in June means I have time to move between multiple locations and try different compositions.
Capture on Travel Days Too
I used to waste travel days because I was exhausted from the airport, the rental car, the hotel check-in. Now I plan travel days around golden hour.
If I have a 4-hour drive from one city to another, I schedule the drive for midday and arrive at my new destination with time to scout and shoot sunset. That turns a wasted day into a productive shoot day.
Travel days are also great for unexpected shots. Airport windows, train platforms, and roadside rest stops all have their own kind of golden hour light. Keep your camera in your bag during travel days and pull it out whenever the light is good.
Some of my favorite travel photos came from a 15-minute layover in Doha and a sunset stop on a highway in New Zealand.
Common Mistakes to Avoid in Golden Hour Travel Photography
I’ve made every golden hour mistake in the book, and I’ve watched other photographers make them too. Here are the five most common mistakes and exactly how to avoid them.
Showing up late. The single most common mistake is arriving at your golden hour spot five minutes after the light has changed. Set multiple alarms, leave the hotel early, and accept that being 15 minutes early is much better than being 5 minutes late.
Shooting only JPG. JPGs lose color information permanently. Golden hour is all about color, and you need the flexibility of RAW to get it right in post. If your camera can shoot RAW, switch to RAW or RAW+JPG before you leave the hotel.
Ignoring the sky. Some photographers get so focused on their subject that they forget about the sky behind them. During golden hour, the sky is often more dramatic than the subject. Tilt your camera up, recompose to include more sky, and watch the colors shift every few minutes.
Stopping too soon. The light keeps changing for 30 minutes after the sun disappears below the horizon. Many photographers pack up the moment the sun sets and miss the best blue hour light. Stay for at least 30 minutes past sunset and you’ll capture the most colorful part of the day.
Forgetting the back of the camera. Golden hour light is bright, and LCD screens are hard to read in bright light. Trust your histogram, not your screen. Check the histogram after every few shots and adjust exposure compensation if highlights are clipping or shadows are blocking up.
Frequently Asked Questions
How to shoot photos during golden hour?
To shoot photos during golden hour, arrive 30 minutes before sunrise or sunset, set your camera to a low ISO (100 to 400), shoot in RAW, and position your subject so the warm light falls on their face or creates a backlit rim. Use a wide aperture like f/2.8 for portraits or f/8 for landscapes, and check your histogram to avoid blown highlights in the sky.
What is the 20-60-20 rule in photography?
The 20-60-20 rule in photography suggests that you should spend 20 percent of your time researching and planning the shoot, 60 percent of your time shooting during the best light windows (like golden hour and blue hour), and 20 percent of your time post-processing and reviewing your images. It is a simple workflow that helps photographers make the most of limited shooting time.
How long before sunset should you start golden hour photos?
You should start golden hour photos about 30 to 60 minutes before sunset. The exact window depends on your latitude and season, but the warm tones typically begin when the sun is roughly 6 degrees above the horizon and last until the sun dips below the horizon plus another 10 to 20 minutes of lingering afterglow.
How to shoot golden hour photos on iPhone?
To shoot golden hour photos on iPhone, open the camera app, tap and hold on your subject to lock focus and exposure, then drag the brightness slider down slightly to avoid blown highlights. Shoot with the sun behind your subject for backlit portraits, or face the sun for a glowing sky. Use Portrait Mode for people, turn on HDR, and shoot in 4K RAW if your iPhone supports it.
What is the difference between golden hour and blue hour?
Golden hour and blue hour are the two best times of day for outdoor photography, but they produce very different light. Golden hour happens around sunrise and sunset and produces warm, golden, low-angle light ideal for portraits and landscapes. Blue hour happens just before sunrise and just after sunset when the sun is below the horizon, producing cool blue tones ideal for cityscapes and skylines.
Final Thoughts: Making Golden Hour Your Travel Photography Advantage
Golden hour travel photography comes down to one simple idea: light is more important than location. I’d rather shoot a familiar spot during golden hour than a famous landmark under harsh midday sun.
The warm, soft, directional light transforms ordinary scenes into extraordinary images, and it’s available every single day, in every corner of the world, for free.
If you’re planning a trip in 2026, start by mapping out the golden hour times for your destination. Pick a few key spots, scout them in advance, and arrive 30 minutes early.
Set up your camera with the settings I outlined above, work through the five lighting techniques, and stay for at least 30 minutes past sunset to catch the blue hour too. With a little planning, golden hour travel photography will become the easiest and most rewarding part of your photography practice.
Most importantly, keep shooting. The first time you nail a backlit portrait during golden hour, or capture a glowing silhouette against a pink sky, you’ll understand why photographers plan entire trips around this single hour of light.
Bring your camera, show up early, and trust the process. Your best travel photo might be one golden hour away.