
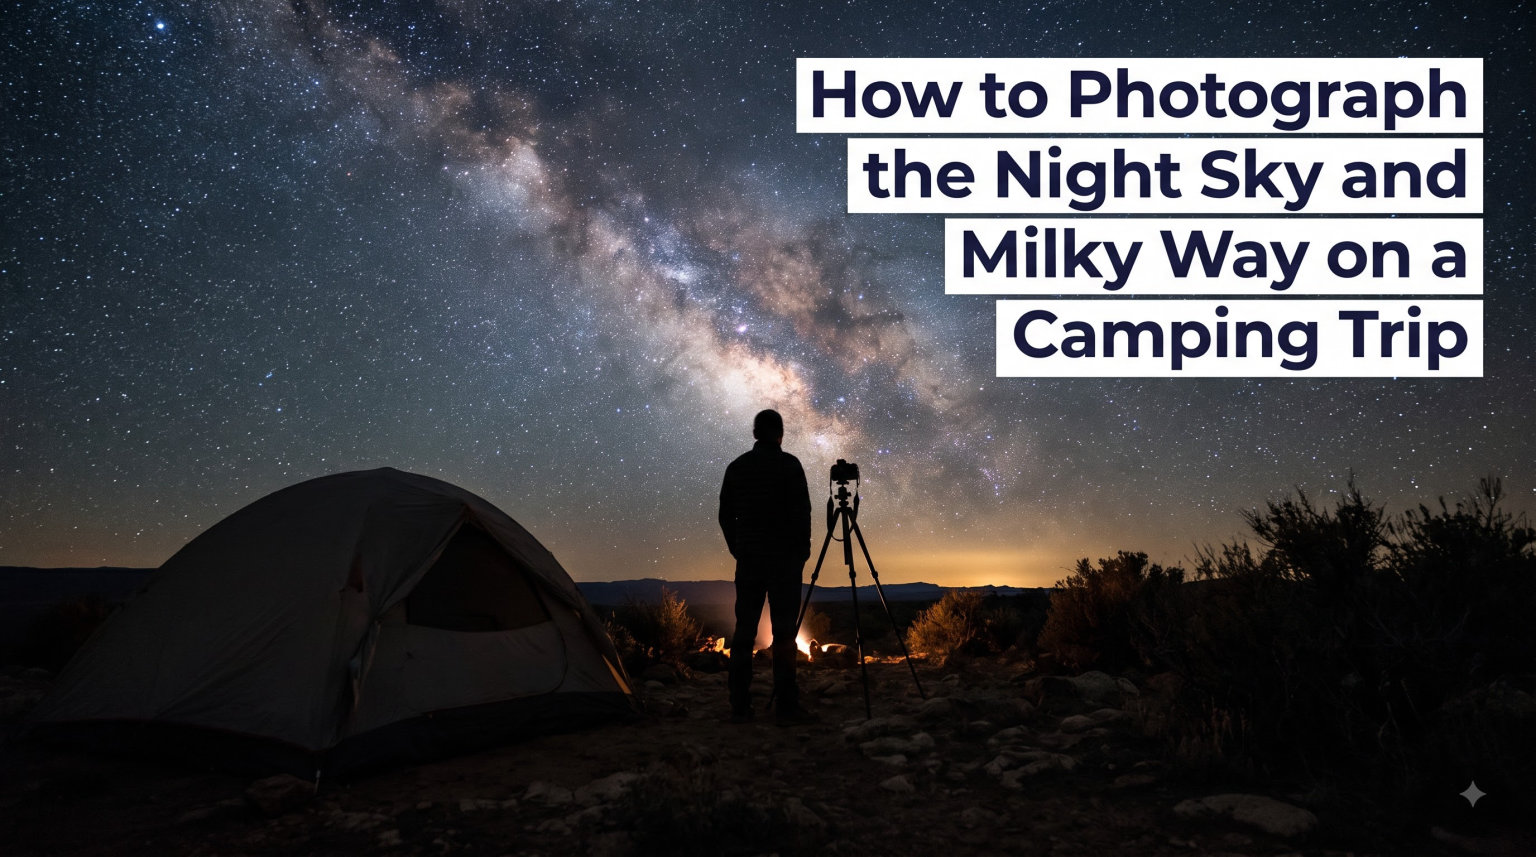
I still remember the first time I saw the Milky Way with my own eyes at a remote campground in Utah. I had a cheap DSLR, a wobbly tripod, and almost no idea what I was doing. I came home with three blurry images and a memory I will never forget.
Three years and dozens of camping trips later, I have photographed the galactic core from deserts, mountaintops, and lakeside camps. The good news is that learning how to photograph the night sky and Milky Way on a camping trip is much easier than it looks. With the right gear, the right timing, and a few settings anyone can learn, you can bring home stunning shots of the cosmos.
This guide pulls together everything our team has learned from years of camping under dark skies. We will cover gear, camera settings, planning, composition, smartphone tricks, and post-processing. By the end, you will have a complete checklist for your next trip.
Table of Contents
Why Camping Trips Are Perfect for Night Sky Photography
Camping trips put you in exactly the right place to photograph the night sky. Most urban and suburban areas drown the stars in light pollution, washing out all but the brightest constellations. Drive a few hours out of any major city, and the sky transforms overnight.
The first big advantage is dark skies. National parks, state forests, and BLM land typically sit in Bortle Class 2 to 4 zones. That means you can see thousands of stars, the Milky Way band, and even the faint glow of nebulae with the naked eye.
The second advantage is built-in foreground interest. Your tent, campfire, picnic table, trees, mountains, and lake all become natural framing elements. Generic night sky articles often show a sky with nothing at the bottom. Camping trips give you stories to tell in the foreground.
Finally, camping gives you time. There is no rush to drive home after sunset. You can wait for the perfect alignment of the Milky Way, rest between shots, and stay out as long as your battery and body allow.
Best Time to Photograph the Milky Way While Camping
Timing matters more than any gear choice. The Milky Way core is only visible during certain months, at certain hours, and under specific moon conditions. Get the timing wrong and even the best gear produces empty black frames.
Milky Way Season
The galactic core rises highest in the Northern Hemisphere between March and October. Peak visibility runs from late May through early August, when the core climbs high above the horizon after midnight.
In the Southern Hemisphere, the core season shifts. Photographers in Australia, New Zealand, and South America get their best views between February and September.
Best Months for Camping Trips
June, July, and August are the easiest months for camping photographers in North America and Europe. The core rises late, but nights are mild and campgrounds stay open long hours.
April, May, September, and October work too, especially in desert regions. The galactic core appears closer to the horizon but the weather is often more comfortable for sleeping outside.
Moon Phase Planning
A bright moon washes out the Milky Way almost as much as city lights. Plan your trip around a new moon or a thin crescent. The week before and after a new moon gives you three to four nights of dark sky.
Apps like PhotoPills and Star Walk 2 show moon phase, moonrise time, and Milky Way position for any date and location. I check them at least a month before booking any camping site.
Time of Night
The galactic core rises at different times depending on the month. In June at northern latitudes, it appears around midnight and climbs highest around 3 AM. In August, it shows up as early as 10 PM.
Arrive at your campsite an hour before the core rises. That gives you time to set up, focus, and take test shots without losing the moment.
Finding Dark Sky Locations Near Your Campsite
Picking the right campsite is just as important as picking the right camera. A Bortle Class 8 campground 20 miles outside a city will still give you washed-out skies.
Use a Light Pollution Map
The free Light Pollution Map at lightpollutionmap.info shows real-time light pollution levels across the world. Look for areas shaded blue, green, or gray. Those are dark sky zones.
Open the map before booking your campsite. Aim for a spot at least 50 miles from any major metro area. Desert regions, mountain ranges, and remote forests all have great options.
Bortle Scale Explained
The Bortle Scale ranks sky darkness from Class 1 (excellent dark sky) to Class 9 (inner city sky). For Milky Way photography, you want Class 1 to 4. Class 5 still works but the core will look faint.
Campsites inside national parks typically sit at Bortle 2 or 3. State park campgrounds near small towns often sit at Bortle 4 or 5. Private RV parks near highways are usually unusable for Milky Way shots.
DarkSky International Certified Parks
DarkSky International certifies parks and reserves that protect night skies. Their website lists more than 200 certified locations worldwide. Certified parks have strict lighting rules, which means darker skies and better photos.
Some favorites among our team include Big Bend (Texas), Cherry Springs (Pennsylvania), Jasper (Canada), and Aoraki Mackenzie (New Zealand). Each has dedicated astronomy areas with open sight lines.
Essential Gear for Night Sky Photography on a Camping Trip
You do not need a huge kit to photograph the Milky Way while camping. A body, a lens, and a tripod handle 90 percent of the work. Add a few extras for comfort and you are set.
Camera Body
Any modern DSLR or mirrorless camera with manual mode works. Full-frame sensors gather more light and produce cleaner images at high ISO, which is helpful. Crop sensors work too, just expect slightly more noise.
Our team has shot Milky Way photos on entry-level Canon Rebels, Nikon D5xxx series, Sony a6xxx series, and Fujifilm X-T cameras. All can produce great results with the right settings.
Wide-Angle Lens With Fast Aperture
A wide-angle lens lets you capture more sky and more foreground. Focal lengths between 14mm and 24mm work best for camping scenes. A fast aperture of f/2.8 or wider gathers enough light for short exposures.
Popular choices include the Rokinon 14mm f/2.8, Sigma 14-24mm f/2.8, Tamron 15-30mm f/2.8, and Canon RF 15-35mm f/2.8. Budget shoppers can find used manual focus lenses for under 200 dollars that perform beautifully.
Sturdy Tripod
A tripod is non-negotiable. Long exposures of 20 seconds cannot be hand-held. Buy the sturdiest tripod you can afford, ideally with a ball head for easy angle adjustments.
Carbon fiber tripods weigh less and are easier to carry on camping hikes. Aluminum tripods cost less and work fine for car camping. Avoid flimsy travel tripods that wobble in any breeze.
Remote Shutter or Intervalometer
Pressing the shutter button with your finger causes camera shake, even on a tripod. A wired remote, wireless remote, or built-in intervalometer solves the problem. Most cameras have a 2-second self-timer that works too.
Extra Batteries and Memory Cards
Long exposures drain batteries fast. Cold nights drain them even faster. Pack at least three fully charged batteries per camera, plus a power bank if your model supports USB charging.
Bring more memory card space than you think you need. RAW files from full-frame cameras run 25 to 40 MB each. A 64 GB card holds about 1500 to 2500 frames depending on resolution.
Headlamp With Red Light Mode
A red light preserves your night vision while letting you see camera controls. Most headlamps include a red mode. Avoid white lights near other campers and near your camera (white light ruins dark adaptation).
Dew Heater and Lens Warmer
Humid camping nights often leave dew on cold lens surfaces within minutes. A simple USB dew heater strap keeps the lens warm enough to prevent condensation. Hand warmer packets wrapped around the lens work in a pinch.
Camera Settings: The Exposure Triangle Explained
Night sky photography uses a specific combination of ISO, aperture, and shutter speed. The exact numbers vary by camera, lens, and light conditions, but the starting point below works for most setups.
Starting Settings
Set your camera to Manual mode first. Use these starting settings: ISO 3200, aperture f/2.8, shutter speed 20 seconds. Adjust based on your histogram and test shots.
Full-frame cameras can push ISO to 6400 without much noise. Crop sensors do better at ISO 1600 to 3200. Test your camera at home before the camping trip so you know its limits.
The 500 Rule for Sharp Stars
Stars move across the sky as the Earth rotates. Long exposures turn stars into trails instead of sharp points. The 500 rule helps you pick the longest shutter speed before trailing becomes visible.
Divide 500 by your lens focal length. With a 20mm lens on a full-frame body, 500 divided by 20 equals 25 seconds. With a 14mm lens, you get about 35 seconds. Crop sensor users multiply the focal length by 1.5 or 1.6 before dividing.
ISO and Noise Balance
Higher ISO captures more light but introduces noise. Start at ISO 3200 and check the histogram on your LCD. A clean histogram with detail in both shadows and highlights means you picked the right value.
If shadows look too dark, bump ISO up. If highlights look blown out, drop ISO down. Modern cameras handle high ISO much better than older models, so do not be afraid to push to 6400 when needed.
Aperture Choices
Open your aperture as wide as your lens allows. f/2.8 works well. f/1.8 or f/1.4 gathers even more light but reduces depth of field. For camping scenes with foreground interest, f/2.8 to f/4 hits a sweet spot.
White Balance
Set white balance between 3400K and 4400K for a natural deep blue sky. Auto white balance often shifts colors between shots, which is annoying for editing later. Tungsten or daylight presets give inconsistent results.
Some photographers prefer an even cooler 3200K for a moody look. Warm it up to 5000K if you want a darker, more dramatic sky. Pick what looks right and stick with it for the whole session.
Shoot in RAW Format
RAW files capture way more color and tonal data than JPEGs. They also let you fix exposure, white balance, and noise in post-processing. Always shoot RAW for night sky photography. JPEGs lose too much detail.
How to Focus at Night: Sharp Stars Every Time
Autofocus fails in the dark. Even on the brightest stars, contrast is too low for most systems to lock focus. Switch to manual focus and use one of the methods below.
Live View Magnification
Switch to Live View mode and zoom in to 10x magnification on a bright star. Slowly turn the focus ring until the star shrinks to a pinpoint. The dot should be as small and sharp as possible.
Many cameras offer focus peaking, which highlights sharp edges in a colored overlay. Use it together with Live View for extra precision. Once focus is locked, switch back to viewfinder if you prefer.
Hyperfocal Distance Method
For camping scenes with foreground elements, focus a third of the way into your scene. That balances sharpness between the foreground (tent, campfire) and the background (stars).
Hyperfocal distance charts are available online for every focal length and aperture. Print one and bring it along. At f/2.8 and 14mm, focus at about 2 meters for the sharpest combined foreground and sky.
Tape Your Focus Ring
Once focus is perfect, wrap a small piece of gaffers tape around the focus ring so it cannot move accidentally. Camera bags, tripod adjustments, and cold weather can all nudge your focus out of place.
Take a Test Shot
After focusing, take a test shot at your night sky settings. Zoom into the LCD image and check that stars are sharp points, not blurry blobs. Adjust focus slightly and try again if needed.
Composition Tips for Camping Night Sky Photos
Settings get you a sharp sky. Composition is what makes the photo memorable. Use the camping environment to add depth, scale, and storytelling to your shots.
Rule of Thirds With the Horizon
Place the horizon along the bottom third of the frame for sky-dominant compositions. Place it along the top third for foreground-dominant shots. Centered horizons work for mirror-still lakes or symmetrical reflections.
Foreground Interest
A sky alone looks empty. Add a tent, campfire, picnic table, or tree silhouette to anchor the image. Foreground elements give the eye somewhere to rest and add a sense of place.
Walk around your campsite before dark. Look for clean compositions with interesting shapes. Set up your tripod during blue hour so you are ready when darkness falls.
Frame the Milky Way Core
The brightest part of the Milky Way is the galactic core, near the constellation Sagittarius. Use PhotoPills to see exactly where it will appear at your location and time. Position your tripod so the core sits where you want it.
Vertical compositions work great for tall trees and the core rising overhead. Horizontal compositions suit wide desert landscapes and lakeside scenes. Try both and see which tells your story better.
Leading Lines
Camping scenes have natural leading lines. Paths, fences, riverbanks, and shorelines all guide the eye through the frame. Position your tripod so the lines lead toward the Milky Way.
Silhouettes
Backlight your tent, trees, or mountains to create dramatic silhouettes. Let the bright sky behind them provide all the light. This works especially well with tent scenes where someone inside is reading by headlamp.
Tent Photography
Glow-in-the-dark tent scenes are iconic in night sky photography. Place a headlamp or small lantern inside the tent for warm interior light. The orange glow against the cool blue Milky Way is a classic camping composition.
Keep the tent light subtle. Too much brightness overwhelms the stars. A small battery-powered lantern on its lowest setting usually works perfectly.
Step-by-Step: How to Photograph the Night Sky and Milky Way on a Camping Trip
Follow these steps in order during your next camping trip. Each step builds on the previous one and saves you time in the field.
Step 1: Scout During Daylight
Arrive at your campsite before sunset. Walk around and identify clear sight lines to the southern sky (Northern Hemisphere) or southern sky (Southern Hemisphere). Mark compositions that work with the Milky Way position.
Step 2: Set Up Tripod During Blue Hour
The blue hour, the period just after sunset, gives you enough light to see and adjust your composition. Set up your tripod, mount your camera, and frame your shot. Lock everything down so it does not move later.
Step 3: Switch to Manual Mode
Set the mode dial to M. Turn off autofocus, image stabilization (for tripod work), and any noise reduction features that add delay. These can cause long processing gaps between shots.
Step 4: Focus on a Bright Star
Use Live View at 10x magnification. Find a bright star, manually focus until it becomes a sharp point, and lock the focus ring. Take a test shot at high ISO to confirm sharpness.
Step 5: Dial in Your Settings
Set ISO 3200, f/2.8, and 20 seconds. Take a test shot and review the histogram. Adjust until the histogram sits where you want it, with detail in shadows and no blown highlights.
Step 6: Set White Balance
Switch white balance to Kelvin mode. Set between 3800K and 4200K for a natural deep blue sky. This keeps colors consistent between shots and saves editing time later.
Step 7: Trigger the Shutter
Use a remote shutter, intervalometer, or 2-second self-timer. Avoid touching the camera during the exposure. A single bump ruins a 20-second shot.
Step 8: Review and Adjust
Check each shot on the LCD. Zoom in to confirm stars are sharp. Adjust ISO, aperture, or shutter speed as conditions change. Move your tripod if a better composition appears.
Step 9: Take Multiple Frames
Shoot at least 10 to 20 frames per composition. Stacking them in post-processing reduces noise dramatically. Slight shifts between frames can also help with alignment and star reduction.
Step 10: Stay Out as Long as You Can
The Milky Way moves across the sky through the night. Different compositions appear at different times. Bring warm clothes, snacks, and coffee, and stay out for hours. The best shots often come at 3 AM when everyone else is asleep.
Smartphone Astrophotography: Capture the Milky Way With Your Phone
Modern smartphones can capture the Milky Way under dark skies. The sensors in flagship phones from Apple, Samsung, Google, and Xiaomi have improved dramatically in recent years. You will not get DSLR quality, but you can get impressive results.
Use Pro Mode or Manual Controls
Open your camera app and look for Pro mode, Manual mode, or a dedicated Night mode. In manual controls, set ISO between 1600 and 3200, shutter speed between 15 and 30 seconds, and focus to infinity.
iPhone users can use apps like NightCap, ProCam, or Halide. Android users can try ProCam X, Manual Camera, or their phone’s built-in Pro mode.
Mount Your Phone on a Tripod
Hand-held phone shots at 20 seconds produce blurry messes. Buy a small phone tripod (around 20 dollars) or a phone mount adapter for your camera tripod. Stability is non-negotiable, even for phones.
Disable Night Mode Auto-Processing
Built-in Night modes stack multiple short exposures. They work for handheld city shots but struggle with the very long exposures needed for the Milky Way. Switch to a manual app for full control.
Know the Limitations
Phone sensors are small. They produce more noise than DSLRs at high ISO. They have limited dynamic range. Stars often appear as colored smudges instead of sharp points. For serious work, a dedicated camera still wins. For casual camping shots, phones are surprisingly capable.
Apps Worth Trying
NightCap (iOS) has a dedicated star mode that stacks exposures automatically. ProCam (iOS and Android) gives full manual controls. Halide (iOS) is another favorite among mobile photographers.
Light Painting and Creative Techniques at the Campsite
Light painting adds drama and storytelling to camping night sky photos. The technique is simple: during a long exposure, move a small light source around your subject to brighten specific areas.
Illuminate Your Tent
Place a headlamp or small LED lantern inside your tent during a long exposure. The light bleeds through the tent fabric for a warm, cozy glow. Keep the light moving so it does not blow out the fabric.
Set your tent light on its lowest setting. Too much light overwhelms the stars behind it. A subtle glow is more effective than a bright interior.
Headlamp Light Painting
During a 20 to 30 second exposure, walk around your foreground (tree, rock, tent) with a headlamp. Quickly sweep the light over the subject for one to two seconds. The rest of the time, stay still or hide behind the camera.
Use a red headlamp for more dramatic, less harsh light. White light can blow out details. Adjust your technique based on what looks good in the test shot.
Sparkler Trails
Sparklers add energy and motion to camping photos. Light a sparkler and wave it in patterns during a 10 to 15 second exposure. The sparks trace glowing arcs across the frame.
Be careful with sparklers near dry grass, tents, and other campers. Use them only in safe, clear areas away from flammable materials.
Foreground Glow With Small LEDs
A small battery-powered LED panel can light foreground subjects with precise control. Place it low and to the side for natural-looking illumination. Add a colored gel for creative effects.
Multiple Exposure Techniques
Some cameras let you combine multiple exposures in-camera. Take one shot of the sky at night sky settings, then a second shot of the tent at lower ISO, and combine them for the best of both worlds.
This technique balances bright foregrounds with dark skies without HDR processing later. It also reduces noise in shadow areas.
Post-Processing Basics for Night Sky Images
Post-processing turns good RAW files into great final images. The basics below take your camping photos from flat to stunning.
Import and Organize
Import your RAW files into Lightroom, Capture One, or your favorite editor. Organize by composition and time. Star-rating your best shots helps you find them later.
Adjust White Balance
Tweak white balance until the sky looks deep blue and the Milky Way looks natural. Cooler temperatures (3500K) give a moody look. Warmer temperatures (4500K) give a more traditional sky color.
Exposure and Contrast
Boost exposure slightly if shadows look too dark. Add contrast to make the Milky Way pop. Be careful not to clip highlights in the brightest parts of the core.
Noise Reduction and Sharpening
Apply luminance noise reduction to smooth grainy skies. Use the masking slider to protect sharp stars from being softened. Add a small amount of sharpening to bring out star detail.
Star Reduction
Specialized tools like StarXTerminator (in Photoshop or Lightroom) isolate stars from the sky. You can then reduce star size, adjust color, or replace the sky entirely. Beginners can skip this step and still get great results.
Final Adjustments
Adjust shadows, highlights, and clarity to taste. Add a slight vignette to draw attention to the center of the frame. Export as JPEG for sharing online, or keep the RAW file for future edits.
Common Mistakes to Avoid on Your Camping Photo Trip
Every photographer makes mistakes at first. Learning from common errors saves you hours in the field and helps you come home with better shots.
Forgetting Extra Batteries
Cold nights and long exposures drain batteries fast. A camera that lasts 800 shots in summer might die after 300 in winter. Always pack more batteries than you think you need.
Condensation on Lenses
Humid nights often leave dew on cold lens surfaces within minutes. Bring a microfiber cloth, lens warmer, or USB dew heater. Stop shooting when condensation appears and let the lens warm up.
Checking the LCD Too Much
Each LCD check uses battery power and wrecks your night vision. Use a quick glance to confirm composition, then trust your settings and shoot in batches. Review your images more thoroughly during breaks.
Using Burst Mode
Burst mode fills memory cards fast and rarely helps for night sky work. Slow and methodical shooting produces better results and lets you think about composition between frames.
White Lights Around Other Campers
Your white headlamp ruins the dark adaptation of other campers and photographers. Use a red light mode and keep white lights off unless absolutely necessary. Be respectful of fellow campers trying to enjoy the night.
Ignoring Weather and Humidity
Check the weather forecast before any camping photography trip. Clouds ruin Milky Way shots. High humidity increases condensation. Wind shakes tripods. Plan around the forecast whenever possible.
Skipping Test Shots
Test shots during blue hour save frustration later. Take a few frames at high ISO to confirm focus and exposure. Adjust composition if needed. Once darkness falls, you are ready to capture the real show.
Overlooking the Galactic Core Position
The Milky Way core is not always visible. It sits low on the horizon early in the season and high overhead at peak times. Use PhotoPills to confirm the core will rise above your horizon before committing to a campsite.
FAQs
Can a phone camera capture the Milky Way?
Yes, modern smartphones can capture the Milky Way under dark skies. Use a phone tripod, switch to manual or Pro mode, set ISO between 1600 and 3200, and use a shutter speed of 15 to 30 seconds. Apps like NightCap and ProCam give you full control over settings. The results will not match a full-frame DSLR, but they are impressive for casual camping photography.
How do you plan a Milky Way photography trip?
Plan a Milky Way photography trip in five steps: pick a date within the Milky Way season (March to October in the Northern Hemisphere), choose a campsite at least 50 miles from major cities to escape light pollution, schedule your trip around a new moon for the darkest skies, check the weather for clear conditions, and use PhotoPills or Star Walk 2 to confirm the galactic core will rise above your horizon at the right time. Book your campsite at least a month ahead to secure a good spot.
What is the 500 rule in night sky photography?
The 500 rule is a quick formula for picking the longest shutter speed before stars begin to trail. Divide 500 by your lens focal length to get the maximum exposure time in seconds. With a 20mm lens on a full-frame camera, 500 divided by 20 equals 25 seconds. With a 14mm lens, you get about 35 seconds. Crop sensor cameras multiply the focal length by 1.5 or 1.6 before dividing for accurate results.
How to photograph the Milky Way at night?
Photograph the Milky Way at night with these steps: set up a sturdy tripod during blue hour, switch to manual mode, focus on a bright star using Live View at 10x magnification, set ISO 3200, aperture f/2.8, and shutter speed 20 seconds, set white balance to 3800K to 4200K, use a remote shutter or 2-second timer, shoot in RAW format, and take multiple frames for noise reduction in post-processing. Check your histogram to confirm proper exposure.
Conclusion
Learning how to photograph the night sky and Milky Way on a camping trip is one of the most rewarding outdoor skills you can build. Every camping trip gives you a chance to capture the cosmos, and the gear required is simpler than most people expect.
Start with the basics: a sturdy tripod, a wide-angle lens, and manual camera settings. Pick a dark campsite during a new moon. Show up an hour before the Milky Way rises. Focus carefully, shoot in RAW, and take plenty of frames. Stay out until your battery dies or your body gives up.
Our team has spent years learning the craft, and the journey never gets old. Every camping trip brings new compositions, new conditions, and new memories under the stars. Pack your gear, book your campsite, and start shooting. The Milky Way is waiting.