
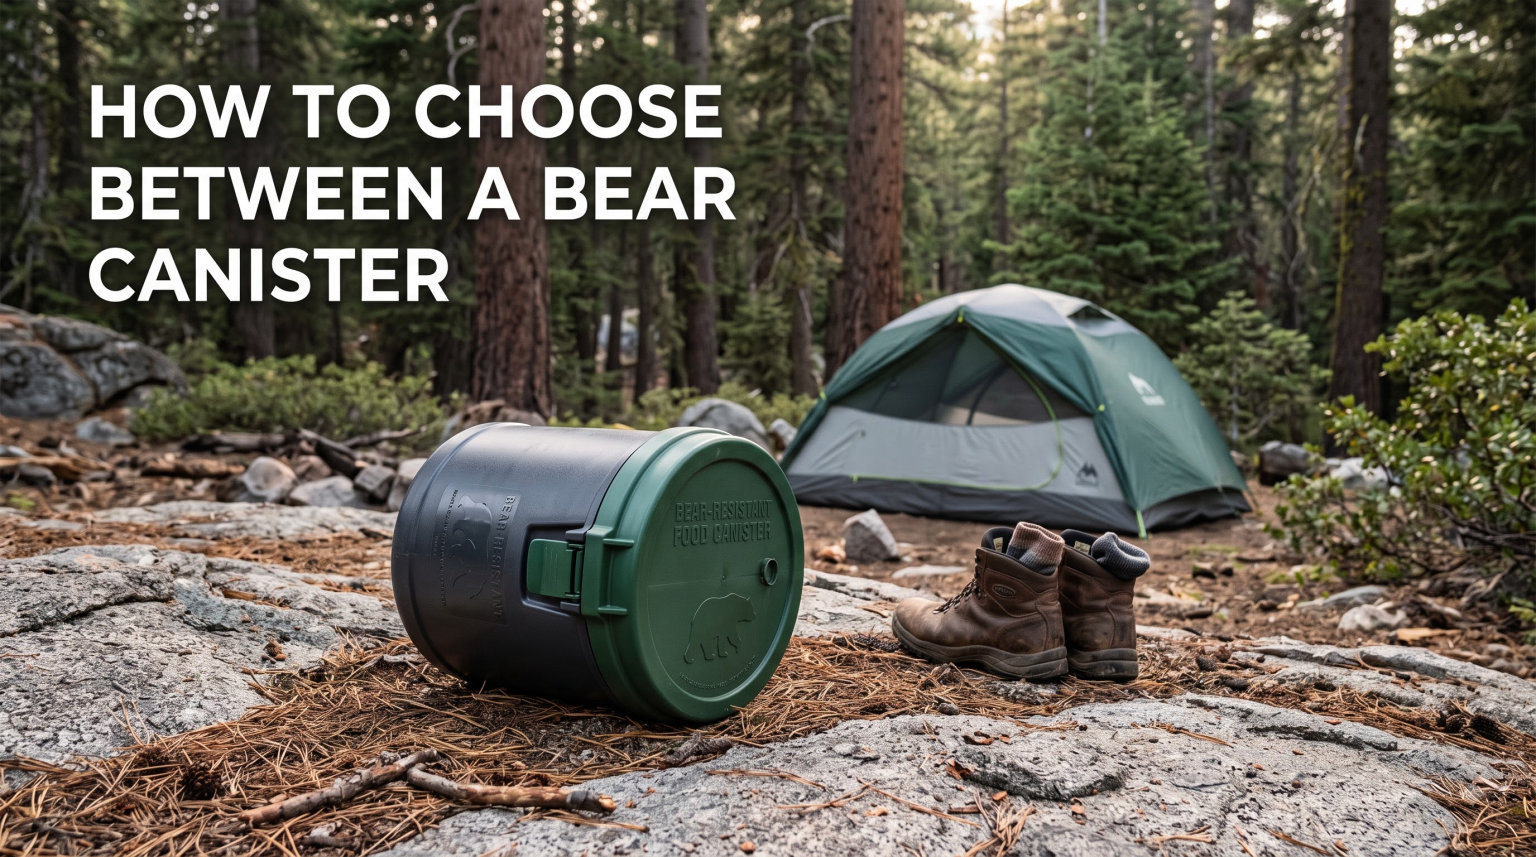
A bear canister is a hard-sided, portable food storage container built to keep bears, raccoons, and other wildlife out of your food and scented items while you camp in the backcountry. If you have ever stood in a gear shop staring at two plastic cylinders wondering which one fits your trip, you are in the right place. This guide walks through exactly how to choose between a bear canister so you can pack with confidence, stay legal in regulated wilderness areas, and protect both yourself and the bears that live there.
Our team has spent years hiking bear country from the Sierra Nevada to the Appalachian Trail, and we have seen firsthand what happens when food storage goes wrong. Bears that score even one human meal often become dangerous, habituated animals that end up relocated or euthanized. Choosing the right bear canister is not just a gear decision. It is a wildlife conservation choice that protects you, future hikers, and the animals themselves.
By the end of this guide you will know what a bear canister actually does, how to match one to your trip length and group size, which parks require them, and how to use one properly in the field. We will also address the real pain points backpackers report on forums, like cold-weather lid failures and the bulk-to-weight tradeoff. Let us start with the basics.
Table of Contents
What Is a Bear Canister?
A bear canister is a portable, bear-resistant food locker made from rigid materials like polyethylene or polycarbonate. It is designed so that a bear cannot bite through it, crush it, or pry the lid off, even after repeated attempts. Most modern canisters earn certification from the Interagency Grizzly Bear Committee, known as IGBC, which is the recognized standard for bear-resistant containers in the United States.
Here is how the design actually works. The walls are thick and impact resistant so teeth and claws slide off rather than puncturing. The lid uses a mechanism that requires human dexterity, like a screw thread or a recessed push-and-twist cap, that a bear paw simply cannot replicate. Some models, like the BearVault, use a transparent body so you can see your food without opening the lid and letting scents escape.
Not every plastic tub counts as a bear canister. To earn the IGBC seal, a container must survive live bear testing at facilities like the Grizzly and Wolf Discovery Center in West Yellowstone. Bears are given the canister baited with food, and if they cannot break in within a set time, the product earns certification. This is why park rangers and the National Park Service only accept specific approved models, not random containers from a hardware store.
There are also soft-sided bear-resistant sacks, like the Ursack, which use high-tensile fabric instead of rigid walls. These are a separate category with different rules and we cover the comparison in detail below. For now, when we say bear canister, we mean the hard-sided, IGBC-certified version.
Why You Need a Bear Canister
Bears have one of the most powerful senses of smell in the animal kingdom, often compared to bloodhounds, with roughly 40 times more olfactory receptor cells than humans. They can detect food smells from miles away, including sealed packaged meals, toothpaste, sunscreen, and even scented trash. Once a bear associates humans with food, that bear becomes dangerous to people and itself.
This is the core reason bear canisters matter. A fed bear is a dead bear, as wildlife managers often say. Bears that learn to raid campsites eventually lose their natural fear of humans and start approaching people aggressively. Wildlife agencies are then forced to relocate or euthanize those animals. Proper food storage breaks this cycle before it starts.
But can bears smell food inside a bear canister? The honest answer is yes, they often can. A bear canister is not airtight or completely odor-proof. What it does is prevent the bear from getting to the food even after it smells it. The scent draws the bear in, but the canister stops it from getting a reward, so the bear eventually gives up and moves on. This is why placement and patience still matter, which we cover later.
Beyond bear safety, canisters also keep out raccoons, marmots, mice, and other opportunistic wildlife that can shred a poorly hung food bag in minutes. In many backcountry areas the smaller critters cause more food loss than bears do.
Bear Canister Pros and Cons
Before learning how to choose between a bear canister, it helps to understand the real tradeoffs. Our team has compiled the most commonly reported benefits and drawbacks from backpacking forums, gear reviews, and our own field testing.
Pros of Bear Canisters
The biggest advantage is reliability. A properly certified canister is essentially bear-proof when used correctly, which removes the guesswork and skill required for hanging a food bag in a tree. You do not need the right tree, the right branch, or good throwing aim. You set it down and walk away.
Approved for every major park that requires hard-sided food storage, including Yosemite, Sequoia, and Rocky Mountain National Park.
No trees required, which matters above treeline and in desert environments where bear hangs are impossible.
Keeps food organized and protected from crushing, moisture, and small critters.
Transparent models let you find items without opening the lid and releasing odors.
Doubles as a short camp seat in a pinch.
Works in all weather, unlike bear hangs that fail in wind, rain, or ice.
Cons of Bear Canisters
The main complaints, voiced repeatedly on Reddit communities like r/Ultralight and r/AppalachianTrail, center on weight and bulk. A typical canister weighs between 1.5 and 2.5 pounds and takes up a meaningful chunk of pack volume. For ultralight thru-hikers, this is the single heaviest non-essential item in the pack.
Heavy compared to a bear bag or Ursack, adding 1.5 to 2.5 pounds to your base weight.
Bulky and rigid, consuming valuable pack space and limiting how much food you can carry for long stretches.
Lids can be difficult to open, especially in cold weather when plastic contracts and fingers are numb.
Initial cost is high compared to hanging a stuff sack, often 70 to 350 dollars depending on the model.
Cannot be packed inside tight spaces the way a soft bag can.
Volume is fixed, so you cannot squeeze in extra days of food without buying a second canister.
The drawbacks are real, but for most backpackers the peace of mind and regulatory compliance outweigh the weight penalty. The key is choosing a canister that fits your specific trip, which is what the rest of this guide covers.
Hard-Sided vs Soft-Sided Bear Storage
When you research how to choose between a bear canister, you will quickly encounter the hard-sided versus soft-sided debate. Both approaches have merit, but they serve different trips and skill levels.
Hard-sided canisters are the rigid plastic or carbon-fiber tubes most people picture. They are heavier, fully IGBC certified, and accepted everywhere bear canisters are required. They physically prevent a bear from crushing your food even if it sits on the canister for hours.
Soft-sided bear-resistant sacks, like the Ursack Major or Ursack AllMitey, use high-tensile aramid fabric that resists tearing and puncturing. They are much lighter, often under 8 ounces, and pack down small. However, a bear can still crush the contents, which is why many parks require a hard-sided canister even if you own a soft sack.
The decision comes down to three factors. First, what does your destination require? If a park mandates an IGBC-certified hard canister, a soft sack will not pass a ranger check. Second, what is your trip style? Ultralight hikers covering long miles often prefer the weight savings of a soft sack where regulations allow. Third, what is your risk tolerance for crushed food? A hard canister guarantees your food survives a bear encounter. A soft sack protects the bear from getting the food but does not guarantee your tortillas stay whole.
For most beginners and for anyone hiking in regulated national park backcountry, a hard-sided canister is the safer, simpler choice. Reserve soft sacks for areas where they are explicitly permitted and where you are comfortable with the tradeoffs.
How to Choose Between a Bear Canister
This is the heart of the guide. Choosing the right bear canister comes down to five practical steps that account for regulations, capacity, weight, lid design, and long-term value. Work through them in order and you will land on the right model for your trips.
Step 1: Check Park Regulations First
Before you look at any specs, find out what your destination actually requires. Not every park accepts every canister, and some areas only allow hard-sided models from a specific approved list. Start with the National Park Service website for the park you plan to visit, then cross-check with the IGBC certified products list, which is updated regularly.
Yosemite, Sequoia, Kings Canyon, Rocky Mountain, Olympic, and Gates of the Arctic all have hard-sided canister requirements in their backcountry. Some areas, like certain Inyo National Forest zones, also mandate canisters. If you show up without an approved container, rangers can turn you away at the trailhead or issue a citation. This step alone narrows your options dramatically.
One common mistake is assuming that because a canister is sold at a major retailer it must be approved everywhere. That is not true. Always verify the specific model and its current certification status before buying or renting.
Step 2: Match Capacity to Your Trip Length
Bear canisters come in a range of volumes, typically measured in cubic inches or liters. The sweet spot for most solo backpackers is between 400 and 700 cubic inches, which covers roughly 4 to 7 days of food depending on how calorie-dense your meals are. Smaller canisters suit overnight and weekend trips. Larger ones, around 700 to 900 cubic inches, handle week-plus expeditions or group sharing.
Here is a quick capacity guide based on typical backpacking food density:
1 to 3 days: roughly 300 to 450 cubic inches, like the BearVault BV450.
4 to 7 days: roughly 450 to 700 cubic inches, like the BearVault BV500.
7 to 10 days: roughly 700 to 900 cubic inches, like the Bearikade Weekender.
10 plus days or group trips: consider two canisters or an extended-capacity model.
Remember that you must fit all scented items inside, not just food. That includes toothpaste, sunscreen, bug spray, lip balm, deodorant, and scented trash like wrappers. New backpackers routinely underestimate volume by 20 to 30 percent because they forget these extras. When in doubt, size up.
Step 3: Consider Weight and Packability
Weight is the single most debated factor in bear canister discussions online. A standard BearVault BV500 weighs about 2 pounds 9 ounces empty, while a carbon-fiber Bearikade Scout weighs under 1 pound 10 ounces. That difference of roughly 15 ounces matters enormously to thru-hikers logging 25 miles a day, and far less to weekend warriors.
Packability is the other half of the equation. A rigid cylinder takes up fixed space in your pack and does not compress when empty. Some hikers pack their sleeping bag or clothing around the canister to fill gaps. Others strap it to the top of the pack for easy access. Think about how the canister fits your specific backpack and how you will manage that bulk on the trail.
As a rule of thumb, prioritize reliability and capacity over weight savings if you are a beginner. Once you have logged more miles and know your preferences, you can optimize for the lightest canister that still meets your capacity needs and is legal in your destination.
Step 4: Evaluate the Lid Mechanism
The lid is the part you interact with every single day of your trip, and it is also the part that fails or frustrates most often. There are two dominant designs: the screw-on threaded lid and the push-and-twist recessed cap.
The screw-on lid, used on Bearikade and Garcia models, is reliable and easy to operate with bare hands. It can still bind in cold weather but tends to release with a firm grip. The push-and-twist recessed cap, used on BearVault models, requires you to press three locking tabs simultaneously while rotating. This is what makes it bear-proof, but it also makes it genuinely hard to open when your fingers are cold, wet, or tired.
Forum users on r/backpacking frequently report BearVault lid struggles below freezing. The plastic contracts, the tabs get stiff, and numb fingers cannot maintain the pressure needed. Two workarounds help: carry a small piece of rubber grip pad to improve traction, or warm the lid against your body for a few minutes before opening. If you hike in cold conditions regularly, factor this into your choice and consider a screw-lid model instead.
Step 5: Factor in Long-Term Value
A bear canister is not a one-trip purchase for most people. If you backpack regularly, the cost per use drops quickly over a few seasons. The math changes based on how often you go, how long your trips are, and whether you can rent locally.
The cheapest approved canisters, like the BearVault BV450, run around 70 to 85 dollars and last for years with basic care. Premium carbon-fiber models like the Bearikade can exceed 300 dollars but offer the best weight-to-volume ratio on the market and are widely considered lifetime gear. Mid-range options like the Garcia Machine canister sit around 80 to 100 dollars and are nearly indestructible.
If you hike fewer than two or three trips a year, renting from an outdoor store or ranger station often costs 5 to 10 dollars per day and makes more financial sense. If you hike monthly or are planning a thru-hike, buying pays off within a season. We break this down further in the renting versus buying section below.
Putting the Decision Together
The five-step framework condenses into one sentence: choose the lightest, smallest, IGBC-certified hard-sided canister that holds all your food and scented items for your longest planned trip, with a lid you can actually operate in the conditions you hike. Run your shortlist through that sentence and the right answer usually emerges.
Bear Canister Size Guide
Size selection deserves its own section because it is where most beginners overspend or undershoot. The two most popular models, the BearVault BV450 and the BearVault BV500, illustrate the tradeoff perfectly.
The BV450 holds 445 cubic inches, or about 7.3 liters, and suits solo trips of 1 to 4 days. The BV500 holds 700 cubic inches, or about 11.5 liters, and suits solo trips of 5 to 7 days or short group trips. The BV500 weighs about 9 ounces more than the BV450, but it carries nearly 60 percent more food.
The classic question on hiking forums is whether to buy the smaller BV450 to save weight or the larger BV500 for versatility. Our team leans toward the BV500 for most backpackers, because running out of food storage mid-trip is a far worse problem than carrying 9 extra ounces. You can always pack the spare volume with clothing or gear on shorter trips.
Group size changes the math. A party of two on a 5-day trip typically needs two BV500s or one extended-capacity canister like the Bearikade Weekender, which holds 900 cubic inches. Splitting the weight between two packs is usually the most comfortable approach.
Finally, consider how calorie-dense your food is. Freeze-dried meals and energy-dense snacks like nuts, peanut butter, and olive oil pack more calories per cubic inch than bulky items like crackers or fresh fruit. If you plan meals carefully, you can fit surprising amounts into a smaller canister.
Parks and Areas Requiring Bear Canisters
Bear canister regulations are not uniform. Each land management agency sets its own rules, and they change over time as bear activity shifts. The list below covers the major areas where hard-sided IGBC-certified canisters are mandatory for backcountry overnight use.
Yosemite National Park requires IGBC-certified canisters in all designated backcountry zones.
Sequoia and Kings Canyon National Parks require canisters in most wilderness areas.
Rocky Mountain National Park requires canisters in designated backcountry campsites.
Olympic National Park requires canisters in most coastal and alpine zones.
Gates of the Arctic National Park requires canisters throughout the park.
Inyo National Forest requires canisters in specific high-use zones, especially the Eastern Sierra.
Denali National Park requires bear-resistant food containers for all backcountry permits.
Adirondack High Peaks region in New York requires canisters from April through November.
This is not an exhaustive list, and local rules change. Always check the official park website and the IGBC certified products list before your trip. Some areas also accept soft-sided Ursacks with specific certification, while others demand hard-sided containers only. The penalty for non-compliance ranges from being turned away at the trailhead to fines of several hundred dollars.
How to Pack a Bear Canister
Packing a bear canister efficiently is a learned skill. Done well, you can fit a surprising amount of food into a small volume. Done poorly, you end up sitting on the lid hoping it threads shut. Follow these steps to maximize capacity.
Step 1: Plan calorie-dense meals. Choose foods that deliver high calories per ounce and per cubic inch. Think peanut butter, olive oil packets, nuts, jerky, cheese, and freeze-dried dinners. Avoid bulky low-calorie items like rice cakes or large chip bags.
Step 2: Remove excess packaging. Repackage meals into lighter, more compressible bags or containers. Flatten freeze-dried meal bags to squeeze out air. Cut away cardboard boxes and unnecessary instructions.
Step 3: Layer heavy and dense items at the bottom. This stabilizes the canister and prevents shifting. Put fragile items like crackers or tortillas on top where they will not be crushed.
Step 4: Fill every gap. Stuff small items like tea bags, spice packets, and energy gels into empty corners. Use socks or bandanas as filler to prevent rattling and save pack space elsewhere.
Step 5: Load the next day’s food at the top for easy access, so you only open the canister once per meal cycle and minimize odor release.
Step 6: Reserve room for scented non-food items. Toothpaste, sunscreen, bug spray, lip balm, deodorant, and scented trash all go inside. Double-bag anything that might leak.
What stays out? Your cookset, water bottles, and unscented clothing can stay in your main pack. The rule of thumb is simple: if it has a smell, or if it ever touched food, it goes in the canister.
How to Use a Bear Canister in the Field
Owning a canister is only half the battle. Using it correctly in camp is what actually prevents bear encounters. Placement matters more than most hikers realize.
Store the canister at least 100 feet, or about 30 meters, from your sleeping area and your cooking area. This keeps food odors away from where you sleep and reduces the chance a curious bear wanders through your tent zone. Place it on flat ground away from cliffs, rivers, and steep drop-offs, since bears have been known to bat canisters off ledges.
Avoid wedging the canister between rocks or under logs. A clever bear can use those as leverage points. Set it in the open where it can roll harmlessly if a bear swats it. Some hikers mark or brightly color their canister so it is easy to find the next morning if a bear has played soccer with it overnight.
Open the canister only when you need to retrieve food, and close it immediately afterward. Do not leave it open while you cook. Every minute the lid is off, odors escape and attract wildlife. Plan your meal breaks so you grab everything you need in one go.
Bear Canister Maintenance and Care
A bear canister is a piece of safety equipment, and like any safety gear it needs regular inspection and care. Most canisters last for years, even decades, when treated properly. Neglected ones develop cracks, warped lids, or stripped threads that can fail at the worst moment.
After every trip, empty the canister completely and wash it with warm soapy water. Pay attention to the threads and lid seal, where food residue and grease accumulate. Rinse thoroughly and let it dry fully open before storing. Trapped moisture causes mold and mildew that ruin your next trip’s food.
Inspect the body for cracks, dents, and UV damage. Prolonged sun exposure degrades polyethylene over time, making it brittle. If you see hairline cracks, especially near the lid or base, retire the canister. A cracked canister may still pass a ranger inspection but can fail under bear pressure.
Check the lid mechanism between trips. Test that screw threads still turn smoothly and that recessed caps still lock firmly. Lubricate plastic threads with a small amount of food-safe silicone if they bind. Store the canister in a cool, dry place out of direct sunlight when not in use.
Renting vs Buying a Bear Canister
One of the biggest content gaps in existing bear canister guides is the rent-versus-buy decision. Our team dug into the real math so you do not have to guess.
Renting makes sense for infrequent hikers. Most outdoor retailers, including REI and many park visitor centers, rent approved canisters for roughly 5 to 10 dollars per day. If you backpack two or three times a year for weekend trips, renting keeps your cost under 60 dollars annually and avoids storing bulky gear at home. Park rentals have the added benefit of guaranteeing you get a locally approved model.
Buying pays off once you hike regularly. A BearVault BV500 at around 80 dollars breaks even with rental costs after roughly 8 to 12 days of use, depending on rental rates in your area. If you are planning a thru-hike, a multi-week trip, or you backpack monthly, owning is clearly the better financial choice. You also get to know your specific canister, which makes packing and lid operation second nature.
The premium buyer category, like the carbon-fiber Bearikade, makes sense only for serious backpackers chasing weight savings. At 300-plus dollars, the break-even point is measured in seasons, not trips. For most people, a mid-range owned canister plus occasional rentals for group trips is the most flexible and cost-effective approach.
One more option worth noting: borrowing from friends or local hiking clubs. Many trail communities have informal gear libraries where you can borrow a canister free or cheap. This is an underused resource that bridges the gap between renting and buying.
Environmental Impact of Bear Canisters
Bear canisters are environmental protection tools first and consumer products second. Every canister in use is a bear that does not get habituated to human food, which is a bear that gets to keep living wild. This is the single most important sustainability argument for owning and using one properly.
From a manufacturing standpoint, canisters are durable goods designed to last for many years. Unlike disposable food packaging or single-use gear, a well-cared-for canister can serve a decade or more. Choosing a quality model and maintaining it reduces the lifetime environmental footprint compared to replacing cheaper gear repeatedly.
Some hikers also pass canisters along to friends or donate used ones to scout troops and outdoor programs when they upgrade. This extends the useful life and spreads the bear-safety benefit further. If you do retire a canister, check whether the manufacturer or a local gear shop accepts it for recycling before sending it to a landfill.
FAQs
Which bear canister should I get?
For most backpackers, the BearVault BV500 is the best all-around choice because it holds enough food for 5 to 7 day solo trips, is IGBC certified for every major park, and costs under 100 dollars. If you only take weekend trips, the smaller BV450 saves weight. If you are an ultralight thru-hiker willing to invest, the Bearikade Scout offers the best weight-to-volume ratio on the market.
Are there any drawbacks to bear bins?
Yes. The main drawbacks are weight, bulk, and lid difficulty. A typical canister weighs 1.5 to 2.5 pounds, takes up fixed pack space that cannot compress, and some lid mechanisms, especially BearVault models, are hard to open in cold weather when plastic contracts. They also cost more upfront than a bear hang setup.
What is the difference between BearVault 450 and 500?
The BearVault BV450 holds 445 cubic inches (about 7.3 liters) and suits solo trips of 1 to 4 days. The BearVault BV500 holds 700 cubic inches (about 11.5 liters) and suits solo trips of 5 to 7 days or short group trips. The BV500 weighs about 9 ounces more but carries nearly 60 percent more food, making it the more versatile choice for most backpackers.
Can bears smell food in bear canisters?
Yes, bears can often smell food inside a bear canister because the containers are not completely airtight. The canister does not block odor. What it does is prevent the bear from reaching the food even after it smells it, so the bear eventually gives up without a reward. This is why proper placement away from your tent still matters.
Conclusion
Learning how to choose between a bear canister comes down to five practical steps: verify your park regulations, match capacity to your trip length, weigh the bulk-versus-weight tradeoff, pick a lid you can actually operate, and decide whether renting or buying fits your hiking frequency. Run any candidate canister through that framework and the right choice becomes obvious.
A bear canister is more than a piece of gear. It is a commitment to keeping bears wild and yourself safe in their habitat. The weight is real, the bulk is real, and the lid frustrations are real, but so is the alternative of a habituated bear that ends up destroyed because someone skipped proper food storage. Carry the canister, use it correctly, and you protect wildlife for everyone who hikes after you.
Your next step is simple. Check the IGBC certified products list, confirm what your destination requires, and pick the model that fits your longest planned trip. Then get out there and hike with confidence.