
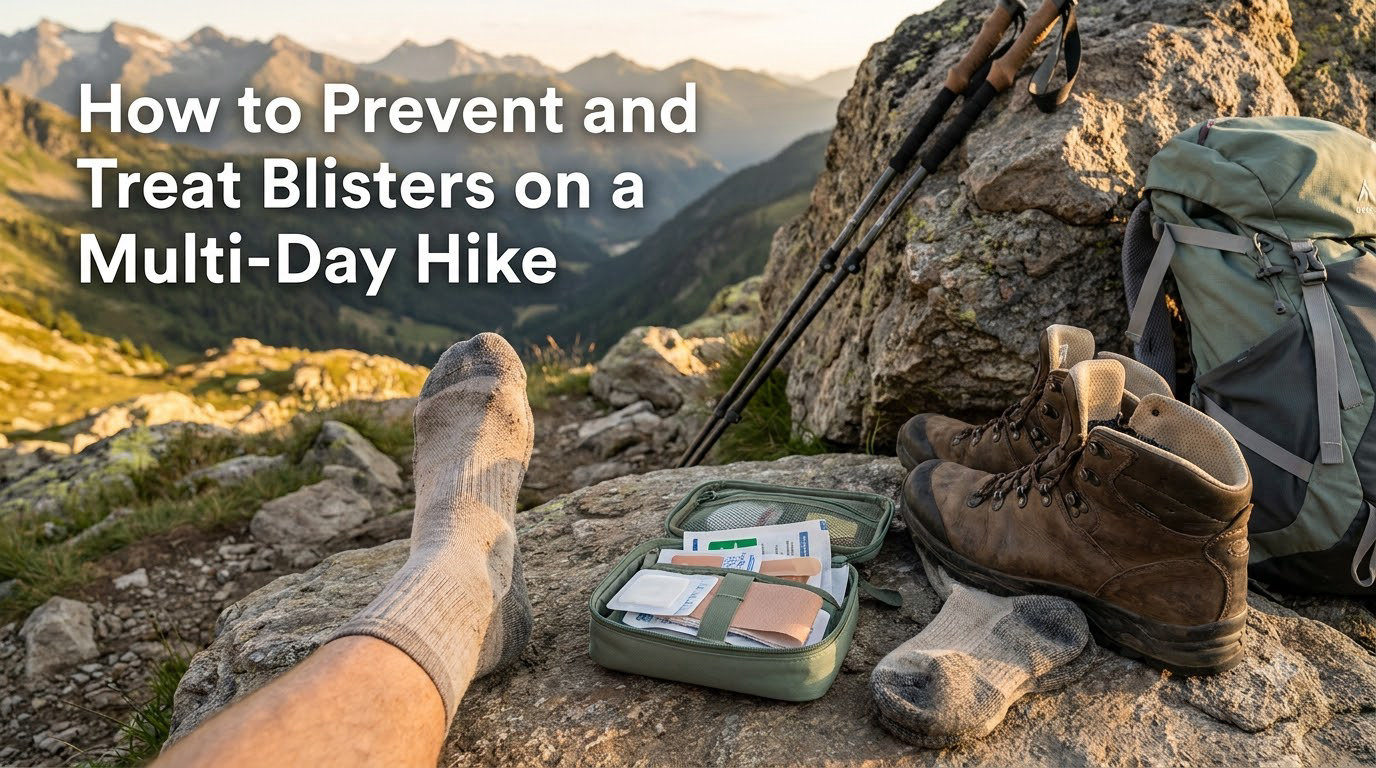
Nothing ends a multi-day hike faster than a blister that turns every step into agony. I have seen hikers with months of training and top-tier gear limp off the trail because a quarter-sized pocket of fluid on their heel made walking unbearable. Blisters on a multi-day hike are not just an annoyance. They are the number one reason hikers cut trips short, and most of them are preventable.
The problem is that most blister advice stops at “wear good socks and break in your boots.” That is only part of the picture. If you are hiking for three, five, or fourteen days straight, your feet go through changes that single-day advice never accounts for.
Your feet swell. Skin becomes saturated with moisture. Areas that felt fine on day one become danger zones by day two. Research and thousands of hiker reports confirm that day two of a multi-day hike is statistically the highest-risk day for blister formation.
In this guide, I cover what actually causes blisters, why the first two to three days of any trip are so dangerous, and how to build a prevention system that works across the full length of your hike. You will learn how to read calluses as warning signs, how to identify hot spots before they become blisters, and what to do when a blister has already formed. I also include a complete blister kit checklist so you can pack with confidence on your next multi-day trip.
Whether you are section-hiking the Appalachian Trail, backpacking a five-day loop, or walking the Camino de Santiago, the principles here will help you keep your feet intact from trailhead to finish line.
Table of Contents
What Causes Blisters on Multi-Day Hikes
Blisters on multi-day hikes are caused by repetitive shear stress, not simple rubbing. Shear is the back-and-forth sliding of skin layers against each other when your foot moves inside your footwear with every step. Over thousands of repetitions, this stretching tears the connections between skin layers apart, creating a space that fills with fluid.
This distinction matters because it changes how you prevent blisters. Most people think blisters come from friction against the skin surface, like a rope burn. In reality, the damage happens underneath the visible skin.
The outer layer of skin stays intact at first while the layers beneath separate. That fluid-filled bubble you see is the result of internal skin failure. Understanding this changes your entire approach to prevention and treatment.
Three factors work together to push shear stress past your skin’s breaking point. Pressure from your body weight and pack load drives your foot into the shoe bed. Moisture from sweat softens the skin and lowers its tolerance to stretching.
Heat from exertion and enclosed footwear increases both sweating and skin fragility. When all three combine over a long day of hiking, the skin simply cannot hold together. This is why simply buying “good boots” does not solve the blister problem on its own.
You have to manage all three factors to prevent blisters on a multi-day hike. Reduce pressure points with proper fit, manage moisture with the right socks and airing breaks, and control heat with breathable footwear choices. I cover specific strategies for each of these in the prevention section below.
The Critical First 2 to 3 Days: Why Day 2 Is Highest Risk
Day two of a multi-day hike is when most blisters occur, and understanding why is the single most useful piece of information in this entire guide. Multiple studies of long-distance hikers and military marchers show that blister incidence peaks on the second day of sustained walking. After that peak, risk gradually decreases as the trip continues.
The reason comes down to how your feet adapt to sustained hiking. On day one, your skin is fresh, dry, and at its normal thickness. Everything fits the way it did when you laced up at the trailhead.
By day two, several things have changed simultaneously. Your feet have started swelling from hours of sustained impact and pack weight. This swelling changes how your footwear fits, creating new pressure points that were not there the day before.
Sweat from day one has also started to soften the outer layer of skin, lowering its resistance to shear. Add in accumulated foot fatigue, and you have a perfect recipe for skin separation. This combination is why day two catches so many hikers off guard.
By day three or four, your feet begin to adapt. Skin starts toughening in response to the repeated stress, and swelling stabilizes or reduces slightly. You have also learned where your particular pressure points are and can tape or pad them proactively.
This is why hikers who make it past the first three days without serious blisters tend to finish their trips blister-free. Use the first two to three days as your critical prevention window.
There is also a concept called blister history that matters enormously during this period. If you have blistered in a specific spot before, you will almost certainly blister there again under similar conditions. Your skin remembers.
The scar tissue from a previous blister is actually weaker than surrounding skin, making it more vulnerable to tearing again under the same forces. This is why experienced hikers tape their known problem spots before day one even begins. Knowing your blister history is one of the most powerful prevention tools you have.
Tape proactively, change socks at every rest break, air your feet at lunch, and inspect for hot spots with obsessive attention during this period. If you get through day three intact, the rest of your trip becomes dramatically easier.
Calluses: Your Body’s Warning Signs
Calluses are not protective armor. They are flashing warning signs that mark exactly where you are most likely to blister. Most hikers think thick calluses build up to protect the skin underneath, but the opposite is true.
A callus is your body’s response to repeated shear stress in a specific location. The problem is that thick callused skin is less flexible than normal skin. When a callus is subjected to the same shear forces that created it, it cannot stretch and absorb the movement the way healthy skin does.
Instead, it tends to crack or tear at the junction between the thick callus and the thinner surrounding skin. This junction is exactly where blisters form on long hikes. Your calluses are essentially telling you where your next blisters will appear.
Use this information to your advantage. Before your trip, look at your feet and map where your calluses are. Those spots on your heels, the balls of your feet, the sides of your toes, or the arch are your personal blister prediction zones.
Tape them before you start hiking. Do not wait for a hot spot to develop in these areas. If you have a callus there, your skin has already identified that location as a high-shear area that needs protection.
I recommend taping every callused spot with Leukotape or a similar adhesive on day one of any multi-day hike, before you take your first step. This is called preventive taping, and it is one of the most effective strategies I have used personally. The thru-hiking community recommends it consistently across hiking forums and trip reports.
How to Prevent Blisters on a Multi-Day Hike
Preventing blisters on a multi-day hike requires a layered strategy that addresses fit, moisture, friction, and timing. No single technique will protect you across a full trip. You need a system that combines footwear, socks, taping, and daily foot care habits into a routine you follow every day.
The most effective approach follows four principles. Reduce shear by eliminating foot movement inside your shoes. Manage moisture before it softens your skin. Tape known problem areas before they become blisters. Adapt your routine as your feet change over the course of the trip.
Footwear Fit and Break-In
Your footwear is the foundation of blister prevention. Boots or trail runners that are too loose allow your foot to slide with every step, directly increasing shear forces. Footwear that is too tight creates pressure points that damage skin through compression and restricted blood flow.
When trying on hiking footwear, do it at the end of the day when your feet are naturally swollen. Wear the socks you plan to hike in. There should be enough room to wiggle your toes freely, but your heel should lock in place when you walk.
If your heel lifts inside the shoe with each step, you will develop heel blisters. That is not a possibility, it is a certainty. Heel slip is the most common cause of the most common blister location.
The debate between trail runners and hiking boots is directly relevant to blister prevention. The thru-hiking community overwhelmingly favors trail runners, and the data supports this preference. Trail runners are lighter, more breathable, and dry faster than boots.
Trail runners also allow your feet to move more naturally and trap less heat and moisture. Boots have advantages for ankle support and rough terrain, but they trap moisture and heat, which directly contribute to blister formation. For most multi-day hikes on maintained trails, trail runners are the better choice for foot health.
Whatever you choose, break in your footwear thoroughly before a multi-day trip. Wear them on progressively longer day hikes with the socks and pack weight you will use on the actual trip. A break-in hike of at least fifteen miles over varied terrain will reveal pressure points and fit issues before you are committed to a multi-day trip.
Sock Strategy: Liners, Layers, and Materials
Socks are your second line of defense after footwear fit, and the right sock strategy can eliminate most blister-causing shear. The goal is to create a situation where friction happens between your sock layers rather than between your skin and the sock.
The most effective approach for multi-day hiking is double socking. Wear a thin, snug-fitting liner sock directly against your skin, then layer a thicker hiking sock over it. The liner sock moves with your foot while the outer sock moves with your shoe.
The two sock layers slide against each other instead of your skin sliding against a single sock. This dramatically reduces shear at the skin surface. Double socking is one of the most consistently recommended blister prevention techniques across hiking forums and expert guides.
For materials, merino wool is the gold standard for hiking socks. It regulates temperature, wicks moisture away from the skin, and retains its insulating properties even when damp. Avoid cotton entirely.
Cotton absorbs sweat, holds it against your skin, and turns your feet into a soft, blister-prone mess within hours. Synthetic blends like nylon and polyester can work for liner socks because they wick moisture effectively and dry quickly. But for your main hiking sock, merino wool is hard to beat.
Bring at least two pairs of hiking socks for any multi-day trip so you can rotate them. Hang damp socks on your pack during the day to dry while you wear the other pair. Dry socks are non-negotiable for blister prevention on extended trips.
Preventive Taping and Lacing
Taping known problem areas before you start hiking is the most underused and most effective blister prevention technique I know. If you have calluses on your heels or the balls of your feet, tape those areas with Leukotape P before day one.
Leukotape stays on for days even through sweat and river crossings. It creates a smooth surface that absorbs shear instead of your skin absorbing it. Once you try preventive taping, you will never go back to reactive treatment alone.
To tape effectively, clean and dry the area first. Cut a piece of tape slightly larger than the at-risk zone. Apply it smoothly without wrinkles, and rub it firmly to activate the adhesive.
For toes, wrap each toe individually. For heels, apply a single strip from the back of the heel up onto the ankle bone. The tape should lie completely flat against your skin with no edges catching on your sock.
Lacing technique also matters for preventing blisters. Use a heel-lock lacing pattern to keep your heel from lifting inside the shoe. This involves threading the lace through the top eyelets and crossing them through the resulting loop before tying.
Heel-lock lacing creates a tighter lock at the ankle that prevents the heel slip responsible for the most common blisters hikers experience. Combined with properly fitted footwear and double socks, it can eliminate heel blisters entirely.
Daily Moisture Management
Moisture management is a daily discipline on multi-day hikes, not a one-time decision. Take your boots and socks off at every extended rest break. Let your feet air out for at least ten minutes at lunch.
If you cross a stream, take the opportunity to rinse salt and grime off your feet. Dry them completely before putting socks back on. Every airing break lowers your skin’s moisture level and raises its resistance to shear.
Salt accumulation from dried sweat is a hidden blister risk that most hikers never think about. As sweat evaporates over a multi-day trip, salt crystals build up on your skin and inside your socks. These crystals act like fine sandpaper between your skin and your sock, accelerating wear with every step.
Rinsing your feet in streams and rotating socks prevents this buildup. It is a small habit that pays massive dividends over a multi-day trip. Your feet will be noticeably less tender at the end of each day if you manage salt and moisture consistently.
Hot Spot Identification and Immediate Action
A hot spot is the earliest warning that a blister is forming, and catching it at this stage means the difference between a five-minute fix and a multi-day problem. A hot spot feels like a localized area of warmth, stinging, or burning on your foot during hiking. It may look slightly red or swollen, or it may show no visible sign at all.
The feeling is the signal, not the appearance. If you wait until you can see a blister, you have already waited too long. The moment you feel that distinctive warm sting, your window for easy prevention is open but closing fast.
The instant you feel a hot spot, stop walking. This is non-negotiable. Every step you take after a hot spot develops pushes that area closer to a full blister.
The difference between a hot spot and a blister can be as little as thirty minutes of continued hiking. Those thirty minutes of ignoring the signal can cost you days of painful recovery.
When you stop, follow this protocol immediately. Remove your boot and sock on the affected foot. Inspect the area and clean off any dirt or sweat, then dry the skin completely.
Apply a piece of Leukotape or a hydrocolloid plaster directly over the hot spot. Cover the entire reddened area with a margin of healthy skin around it. Smooth it down firmly, put on a dry sock and your boot, then resume hiking.
Do not use moleskin for hot spots. Moleskin is thick and bulky, and it can create new pressure points that cause blisters in adjacent areas. Save moleskin for cushioning already-formed blisters.
For hot spots, you want a thin, smooth, strongly adhesive tape that stays flat against your skin. Check the hot spot at every subsequent break for the rest of the day. If the tape has shifted or peeled, reapply it immediately.
If the hot spot has resolved by evening, continue taping the area for the rest of the trip as a precaution. If it has progressed to a blister despite your efforts, move to the treatment protocol in the next section.
Blister Roof Stages: What the Skin Tells You
Every blister goes through three stages, and the stage determines how you should treat it. Understanding blister roof stages helps you make the right call on the trail instead of guessing. The blister roof is the thin layer of skin that forms the top of the fluid-filled bubble, and its condition tells you everything you need to know about treatment.
Stage One: Intact Roof. The blister is a complete, unbroken bubble of clear or slightly pink fluid. The roof skin is thin but continuous. This is the most treatable stage and the one where your intervention matters most.
An intact blister roof protects the raw skin underneath from infection and allows natural healing. Your goal at this stage is to protect the roof, reduce pressure on the area, and decide whether drainage is necessary based on size and location. Most blisters you encounter on a multi-day hike will be at this stage when you first notice them.
Stage Two: Torn Roof. The blister roof has partially torn but still covers most of the raw skin beneath. Fluid may be leaking from the tear. This stage requires careful management because the remaining roof is fragile and could tear further with continued hiking.
You need to cover the entire blister with a hydrocolloid plaster or a donut-shaped moleskin pad. This protects the compromised roof from further damage while it heals. Do not remove the remaining roof skin, as it still provides protection to the raw area beneath.
Stage Three: Deroofed. The blister roof has completely come off, exposing the raw, pink, and extremely tender skin underneath. This is the most painful stage and carries the highest infection risk. Treatment focuses on protecting the raw skin, preventing infection, and reducing pain enough to continue walking.
Apply a hydrocolloid plaster directly to the raw skin to create an artificial blister roof. Then cover with tape or a donut pad for cushioning. Monitor closely for signs of infection, because the exposed skin is vulnerable to bacteria from dirt and sweat.
Always assess which stage your blister is in before applying any treatment. An intact blister needs protection. A torn blister needs both protection and careful dressing.
A deroofed blister needs infection prevention and pain management above all else. Treating all blisters the same way leads to worse outcomes, especially on a multi-day hike where you need the treatment to hold for days.
How to Treat Blisters on the Trail
On-trail blister treatment depends on the blister’s stage, size, location, and whether you need to keep walking. The goal is always to protect the skin, prevent infection, and reduce pain enough to continue your hike safely. Here is how to handle each situation you are likely to encounter on a multi-day hike.
To Drain or Not to Drain
Draining a blister is sometimes necessary and sometimes the worst thing you can do. The decision depends on size, location, and roof condition. Drain a blister if it is large, if it is on a weight-bearing area where it will burst anyway, or if the fluid pressure is causing significant pain.
Do not drain a blister if it is small, if the roof is intact and not under pressure, or if you do not have sterile equipment and reasonably clean conditions. A small intact blister will often reabsorb on its own overnight if you protect it well.
Never drain a blood-filled blister. Blood in a blister means the damage extends deeper than the surface skin layers, and puncturing it risks serious infection. Leave blood blisters alone, pad around them, and let them reabsorb naturally over a few days.
How to Drain a Blister Safely
If you decide to drain, follow these steps carefully. Clean the blister and surrounding skin with an alcohol wipe. Sterilize a needle or pin with alcohol or by holding it in a flame until it glows, then let it cool.
Pierce the blister in two or three places near the edge, not the center. Use gentle pressure with a clean cloth to push the fluid out. Leave the roof completely intact and do not tear it off.
The roof is your natural bandage. Removing it exposes raw skin to dirt, sweat, and bacteria, turning a manageable blister into a painful, potentially infected wound. After draining, apply a hydrocolloid plaster or a donut-shaped moleskin pad over the blister to protect it.
The fluid may reaccumulate over the next day. If it does, repeat the drainage process with sterile technique. As long as the roof stays intact, repeated draining is safe and often necessary on a multi-day hike.
Dressing and Padding Techniques
For an intact or drained blister, a hydrocolloid plaster is your best option. These plasters create a gel-like environment over the blister that promotes healing, stays in place for days, and provides a smooth surface that reduces friction. Apply them directly to clean, dry skin and press firmly to seal the edges.
For a torn or deroofed blister, first apply a hydrocolloid plaster to the raw skin to act as an artificial roof. Then cut a donut-shaped pad from moleskin or foam with a hole in the center slightly larger than the blister. Place the donut over the blister so the padded ring surrounds it, reducing pressure on the raw area.
Cover the entire dressing with tape to hold it in place. This layered approach protects the wound, reduces pressure, and keeps everything secured for continued hiking. Check the dressing at every break and replace it if it has shifted or become wet.
If the blister is caused by friction from a specific spot inside your shoe, an Engo patch applied to the inside of your footwear can eliminate the friction source. These patches are thin, adhesive-backed sheets that create a low-friction surface on the shoe bed or lining. They reduce shear at the skin without adding bulk to your foot.
Gel toe protectors and toe caps are useful for toe blisters. These silicone sleeves slide over individual toes and provide a soft, friction-reducing barrier. They are especially helpful for blisters between toes caused by toes rubbing together during long days of hiking.
When to Stop Hiking
Sometimes the right treatment is to stop. If a blister shows signs of infection, you need to get off the trail and seek medical attention. Watch for spreading redness, pus, increasing heat, red streaks radiating from the area, or fever.
An infected blister on a multi-day hike can escalate into cellulitis or worse. No summit or trail mile is worth risking a serious infection. If you see these signs, end your hike and get to a medical facility.
Also stop if the pain causes you to change your gait significantly. Limping to avoid blister pain transfers stress to your knees, hips, and the opposite foot. This can cause secondary injuries that are harder to treat than the original blister.
If you cannot walk with a normal stride, it is time to rest for a day or end the trip. Pushing through a blister that alters your gait is how a minor foot problem becomes a major leg or back injury on a remote trail.
Your Complete Blister Kit Checklist
A well-stocked blister kit is the difference between handling a foot problem on the trail and ending your trip early. I carry the following items in a small ziplock bag that lives at the top of my pack where I can reach it in under thirty seconds. Every item here has a specific purpose, and I have used each one on actual hikes.
The essentials:
1. Leukotape P roll. This is the single most important item in your kit. It is a zinc oxide athletic tape that stays on for days through sweat, water, and friction. Use it for preventive taping, hot spot coverage, and securing dressings. One roll lasts an entire multi-day trip for one person.
2. Hydrocolloid plasters. Pack several in different sizes. These are your go-to for intact blisters, drained blisters, and deroofed blisters. They create a healing environment and reduce friction simultaneously.
3. Moleskin or foam padding. Use this for donut pads around large or painful blisters. A small sheet is enough. Cut it to size on the trail with your scissors.
4. Small scissors. You need these for cutting tape, moleskin, and plasters to size. A tiny pair of folding scissors weighs almost nothing and saves you from tearing materials imprecisely. Clean cuts mean better-fitting dressings.
5. Alcohol wipes. Pack at least five. Use them to clean skin before applying tape or plasters, to sterilize needles, and to clean blister wounds. Cleanliness is your primary defense against infection on the trail.
6. Sterile needles or safety pins. Two or three are sufficient. Use them for draining blisters. Always sterilize with alcohol or flame before each use.
Situational additions for longer trips:
7. Engo patches. These are adhesive friction-reduction patches that go inside your footwear. They are the only effective way to reduce friction at the source when the problem is a rough spot on your shoe bed or lining. Cut them to size and apply to clean, dry footwear.
8. Gel toe protectors or toe caps. Pack two or three in different sizes. These silicone sleeves are essential for toe blisters and for preventing blisters between toes on long mileage days.
9. Antibiotic ointment. A small tube for deroofed blisters and any sign of infection. Apply under a hydrocolloid plaster or bandage to keep bacteria out of raw skin.
10. Duct tape. Not for your skin, but for repairing footwear issues that could cause blisters. A blowout in your shoe lining, a separated sole, or a torn insole can create sudden friction points. Duct tape fixes these temporarily and keeps you moving.
Organize your kit so the most-used items are on top. Leukotape, hydrocolloid plasters, and alcohol wipes should be immediately accessible. Replenish your kit after every trip and check expiration dates on ointments and sterile supplies before departure.
The weight of this entire kit is under four ounces. That is less than a single energy bar, and it can save your entire trip. There is no good reason to head out on a multi-day hike without these supplies.
FAQs
What causes blisters on multi-day hikes?
Blisters on multi-day hikes are caused by repetitive shear stress, which is the back-and-forth sliding of skin layers against each other when your foot moves inside your footwear. This stretching tears the connections between skin layers, creating a fluid-filled pocket. Moisture, heat, and pressure all lower your skin’s tolerance to shear and accelerate blister formation.
When do most blisters occur on multi-day hikes?
Most blisters on multi-day hikes occur on day two. By the second day, feet have swelled from sustained impact, sweat from day one has softened the skin, and new pressure points have developed from changes in how footwear fits. Blister risk peaks on day two and gradually decreases as feet adapt and toughen by days three and four.
How do you prevent blisters on long hikes?
Prevent blisters on long hikes by combining four strategies: wear properly fitted footwear broken in before your trip, use a double-sock system with a thin liner sock under a merino wool hiking sock, tape known problem areas with Leukotape before you start hiking, and manage moisture by airing your feet at every break and rotating dry socks daily.
Should you pop a blister on a hike?
Drain a blister only if it is large, painful, or on a weight-bearing area where it will burst on its own. Use a sterilized needle to pierce near the edge in two or three spots, press out the fluid, and always leave the blister roof intact. Never drain a blood-filled blister, and never remove the roof, as it protects the raw skin underneath from infection.
What is the best tape for hiking blisters?
Leukotape P is widely considered the best tape for hiking blisters. It uses a zinc oxide adhesive that stays firmly attached for days through sweat, water, and friction. It is thin enough to lie flat against the skin without creating new pressure points, and it provides a smooth surface that absorbs shear forces instead of your skin.
How do you treat blisters while hiking?
Treat blisters based on their stage. For an intact blister, apply a hydrocolloid plaster to protect the roof. For a torn blister, cover with a hydrocolloid plaster and a donut-shaped moleskin pad. For a deroofed blister, apply a hydrocolloid plaster directly to the raw skin to act as an artificial roof, pad around it, and monitor for infection. Stop hiking if pain forces a gait change or if infection signs appear.
How do you avoid blisters on heels while hiking?
Heel blisters are caused by heel lift inside your footwear. Prevent them by using a heel-lock lacing technique to secure your heel, wearing a double-sock system so socks slide against each other rather than against your skin, and taping the back of your heel with Leukotape before you start hiking if you have a history of heel blisters.
Conclusion
Knowing how to prevent and treat blisters on a multi-day hike comes down to understanding that shear, not simple friction, causes the damage, and that day two is your highest-risk window. Build your prevention system before day one by fitting your footwear properly, double-socking with merino wool, taping your known problem spots, and managing moisture through the critical first three days.
Carry a complete blister kit, learn to recognize hot spots instantly, and know the three blister roof stages so you can choose the right treatment on the trail. Prevention will always be more effective than treatment, but when a blister does form, the difference between finishing your hike and quitting comes down to having the right supplies and the knowledge to use them.
Tape before you hike, stop at the first hot spot, protect the blister roof, and never ignore the signs of infection. Take care of your feet from trailhead to trailhead, and they will carry you every mile of the journey.