
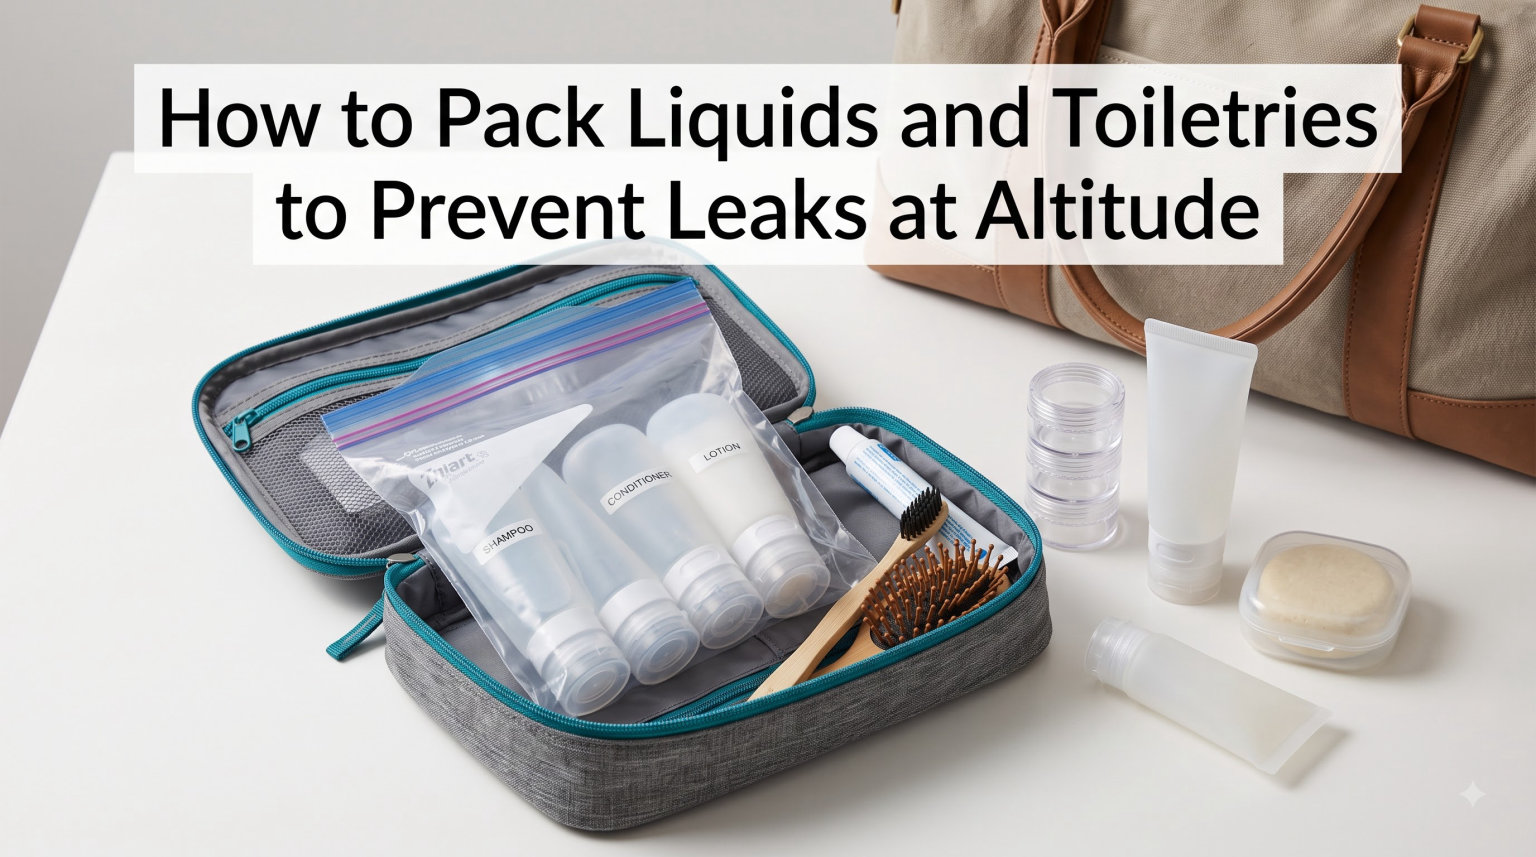
Opening your suitcase after a long flight only to find shampoo splattered across every piece of clothing is a uniquely miserable travel experience. I have been there, and after ruining three good shirts on a single trip to Denver, I decided to figure out exactly how to pack liquids and toiletries to prevent leaks at altitude once and for all.
The problem is real and widespread. Browse any travel forum and you will find hundreds of posts from frustrated travelers dealing with exploded lotion bottles, leaked face wash, and ruined electronics. Most of these disasters happen for the same reason: cabin pressure changes that no one warns you about.
In this guide, I will walk you through the science behind why your bottles leak on planes, the packing techniques that actually work, and the container choices that make a difference. By the time you finish reading, you will have a complete system for flying with liquids that keeps everything dry and secure, whether you are packing a carry-on for a weekend getaway or checking bags for a two-week adventure.
These methods come from a mix of personal testing across dozens of flights, advice from seasoned travelers on Reddit communities like r/TravelHacks and r/HerOneBag, and a solid understanding of the physics involved. Let us get into it.
Table of Contents
Why Liquids Leak at Altitude: The Science Behind the Mess
Every toiletry leak on a plane traces back to one fundamental cause: air pressure differences between ground level and cruising altitude. Understanding this simple physics concept is the key to preventing leaks, and almost no travel guide bothers to explain it.
When you pack a bottle at home, the air pressure inside that bottle matches the atmospheric pressure around you, typically around 14.7 psi at sea level. The cap seals that pressure in. But when your plane climbs to 35,000 feet, the cabin gets pressurized to an equivalent altitude of about 6,000 to 8,000 feet.
That means the cabin pressure drops significantly compared to ground level. The air trapped inside your sealed bottles is now at a higher pressure than the air outside them. Physics demands that high pressure moves toward low pressure, so the trapped air pushes outward against the liquid and against every seam in the cap.
If there is even a tiny gap in the seal, that pressurized air forces liquid out. This is why a bottle that never leaks in your bathroom cabinet suddenly explodes in your luggage. It is also why partially filled bottles are more dangerous than full ones. More air space inside means more expanding air, which means more outward pressure on the liquid.
Temperature changes compound the problem. Cargo holds on planes can get cold, sometimes dropping to near freezing during long flights. Cold causes many liquids to contract slightly, but the real issue happens during descent. As the plane warms back up and cabin pressure increases, temperature shifts can cause containers to flex and weaken seals that held fine on the way up.
This same pressure principle explains why chips bags puff up at altitude and why your ears pop. The difference is that your toiletries have liquid ready to be pushed out through any weakness. Once you understand that you are essentially fighting a pressure differential, the prevention techniques start to make logical sense.
I tested this theory myself on a flight from Seattle to Denver in 2026. I packed two identical shampoo bottles, one squeezed flat with minimal air and one half full with lots of headspace. The half-full one leaked. The squeezed one did not. The science checks out in practice.
The TSA 3-1-1 Rule Explained
Before we get into leak prevention techniques, you need to understand the rules governing what liquids you can even bring on a plane. The TSA 3-1-1 rule is the foundation of carry-on liquid packing, and it directly affects how you prevent leaks.
The rule breaks down simply. You can bring liquids, gels, creams, and aerosols in containers of 3.4 ounces (100 milliliters) or less. All containers must fit inside a single quart-sized clear plastic bag. Each passenger gets one bag. That is three ones: 3.4 ounces, one quart bag, one bag per person.
This rule exists because of a security incident in 2006 and applies to all carry-on luggage at U.S. airports. Many international airports follow similar guidelines, though exact limits can vary. Always check local regulations if you are flying internationally.
Here is where leak prevention intersects with the rules. Those small 3.4-ounce containers are actually easier to seal properly than full-size bottles. Less liquid volume means less mess if something does go wrong. The quart-sized bag itself serves as a secondary containment layer.
Liquids packed in checked luggage do not face the 3-1-1 rule. You can bring full-size bottles in checked bags, but this is actually where leaks cause the most damage. A full-size shampoo bottle exploding in a checked bag can ruin everything in your suitcase with no easy cleanup option mid-flight.
TSA agents will confiscate any liquid container over 3.4 ounces in your carry-on, regardless of how much liquid is actually inside. A 4-ounce bottle that is nearly empty will still get pulled. I have seen travelers lose expensive skincare products this way. When in doubt, transfer to a clearly labeled 100ml container.
Some items are exempt from the 3-1-1 rule, including medications, baby formula, breast milk, and liquid nutrition for medical needs. Declare these separately at security. They still need proper sealing to survive the flight.
How to Pack Liquids and Toiletries to Prevent Leaks at Altitude: Step-by-Step Techniques
The most reliable leak prevention method I have found combines several simple techniques into a layered defense system. No single trick works perfectly on its own, but stacking them creates a nearly leak-proof setup.
Here is the exact process I use for every flight, refined over dozens of trips and tested against the worst cabin pressure changes.
Step 1: Squeeze Out Excess Air
This is the single most effective technique, and it comes straight from the Reddit travel community. Before capping any bottle, squeeze the sides to push excess air out, then tighten the cap while the bottle is still compressed. This creates a slight vacuum inside the container.
When cabin pressure drops at altitude, the bottle will expand back to its normal shape instead of forcing liquid out through the seal. Less trapped air means less outward pressure on your liquid. This works for squeeze bottles, tubes of toothpaste, and any flexible container.
I cannot stress this enough. After I started squeezing air out before every flight, my leak incidents dropped from every trip to essentially zero. It is free, takes five seconds, and prevents the majority of altitude leaks.
Step 2: Add Plastic Wrap Under the Cap
Take a small square of plastic wrap or cling film and place it over the bottle opening before screwing the cap back on. The cap compresses the plastic against the threads, creating a secondary seal that air pressure cannot easily breach.
This trick adds about ten seconds per bottle and catches leaks that would otherwise escape through tiny gaps in the cap threading. Multiple travelers on r/TravelHacks swear by this method, and it has become my standard practice for anything I really do not want to lose.
For pump bottles and spray tops, wrap plastic film around the entire nozzle assembly and secure it with a rubber band. Pump mechanisms are notorious leakers because they have moving parts that create natural escape paths for liquid under pressure.
Step 3: Tape the Seams
For extra security on high-value items, wrap a small piece of duct tape or painter’s tape around the seam where the cap meets the bottle. This physically reinforces the seal and adds a third barrier against leaks.
One traveler I read about uses this method exclusively for expensive skincare products and has never had a leak since. Painter’s tape is ideal because it removes cleanly without leaving residue, while duct tape provides maximum hold for longer flights.
Step 4: Double Bag Everything
Even with perfect sealing techniques, place every liquid container inside its own zip-top bag. Then group those individual bags inside a larger waterproof pouch. If one bottle does leak, the mess stays contained rather than spreading across your luggage.
Press as much air out of each zip-top bag as possible before sealing. The same pressure principle applies here: trapped air in the bag can force the bag open or push liquid around. Flat, airless bags are more secure.
I use this layered approach for checked luggage especially. In a checked bag, you will not be there to notice or fix a leak mid-flight, so containment becomes your best protection.
Best Container Types for Travel Liquids
Not all travel containers are created equal when it comes to surviving altitude changes. The material, cap design, and overall build quality all affect leak resistance. After testing containers across many flights, I have clear opinions on what works.
Silicone squeeze bottles are my top pick for most liquids. They are flexible, which means they can handle pressure changes without cracking. The soft body also makes them easy to squeeze air out of before sealing. Look for food-grade silicone bottles with a three-layer leak-proof cap design.
The squeeze mechanism actually works in your favor here. When you compress a silicone bottle to remove air and then cap it, the bottle naturally wants to return to its original shape. This creates negative pressure inside that counteracts the cabin pressure drop. It is physics working for you instead of against you.
Hard plastic travel bottles are the second option. They are more rigid and do not allow you to squeeze out air as easily, which is a drawback. However, quality hard plastic bottles with flip-top caps that have an inner silicone gasket can still be reliable. Avoid cheap hard plastic containers with simple screw-on caps, as these rely entirely on the thread seal and are the most common leakers.
Glass containers are the worst choice for air travel. Glass does not flex, so any pressure buildup goes straight to the cap seal. Glass is also heavy and breakable, creating a double risk of both leaks and shattering. If you must travel with glass containers, wrap them thoroughly and pack them only in carry-on luggage where temperature stays more stable.
Fine-mist atomizer bottles need special attention. The spray mechanism has tiny internal channels that liquid can travel through under pressure. Always lock the spray nozzle when packed and wrap the entire top in plastic film. Some travelers remove the spray mechanism entirely and replace it with a solid cap for flights.
Pump bottles deserve their own warning. The pump mechanism has a dip tube that runs from the bottom of the bottle to the top, creating a direct channel for liquid to escape. Turn the pump to the locked position, wrap it in plastic, and tape it down. Even then, pumps remain the riskiest container type for air travel.
Solid Toiletries: The Leak-Proof Alternative
The most reliable way to prevent a liquid leak is to not bring liquid at all. Solid toiletry alternatives have come a long way in 2026, and switching to solids eliminates the entire pressure problem. No liquid means nothing to push out through a cap.
Shampoo bars and conditioner bars are the easiest swap. They work just like liquid shampoo but in solid form, lathering up when you rub them between wet hands. A single shampoo bar can last as long as two to three bottles of liquid shampoo, saving you money and eliminating the most common leak culprit entirely.
Toothpaste tablets are another great option. Instead of a tube of paste, you get small tablets that you chew and then brush as normal. They take some getting used to, but they are TSA-friendly, take up minimal space, and cannot leak under any pressure condition.
Solid perfume comes in small tins or wax-based sticks. No liquid means no spray mechanism to fail. You apply it by rubbing your finger on the surface and dabbing it on your skin. The tin seals tightly and is not affected by pressure changes at all.
Solid deodorant sticks are already what most people use, so this is an easy one. Just make sure the cap is on tight. If you prefer liquid roll-on deodorant, apply the same squeeze-and-seal technique described earlier.
Solid lotion bars are less common but worth considering for long trips. They look like soap bars but melt at skin temperature when you rub them on. They provide the same moisture as liquid lotion without any leak risk.
I went fully solid on a two-week trip to South America in 2026 and it was liberating. No quart-sized bag needed, no leak anxiety, and everything fit in half the space. Not every product has a solid equivalent, but swapping even two or three liquids for solids dramatically reduces your leak risk.
Carry-On vs Checked Luggage: Where to Pack Your Liquids
Deciding where to put your liquids is just as important as how you seal them. Carry-on and checked luggage face different conditions, and your strategy should match.
Carry-on luggage is the safer option for liquids. The cabin stays pressurized and relatively temperature-stable compared to the cargo hold. You can also access your bag mid-flight if you notice an issue. The downside is the 3-1-1 rule limits you to small containers.
For essential items like daily skincare, medications, and contact lens solution, always pack them in your carry-on. Even if you check a bag, keep critical liquids with you. If your checked bag gets delayed, you will still have what you need.
Checked luggage faces harsher conditions. The cargo hold experiences wider temperature swings, sometimes dropping near freezing on long flights. The pressure in the cargo area is generally the same as the cabin on modern passenger planes, but older aircraft may have different cargo pressurization.
For checked bags, full-size bottles are allowed, but this is where leaks cause maximum damage. A full-size bottle of body wash exploding can soak every item of clothing you packed. Always apply every sealing technique if you check liquids.
Here is my personal rule: anything I cannot afford to lose stays in my carry-on in small containers. Backup supplies and non-essential liquids go in checked luggage with full leak protection. This way, even if a checked bottle leaks, it is not a product I urgently need.
If you are traveling with expensive or hard-to-replace products, consider buying travel-sized versions at your destination instead of risking them in transit. Many hotels also provide basic toiletries, reducing how much you need to pack.
Strategic Placement Tips Inside Your Bag
Where you place liquids within your luggage matters for both leak prevention and security screening efficiency. A few positioning choices can save you headaches.
In your carry-on, place the quart-sized liquids bag at the top of your luggage or in an easily accessible outer pocket. TSA requires you to remove it for screening, so packing it at the bottom guarantees you will have to unpack everything.
For checked bags, position liquid containers in the center of the suitcase, surrounded by soft items like clothing. This provides cushioning against impacts and keeps bottles away from the hard edges of the case where pressure and movement concentrate.
Never pack liquids near electronics, documents, or anything that water damage would destroy. A single leak near your laptop sleeve or passport can turn a minor inconvenience into a major problem.
Use a dedicated waterproof toiletry bag as your primary containment layer. Even if you trust your bottle seals, having all liquids in one waterproof pouch means any leak stays isolated. Look for bags with a waterproof lining and a reliable zipper closure.
Common Mistakes to Avoid When Packing Liquids
After years of trial and error, and reading hundreds of traveler complaints online, I have identified the mistakes that cause most leak disasters.
The biggest mistake is overfilling containers. A completely full bottle with zero headspace might seem safer, but it actually creates maximum pressure when the liquid warms and expands slightly during flight. Leave a small air gap at the top, then squeeze that air out before capping.
Another common error is reusing cheap containers. Those flimsy bottles from the drugstore are not designed for multiple uses. The plastic degrades, caps loosen, and seals fail after a few trips. Invest in quality travel bottles that are built to last.
Failing to clean bottle threads is a sneaky cause of leaks. Residual product on the threading prevents the cap from forming a complete seal. Wipe the threads clean with a tissue before capping every time.
Relying on triple bagging alone does not work. I read this complaint constantly on travel forums. Zip-top bags catch leaks, but they do not prevent them. You still need proper bottle sealing techniques even with bags as backup.
Forgetting to check bottles before the return flight is something I have done more than once. The seal that held on the way out may have loosened during your trip. Re-squeeze, re-wrap, and re-seal before flying home.
FAQs
How to pack toiletries so they don’t leak?
Squeeze excess air out of each bottle before capping it, place a small square of plastic wrap over the opening under the cap, and put each container inside its own zip-top bag. This three-layer approach handles the pressure changes that cause most leaks at altitude.
Should you squeeze bottles before flying?
Yes, squeezing air out of flexible bottles before tightening the cap is the single most effective leak prevention technique. It creates negative pressure inside the container that counteracts the cabin pressure drop at cruising altitude.
Where do I pack my toiletries when flying?
Pack essential toiletries in your carry-on in containers of 3.4 ounces or less inside a quart-sized clear bag. Non-essential liquids can go in checked luggage, but apply full leak-proof sealing techniques since checked bags face harsher conditions.
Will TSA notice a 4 oz bottle?
Yes, TSA agents will identify any container over 3.4 ounces during screening, regardless of how full it is. A 4-ounce bottle that is nearly empty will still be confiscated. Transfer liquids to clearly labeled 100ml containers to stay within the 3-1-1 rule.
How to keep liquids from exploding on a plane?
Remove air from bottles by squeezing them before capping, add plastic wrap under each cap, secure pump and spray tops with tape, and double-bag all containers. Place liquids in the center of your bag surrounded by soft items for cushioning against temperature changes.
Are there travel bottles that don’t leak?
Silicone squeeze bottles with three-layer leak-proof caps are the most reliable option for air travel. Their flexible bodies handle pressure changes better than rigid containers, and you can squeeze out excess air before sealing to prevent altitude leaks.
Conclusion
Learning how to pack liquids and toiletries to prevent leaks at altitude comes down to understanding one simple principle: cabin pressure drops cause trapped air inside your bottles to expand and push liquid out through any opening. Every technique in this guide addresses that single physics problem.
Squeeze the air out of your bottles before capping them. Add plastic wrap under caps for a secondary seal. Double-bag everything as a last line of defense. Choose silicone squeeze bottles over rigid containers. Consider solid toiletry alternatives to eliminate liquid risk entirely.
These methods have kept my luggage dry on dozens of flights, from short domestic hops to long-haul international routes. Take five minutes before your next trip to seal your bottles properly, and you will never have to deal with a shampoo explosion again. Safe travels, and may your clothes arrive as clean as you packed them.