
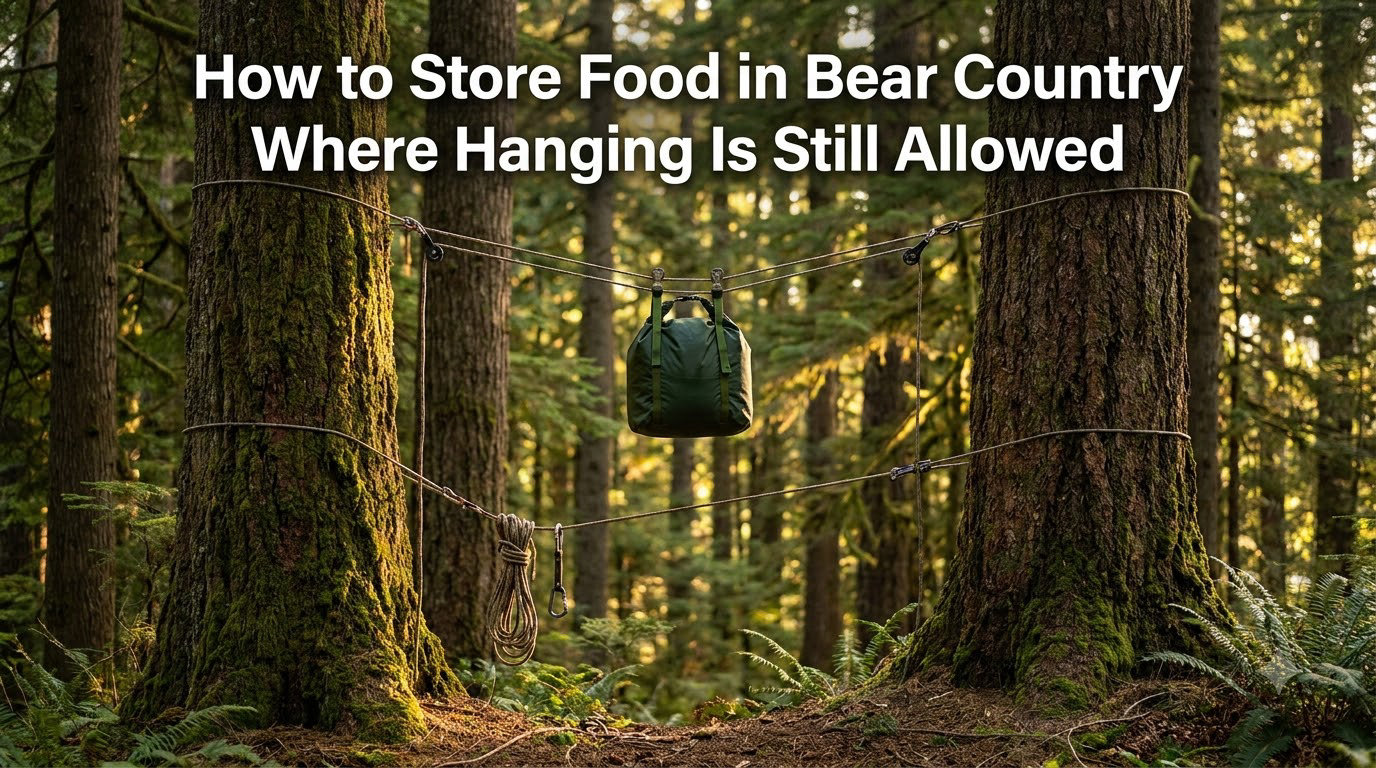
I have spent more than a decade camping in black bear and grizzly country across the Sierra Nevada, the Northern Rockies, and the Appalachian corridor, and food storage is the one topic I get asked about more than any other. Learning how to store food in bear country where hanging is still allowed is not just about protecting your dinner. It is about protecting the bears, the next camper, and your own safety while you sleep.
This guide walks through every piece of the puzzle. We will cover why food storage matters, what actually counts as food, where hanging is still legal in 2026, the exact step-by-step hanging technique, the counterbalance method, the PCT method, common mistakes, and a quick checklist you can take to the trailhead.
By the time you finish reading, you will know exactly how to read park regulations, pick a proper branch, hang your food at the correct height and distance, and adapt when trees are scarce. You will also know when you are required to use a bear canister or Ursack instead of a hang, and why that rule exists in some places and not others.
Table of Contents
Why Proper Food Storage Matters in Bear Country
Bears have one of the most powerful noses in the animal kingdom. A black bear’s sense of smell is estimated to be roughly seven times stronger than a bloodhound’s, and a grizzly’s olfactory region is even more developed. That sealed freezer bag of trail mix, the wrapper in your hipbelt pocket, the dollop of sunscreen on your collar, all of it is broadcasting your location.
Once a bear links humans to a calorie reward, that bear changes. Wildlife biologists call this food conditioning, and it is almost impossible to reverse. The bear returns to campsites, becomes bolder each time, and eventually loses its natural wariness of people.
This is where the saying comes from: a fed bear is a dead bear. When a food-conditioned bear escalates to breaking into cars, tents, or cabins, wildlife managers typically trap and euthanize it. Relocation rarely works because the bear either returns or repeats the behavior in its new territory.
The numbers back this up. Yosemite National Park saw bear incidents drop roughly 96 percent after enforcing canister rules and aggressive food-storage compliance in the late 1990s and early 2000s. The problem was never the bears themselves. The problem was poorly stored food.
When you store food correctly, you are doing three things at once. You keep your food safe for yourself, you prevent a bear from learning a dangerous habit, and you keep the backcountry open and unregulated for the next person behind you.
What Counts as Food in Bear Country
One of the most common mistakes I see on the trail is treating food storage like it only applies to actual food. Bears are not gourmet critics. They are searching for any calorie-dense, strongly scented item, and that includes a lot of things you might not think of as food.
If you are wondering what goes in the bear hang or bear canister at night, the short answer is: anything with a scent. That includes the obvious items like trail mix, energy bars, freeze-dried meals, and cooking oil, but it also includes the things people routinely leave in their tents.
The full list of scented items you must store like food includes: all food and snacks, empty food wrappers and packaging, trash and food scraps, toothpaste and toothbrushes, deodorant and antiperspirant, sunscreen and insect repellent, lip balm, soap and shampoo, lotion and hand sanitizer, scented wet wipes, fuel canisters that have been used for cooking, cookware and utensils that have touched food, and any clothing you wore while cooking.
That last one catches people off guard. If you flipped burgers over a camp stove in your fleece, that fleece now smells like dinner. It goes in the hang or the canister, not in your sleeping bag.
I treat my hang like a giant overnight vault for anything with a smell. When in doubt, hang it. The few seconds it takes to toss in an extra item is always worth avoiding the alternative of a bear investigating your tent at 2 a.m.
How to Store Food in Bear Country Where Hanging Is Still Allowed
Learning how to store food in bear country where hanging is still allowed starts with understanding the three widely accepted methods. The options are an approved hard-sided bear canister, an IGBC-certified Ursack or soft-sided container, or a properly executed bear hang. Each has its place, and each is governed by where you are camping.
In 2026, the general rule of thumb is this: national parks in bear habitat increasingly require canisters or IGBC-approved soft containers, while many national forests, BLM land, and state parks still allow properly executed hangs. Some parks, like Yosemite, Sequoia, and Kings Canyon, mandate canisters and will fine you for hanging instead. Others, like much of the Inyo National Forest surrounding those parks, still permit a hang.
Where a hang is allowed, the standard measurements are non-negotiable. Your food bag must be at least 100 feet from your sleeping area and 200 feet from your cooking area. It must hang at least 12 to 15 feet off the ground, and at least 4 feet out from the trunk of the tree. These numbers are not suggestions. They are the minimum thresholds that have been shown to defeat a motivated black bear.
Within those rules, you have a few sub-methods to choose from. The two main ones are the counterbalance method, which uses no knots and two equal bags, and the PCT method, which uses a single bag and a tied-off cord. Both are effective when done right, and both fail when done wrong.
The most important thing I can tell you is this: pick one method, practice it at home or at a local park before your trip, and execute it the same way every time. The bears do not care which method you choose. They care whether it is done correctly.
National Park vs National Forest: Understanding Jurisdiction Differences
This is the single biggest source of confusion I see on forums, and it is a content gap most articles never address clearly. The rules change depending on which agency manages the land you are camping on.
National Parks are managed by the National Park Service, an agency within the Department of the Interior. NPS rules are written per park and are usually stricter than surrounding land. In heavy bear country, NPS sites typically require an IGBC-approved hard-sided canister. Yosemite, Sequoia, Kings Canyon, Glacier, Rocky Mountain, Grand Teton, and Olympic all have canister requirements for backcountry camping.
National Forests are managed by the U.S. Forest Service, an agency within the Department of Agriculture. Forest Service rules are typically set at the forest or ranger-district level and are often more permissive. Many national forests in the Sierra, the Cascades, and the Rockies still allow properly executed bear hangs, as long as they meet the height and distance requirements.
This creates strange situations on multi-day trips. A Pacific Crest Trail hiker walking from Yosemite north into the Emigrant Wilderness will move from strict canister-required land into land where a hang is permitted. The boundary is a line on a map, but the rule changes the moment you cross it.
To complicate things further, individual wilderness areas within a national forest can issue special orders that override the default. The Ansel Adams Wilderness, the John Muir Wilderness, and the Desolation Wilderness all have specific food-storage orders that may differ from the surrounding forest.
There is no shortcut around checking the current rules before each trip. I make a habit of pulling up the relevant park or forest website, searching for “food storage order,” and reading the actual posted regulation, not a summary from a blog. Conditions change, bear activity spikes in certain years, and managers update requirements accordingly.
For grizzly country, the rules are almost universal. The U.S. Fish and Wildlife Service, the Interagency Grizzly Bear Committee, and local managers in the Greater Yellowstone Ecosystem and the Northern Continental Divide Ecosystem require bear-resistant containers in most backcountry areas. Hanging is rarely accepted as a primary method in grizzly habitat, because grizzlies are large enough and determined enough to defeat most hangs.
Hanging vs Bear Canisters vs Ursack: Method Comparison
The bear canister vs hanging debate is one of the most-asked questions on backpacking forums, and the answer is almost always “it depends.” I have used all three methods extensively, and each one shines in a specific situation.
A hard-sided bear canister is the gold standard for bear resistance. It is an IGBC-certified plastic or carbon-fiber cylinder with a locking lid that a bear cannot open, crush, or chew through. You set it on the ground 100 feet from camp, ideally wedged against a rock or log so a bear cannot roll it away. The downsides are weight, typically 2 to 3 pounds, and bulk. Most canisters hold 600 to 700 cubic inches of food, which works for about 5 to 7 days for a solo hiker.
The Ursack is a soft-sided bag made from ultra-high-molecular-weight polyethylene fabric, often reinforced with aluminum or Kevlar. It is much lighter than a hard canister, often under 8 ounces, and packs flat. An IGBC-certified Ursack resists bear teeth and claws, but it does not provide crush protection or full odor containment. You must pair it with an odor-proof liner and tie it to a solid object so the bear cannot carry it off.
The traditional bear hang is the lightest option of the three. All you need is 50 feet of cord and a stuff sack, which combined weigh well under 5 ounces. The hang also has unlimited capacity, since you can hang any size bag the branch will support. The catch is that it depends entirely on having the right tree and executing the technique correctly.
Here is how I think about the tradeoffs. In places where a canister is required, I carry a canister, full stop. The fine is real, the bear risk is real, and arguing with a backcountry ranger is a losing proposition. In places where a hang is permitted and trees are abundant, like a lot of Appalachian and Pacific Northwest forest, I use a hang because it saves weight on long trips.
The Ursack sits in the middle. It is a great choice for areas above treeline or in sparse forest where a proper hang is impossible, and where canisters are recommended but not strictly required. Some parks accept the Ursack Major or Ursack AllMitey in lieu of a canister. Others do not, so again, check before you go.
One myth I want to kill right now: a hang is not inferior just because it is lighter. A properly executed counterbalance or PCT-method hang, on the right branch at the right height, defeats the vast majority of black bears. The problem is that most hangs are executed poorly, on bad branches, too low, too close to the trunk, and too close to camp.
How to Hang a Bear Bag Properly: Step-by-Step
This is the technique I use most often in the backcountry, and it is the one I teach new backpackers. It is the PCT-style single-bag hang, sometimes called the Marrison Hanger, and it works because the bag is held aloft by tension alone, not by a knot the bear can pull loose.
Before you start, gather your gear. You need 50 feet of 2 to 3mm braided polyester, Dyneema, or UHMWPE cord. Thinner cord cuts weight but is harder to handle, so beginners often start with 2.5mm. You also need a stuff sack for food and a small weighted throwing pouch, which can be as simple as a stuff sack with a handful of small rocks.
Step 1: Pick the right tree. Walk at least 100 feet downwind from your tent and at least 200 feet from your cooking area. Find a tree with a live, horizontal branch 15 to 20 feet off the ground. The branch should be 2 to 4 inches in diameter where the cord will rest, thick enough to support weight but thin enough that a bear cannot comfortably walk out on it.
Step 2: Locate the sweet spot on the branch. You want a section of branch at least 4 feet out from the trunk, ideally 6 feet out, with no foliage or smaller limbs that will snag your cord. Bears can reach roughly 4 to 5 feet out from where they stand on a trunk, so distance from the trunk matters as much as height from the ground.
Step 3: Set up your throw line. Tie your weighted throw pouch to one end of the cord. Stand directly under the branch and toss the pouch over, aiming for the sweet spot you identified. It often takes two or three tries. If the cord gets stuck, do not yank. Walk sideways to free it gently.
Step 4: Hoist the food bag. Once the cord is over the branch, untie the throw pouch and attach your food bag. Pull on the opposite end of the cord to raise the bag. Stop when the bag is suspended at least 12 feet off the ground, ideally 15 feet.
Step 5: Tie off the cord. Wrap the free end of the cord around the trunk of the tree, two or three times, and tie it off with a slippery half hitch or taut-line hitch. The cord should be taut but not straining. Test it with a firm pull before walking away.
Step 6: Verify the placement. Stand back and look at the hang from multiple angles. The bag should be at least 12 feet high, at least 4 feet from the trunk, and well clear of any nearby branches or tree trunks a bear could climb. If anything looks wrong, take it down and start over.
This method takes me about 10 minutes once I find a tree. When I first learned it, it took closer to 30. Practice at home before a trip, ideally in a backyard or local park with a low branch, so you are not fumbling in the dark at camp.
The Counterbalance Method Explained
The counterbalance method is the older, classic technique, and it is still taught by REI, the Sierra Club, and many wilderness guides. It uses no knots and relies on two equal-weight bags hanging on opposite sides of a branch. The genius of the method is that a bear cannot reach either bag, because each bag counterweights the other.
I prefer the PCT method for solo trips because it only requires one bag. But for group trips, especially with two to four people, the counterbalance is often faster and uses less cord per person.
Here is how to execute it. Start with the same tree selection criteria: a live branch 15 to 20 feet high, 4 to 6 feet out from the trunk, and 100 feet from camp.
Step 1: Throw a cord over the branch. Use the same throw-bag technique as the PCT method. You need a longer cord for counterbalance, at least 60 to 75 feet, because the cord will support two bags on opposite sides of the branch.
Step 2: Tie your first food bag to one end. Clip or tie the food bag securely. This will be your counterweight bag.
Step 3: Hoist the first bag all the way up. Pull on the long end of the cord until the first bag is touching the branch overhead.
Step 4: Tie or clip the second bag to the cord at arm’s reach. The second bag goes on the long end of the cord, as high as you can reach. This second bag should weigh the same as the first bag, or as close to the same as possible. You can add a rock or stuff sack of clothing to balance them.
Step 5: Push the second bag up. Use a long stick, your trekking pole, or simply push the second bag upward while it is on the cord. As the second bag rises, the first bag descends. They meet in the middle, suspended on opposite sides of the branch, both hanging roughly 12 to 15 feet off the ground.
Step 6: Retrieve using a stick or pole. In the morning, use a long stick to push one bag upward. As that bag rises, the opposite bag descends to within reach. Pull it down, then lower the other.
The counterbalance method works because a bear that swipes at one bag just pushes it sideways. The other bag immediately rises out of reach, and the swiped bag bounces back. There is no cord on the ground for the bear to grab and no knot to chew through.
The main failure mode is uneven weighting. If one bag is much heavier than the other, the heavier bag will pull the lighter bag all the way up to the branch, leaving the heavier bag hanging too low and within reach of a determined bear. Always check the balance before walking away.
The PCT Method: A Lighter Alternative
The PCT method, sometimes called the Pacific Crest Trail method, is the single-bag technique I described in the step-by-step section above. It is the most popular method among thru-hikers on the Pacific Crest Trail, the Continental Divide Trail, and the Appalachian Trail for one simple reason: it works with one bag, one cord, and a tie-off, with no balancing act required.
The core idea is that the food bag is hoisted to the branch by a single cord, and the cord is then tied off to the trunk. There is no counterweight, and the bag hangs from a fixed point. To retrieve, you simply untie the cord and lower the bag.
The advantage over the counterbalance is simplicity. One bag, one knot, less fumbling in the dark. The advantage over a hard canister is weight and packability. The disadvantage is that the cord is exposed on the trunk, which means a particularly smart bear in high-use areas can sometimes chew through the cord or pull it loose.
In areas where bears have learned the PCT method, the counterbalance is the safer choice. In lower-pressure areas, the PCT method is faster and easier, and that ease of execution often means it gets done correctly, which matters more than which method you use.
Common Mistakes to Avoid When Hanging Food
After years of watching people set up hangs at backcountry campsites, I can tell you the same handful of mistakes show up over and over. Each one of these can cost you your food and, worse, can habituate a bear.
Hanging too close to camp. A hang that is 30 feet from your tent is not a hang. It is an invitation for a bear to walk through your campsite at dinner time. Move at least 100 feet away, and ideally downwind so food odors drift away from your tent, not toward it.
Hanging too low. A bag hung 6 feet off the ground is within reach of a standing black bear. A bag hung 8 feet up is within reach of a bear that climbs a few feet up the trunk. The minimum is 12 feet, and 15 feet is better.
Hanging too close to the trunk. Bears can reach outward from the trunk by 4 to 5 feet. If your bag is 2 feet from the trunk, even at 15 feet high, a bear can climb the trunk and swipe it. Move at least 4 feet out, ideally 6.
Using dead branches. A dead branch will eventually snap under the weight of your food bag or under the tension of the cord. Worse, it can break and drop the bag to the ground at 2 a.m. Always pick a live branch with healthy bark.
Leaving food in your pack overnight. Your pack is not bear resistant. Neither is your tent, your vestibule, or your sleeping bag stuff sack. Anything scented goes in the hang, every night, no exceptions.
Forgetting cookware and cook clothes. Pots, sporks, and the fleece you wore over the stove all smell like food to a bear. These go in the hang or canister too. I keep a separate small bag for cooking gear and hang it alongside the food.
Leaving the cord on the ground. In the counterbalance method, the cord should not be on the ground between the bags. A bear can chew through it or pull it. The PCT method tie-off should be tight to the trunk, not dangling loosely.
Every one of these mistakes is preventable with five extra minutes of attention. I would rather reset a hang three times in the rain than wake up to find my food scattered across the forest floor.
Adapting to Tree-Less and Sparse Environments
Not every campsite has the perfect tree. Above treeline in the Sierra or the White Mountains, in alpine basins in the Rockies, or in established campsites where trees have been stripped of low branches by decades of use, you may not be able to hang at all.
In those environments, the question is no longer how to hang but what to use instead. If you are above treeline or in sparse forest and a hang is impossible, you need an IGBC-approved bear canister or an Ursack, even if the local regulation technically permits a hang.
This is exactly why many parks have moved to mandatory canister rules. The argument is that if a hang cannot be executed reliably in a given area, then allowing hangs at all is creating an incentive for food-conditioned bears.
In established backcountry campsites with bear boxes, the problem solves itself. Bear boxes are metal storage lockers installed at popular sites. They are heavy, they are bear-proof, and they are the easiest option when available. The catch is that they can be full during peak season, so I always carry a backup method.
Regional differences also matter. In black bear country east of the Mississippi, hangs are still widely accepted and trees are generally plentiful. In grizzly country in the Northern Rockies, canisters or bear-resistant panniers are standard. In the Sierra Nevada above treeline, canisters are required by regulation in most areas.
For coastal brown bear country in Alaska, the rules are stricter still. Many areas require electric fencing, bear-resistant containers, or both. Check the specific land manager’s guidance for any trip in Alaska.
Odor Control: Reducing Your Scent Footprint
Even the best bear hang will not help if your entire campsite smells like a kitchen. Reducing your scent footprint is the first line of defense, and it is something most backpackers completely ignore.
Start with how you cook. Cook at least 200 feet from your sleeping area, downwind if possible. Boil-in-bag meals and simple hot-water meals generate far less lingering scent than frying, grilling, or cooking with oil. The same meal that produces a 30-minute aroma cloud when fried will produce almost no scent when rehydrated in a freezer bag.
Use odor-proof bags for individual meals. OPSAK bags, which are made by LOKSAK, are heat-sealable plastic bags rated to be watertight and airtight. They are not bear-proof on their own, but they dramatically reduce the scent that escapes from your food bag, which means the bear is less likely to find your hang in the first place.
Keep your cooking clothes separate. I change out of my hiking clothes before I cook, do all cooking and eating in a dedicated set of clothes, then hang those clothes in the bear bag overnight. The next morning, I change back. This prevents food odors from accumulating in the clothing I sleep in.
Wash dishes away from camp. Use a strainer to catch food particles, pack out the scraps, and scatter the gray water at least 200 feet from any water source and 200 feet from camp. Never dump pasta water or dishwater near your tent.
Treat your trash like food. Food wrappers, used tea bags, and even the empty package from an energy bar all carry scent. They go in the hang or canister with everything else. A single granola bar wrapper in your tent pocket is enough to attract an investigation.
None of these steps will stop a bear that has already found your food, but together they reduce the chance of a bear finding your food in the first place. Prevention is always easier than defense.
Quick Reference: Bear Food Storage Checklist
Here is the checklist I run through on every trip into bear country. Print it, save it to your phone, or tape it inside your pack lid.
Confirm regulations: Check the official park or forest website for the current food-storage order.
Carry approved storage: Hard canister, IGBC-certified Ursack, or proper hang gear.
Pack scent-proof bags: OPSAK or equivalent for all meals and scented items.
Separate cooking clothes: One set for cooking, one set for sleeping.
Cook 200 feet from camp: Downwind when possible.
Hang at least 100 feet from tent: And 200 feet from your cooking area.
Hang at least 12 feet off the ground: 15 feet is better.
Hang at least 4 feet from the trunk: 6 feet is better.
Use a live branch 2 to 4 inches thick: Avoid dead branches.
Practice your hang at home: Do not learn on the trail.
Check the balance (counterbalance): Both bags should weigh the same.
Include all scented items: Food, trash, toiletries, cookware, cook clothes.
Never keep food in the tent: Not even a snack for the morning.
Use bear boxes when available: And carry a backup method.
Frequently Asked Questions
Where to store food when camping in bear country?
Store food at least 100 feet from your sleeping area and 200 feet from your cooking area, using an approved bear canister, an IGBC-certified Ursack, or a properly executed bear hang at least 12 feet off the ground and 4 feet from the trunk. Never keep food, scented toiletries, or trash in your tent.
How to hang food in bear country?
Tie a weighted throw bag to 50 feet of 2 to 3mm cord, toss it over a live branch 15 to 20 feet high and at least 4 feet out from the trunk, attach your food bag to the free end, hoist the bag to at least 12 feet off the ground, and tie off the cord to the tree trunk with a slippery half hitch. The hang should be at least 100 feet from your tent.
What is the 200 rule for camping?
The 200 rule means keeping food storage and cooking at least 200 feet (about 70 paces) from your sleeping area, and ideally 200 feet from any water source. Combined with the 100-foot minimum distance from your tent for the actual food hang, this creates a triangle of tent, cooking area, and food storage that minimizes bear encounters.
How do you hang food to keep bears away?
Use the counterbalance or PCT method. For counterbalance, hoist one food bag up to the branch, attach a second equal-weight bag to the long end of the cord at arm’s reach, then push the second bag up with a stick so both bags meet in the middle, suspended 12 to 15 feet high on opposite sides of the branch. Bears cannot reach either bag because each counterweights the other.
Can I keep food in my car in bear country?
In most national parks, no. Black bears and grizzlies can and do break into vehicles, and many parks issue citations for storing food in a car. Use bear boxes at trailheads and campgrounds instead. In some national forests, food stored in a hard-sided vehicle with windows rolled up and all food out of sight may be permitted, but always check local regulations.
Are you supposed to hang a bear canister?
No. A bear canister is designed to sit on the ground 100 feet from your camp, ideally wedged against a rock or log so a bear cannot roll it away. Hanging a canister is unnecessary because the canister itself is bear-resistant, and trying to hoist a rigid cylinder into a tree can damage both the canister and the branch.
How long can food stay fresh in a bear vault?
Food stays fresh in a bear canister for the same length of time it would in your pack, since the canister is not refrigerated or airtight in a way that extends shelf life. Most backpackers plan for 5 to 7 days of food in a standard canister, and rely on meal choices like freeze-dried or dehydrated meals that do not require cold storage.
How to carry food while hiking in bear country?
Carry all food and scented items in your backpack during the day, ideally in odor-proof bags like OPSAKs. Keep snacks accessible in a hipbelt pocket but seal wrappers immediately. Never leave a pack unattended on the trail, and at every rest stop, keep your pack within sight so a bear cannot approach it without you noticing.
Conclusion
Properly storing your food in bear country is not optional, and it is not just about saving your freeze-dried lasagna from a curious black bear. It is about breaking the cycle that turns a wild bear into a food-conditioned nuisance, and ultimately a dead bear. Every hang done right is a small vote for keeping backcountry camping accessible, free of stricter regulations, and safe for the next person on the trail behind you.
The core takeaways from this guide are simple. Store everything with a scent, including toiletries and cook clothes, at least 100 feet from your tent. Hang at least 12 to 15 feet high and at least 4 feet from the trunk, or use an approved canister or Ursack when regulations require it. Check park and forest rules before every trip, because the rules change and they are not the same on adjacent pieces of land.
Learning how to store food in bear country where hanging is still allowed is a skill, and like any skill, it gets easier with practice. Tie up a hang in your backyard, walk through the counterbalance method with a friend, and read the actual food-storage order on the official park website before your next trip. A few minutes of preparation protects your food, your sleep, and the bears themselves.
See you out there.