
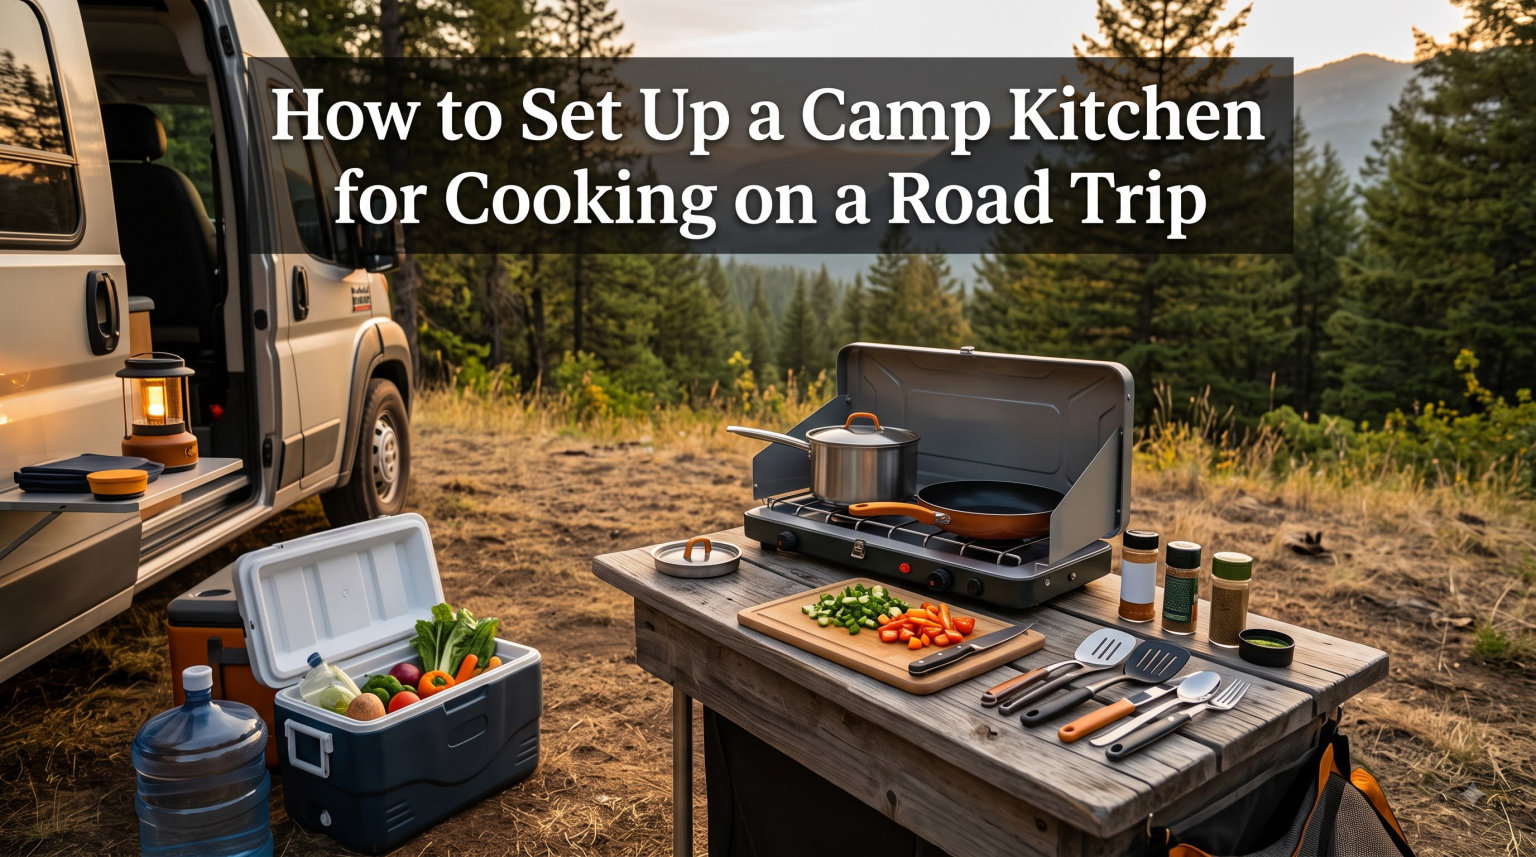
I still remember my first road trip camp kitchen disaster. I had a single burner, a dented pot, and one plastic cutting board balanced on my truck’s tailgate. By night two, I was eating cold beans from the can and promising myself I’d figure this out before the next trip.
Eleven road trips later, I have a setup that lets me cook full breakfasts, freeze-ahead dinners, and even fresh coffee in under 20 minutes from park to plate. If you’re learning how to set up a camp kitchen for cooking on a road trip, this guide walks you through the exact system I wish someone had handed me on day one.
You’ll learn the three-zone layout professional outfitters use, the gear that actually earns its space in your vehicle, how to choose the right stove for your driving style, and the food storage tricks that keep a cooler cold for four days straight. Let’s build your camp kitchen road trip setup from the ground up.
Table of Contents
What Is a Camp Kitchen and Why It Matters on a Road Trip
A camp kitchen is a designated outdoor cooking area at your campsite, organized into separate zones for cooking, prepping food, and cleaning up. On a road trip, where you set up and break down every day or two, that structure becomes the difference between relaxing meals and frustrating chaos.
Without a real camp kitchen road trip setup, you’re digging through coolers with greasy hands, balancing hot pans on uneven ground, and washing dishes with the same water you brush your teeth with. That gets old fast.
A thoughtful camp kitchen setup gives you faster meals, safer cooking, cleaner food, and less stress when you roll into camp tired after a long drive. It also makes it dramatically easier to follow Leave No Trace principles, because everything has a designated place and a planned disposal route.
Understanding the Three Camp Kitchen Zones
Every reliable camp kitchen setup is built around three zones. Once you understand this layout, you can adapt it to any site, from a paved RV pad to a rocky dispersed site in the mountains.
The Cooking Zone
The cooking zone is where heat happens. Place your stove on a stable, flat, non-flammable surface at least three feet from anything that can melt or catch fire. A folding camp table, the tailgate of your vehicle, or a dedicated camp kitchen box all work well.
Keep fuel canisters upright and away from the burner. Store a small fire extinguisher or water bottle within arm’s reach. Position the cooking zone downwind from your dining and sleeping areas so smoke and smells drift away from where you relax.
The Prep Zone
The prep zone sits next to the cooking zone but never directly on it. This is your cutting board, knife, spices, oils, and ingredient staging area. A second small folding table works best, but a large cutting board on your cooler lid is the classic road trip hack.
Keep the prep zone within arm’s reach of both the cooler and the cooking zone. That triangle layout, cooler, prep, cooking, is the secret behind every fast outdoor kitchen.
The Cleanup Zone
The cleanup zone lives at least six feet from the cooking zone to avoid cross-contamination. Set up a three-bucket wash system (more on that below), a dish rack, and a dedicated trash bag.
If you’re at a site with a spigot, run a short hose to the cleanup zone. If you’re dry camping, position the cleanup zone downhill so gray water flows away from camp and toward vegetation, not into a water source.
Essential Gear for Your Camp Kitchen Road Trip
After years of testing gear on desert, mountain, and coastal road trips, I have trimmed my kit to a core list that handles 90% of meals without feeling overloaded. Use this as your starting camp kitchen checklist.
Cooking Gear
- Two-burner propane stove (single burner works for solo trips)
- One 10-inch non-stick skillet with lid
- One 3-quart pot with lid
- One 1-quart saucepan for sauces and coffee
- Lighter or stormproof matches
- Heat-resistant gloves or pot holders
- Metal spatula, tongs, and wooden spoon
Prep Gear
- Large plastic cutting board (color-coded red for meat helps)
- Sharp chef’s knife and paring knife
- Small cutting board for garlic and herbs
- Collapsible mixing bowls (three sizes)
- Measuring cups and spoons
- Salt, pepper, oil, and spice kit in leak-proof containers
Cleanup Gear
- Three-bucket wash system or collapsible dish tubs
- Biodegradable camp soap
- Scrub pad and dish towel
- Microfiber drying towel
- Trash and recycling bags
- Small bottle of bleach for sanitizing
Pack this gear in labeled bins or a dedicated chuck box so you can set up and tear down in under ten minutes. That time savings adds up over a two-week trip.
Choosing the Right Camp Stove for Road Trip Cooking
The stove is the heart of your camp kitchen road trip setup. Picking the right one depends on how you travel, how many people you feed, and where you usually camp. Here is how the main types compare.
Propane Two-Burner Stoves
Propane stoves are the gold standard for car camping. They light instantly, deliver strong heat, and run on inexpensive 1-lb propane bottles you can find at any hardware store. The Camp Chef Everest and Coleman Classic are the two most popular road trip models.
The trade-off is size. A full two-burner stove weighs 10-15 pounds and takes up real space in your vehicle. For solo travelers or minimalist setups, a single-burner is plenty.
Isobutane Canister Stoves
Isobutane stoves like the MSR PocketRocket or Soto WindMaster are smaller, lighter, and boil water in under four minutes. They are perfect if you want a backpacking-capable stove that doubles as a road trip burner.
The catch is fuel cost. Isobutane canisters are pricier than propane and harder to find in remote areas. Pack extras if you’re heading off the beaten path.
Multi-Fuel Stoves
Multi-fuel stoves burn white gas, kerosene, or unleaded gasoline. They are the most versatile option for international road trips or extreme cold, but they require priming and more maintenance than simpler stoves.
For most road trip campers in North America, multi-fuel is overkill. Reach for one only if your route crosses borders or climbs above 10,000 feet in winter.
Built-In and Slide-Out Camp Kitchens
Built-in camp kitchens, like the Yoke Outdoors system or TruckVault drawers with integrated stoves, are the luxury option. They typically weigh 48+ pounds fully loaded and cost $500-$1,500.
If you spend 30+ nights a year camping and value a five-minute setup, a built-in system is worth the investment. For occasional road trips, a portable two-burner on a folding table does the job.
Step-by-Step: How to Set Up a Camp Kitchen at a Campsite
Once you arrive at camp, a consistent setup routine keeps your kitchen organized from night one. Follow these steps every time you pull into a site.
Step 1: Survey Your Site and Pick the Kitchen Spot
Park your vehicle on level ground within 20 feet of your tent but downwind. Look for a flat, stable area at least 15 feet from tent walls, tree branches, and dry grass.
Check for overhead hazards like dead branches or wasp nests. Confirm the spot is downhill from any nearby water source so gray water drains away from streams and lakes.
Step 2: Unload and Stage Gear by Zone
Pull your three bins, cooking, prep, cleanup, from the vehicle and place them in their future zones before unpacking anything. This staging step prevents the classic chaos of stacked pots and missing spices.
Open the cooler last and place it between the prep zone and a shaded area. A closed cooler keeps food safer longer than one left open while you set up.
Step 3: Set Up the Cooking Zone
Place your folding table or tailgate pad. Set the stove on it with the fuel canister locked in and the regulator connected. Light the stove for a 30-second test burn to confirm fuel flow.
Stage cooking utensils in a small bin next to the stove. Hang a towel on the table leg for quick hand wipes.
Step 4: Set Up the Prep Zone
Position the prep table or cutting board within arm’s reach of the cooler and the cooking zone. Lay out the cutting board, knife, salt, pepper, and oil. Pre-measure any spices you use often into a small tray.
Keep a separate container for raw meat if you cook it, and never put cooked food back on the raw meat board.
Step 5: Set Up the Cleanup Zone
Place three buckets or tubs in a row: hot soapy water, rinse water, and sanitizing water with a small splash of bleach. Stack your scrub pad, dish soap, and drying towel beside the tubs.
Set up a dedicated trash and recycling station. Hang a small bag for food scraps if your campsite allows it, otherwise pack everything out.
Step 6: Test the Flow
Before you start cooking for real, walk through the imaginary meal. Pretend you’re pouring coffee, scrambling eggs, washing a pan, and tossing a wrapper. If anything feels awkward, reposition the zones before you commit.
This five-minute test saves twenty minutes of frustration every meal for the rest of the trip.
Packing and Organization Tips for a Portable Camp Kitchen
The most overlooked part of a camp kitchen road trip is the vehicle organization. A great kit is useless if you can’t find it at 9 PM after a 600-mile drive.
Use the Chuck Box Method
A chuck box is a single container that holds every piece of your camp kitchen. It is usually a plastic bin or a wooden box with compartments. Open it, set it on a table, and your entire kitchen is ready.
Label every compartment. I use painter’s tape and a Sharpie for quick updates. The chuck box lives in the back of the vehicle within sliding-reach of the tailgate.
Nesting Cookware Saves Space
Pick cookware that nests together. My 10-inch skillet fits inside my 3-quart pot, which fits inside my 5-gallon water jug. That single stack replaces five bulky items.
Store small utensils in a single zip-top bag inside the largest pot. Spices go in a separate small bin so they don’t rattle through everything else.
Weight Distribution Matters
A fully loaded camp kitchen can weigh 40-60 pounds. Pack heavy items low and centered in the vehicle for better handling. Keep the kitchen gear near the tailgate, sleeping gear and water in the rear, and lighter soft items up high.
If you drive a smaller car or SUV, aim for a fully loaded kitchen under 30 pounds. You can hit that target by skipping the dual-burner stove and choosing one lightweight pot instead of a full cookware set.
Quick-Access Spices and Oils
Decant your favorite spices into 2-oz leak-proof containers. Pack olive oil in a small squeeze bottle rather than a full glass bottle. These small swaps prevent the dreaded oil-soaked sleeping bag disaster.
Keep one “every meal” spice kit separate from specialty baking spices. That way your coffee, eggs, and grilled chicken always have what they need without digging.
Food Storage Solutions for Multi-Day Road Trips
Food storage is where most first-time road trip campers lose the game. A warm cooler means warm beer, sad sandwiches, and a real food safety risk. Here’s how to lock in cold for days.
Choose the Right Cooler
Hard rotomolded coolers like Yeti, RTIC, and Engel keep ice for 3-5 days. Soft coolers are lighter and easier to stash but only hold ice for 1-2 days. For a two-person week-long trip, a 45-quart hard cooler paired with a 20-quart soft cooler for daily access is the sweet spot.
Pre-chill your cooler with a bag of ice the night before you load it. A warm cooler melts your real ice within hours.
Layer and Separate Food
Pack the cooler in layers. Frozen meat on the bottom where it’s coldest. Dairy and eggs in the middle. Drinks and snacks on top where they’re easiest to grab.
Use separate bins or heavy zip-top bags to keep raw meat from leaking onto cheese. Color-coded bins (red for raw meat, blue for ready-to-eat) make this foolproof.
Manage Ice Smartly
Block ice lasts longer than cubed ice. Freeze water in milk cartons before your trip and stack them in the cooler. They act as both ice and emergency drinking water.
Drain meltwater daily. Cold water pulls heat faster than cold air, so a drained cooler holds temperature better than a waterlogged one.
Dry Storage and Bear Country
Keep dry goods in a separate hard bin or a dedicated chuck box. In bear country, store all food, trash, and scented items in bear-resistant canisters or your vehicle with the windows up.
Never store food in your tent. Even a single granola bar wrapper can train a bear or raccoon to investigate every tent in the campground.
Cleanup Station and Leave No Trace Principles
Good cleanup is the difference between a campsite you leave behind and one you leave it better than you found it. The standard outdoor system uses three buckets.
The Three-Bucket Wash System
Bucket one holds hot water with biodegradable camp soap for washing. Bucket two holds clean rinse water. Bucket three holds sanitizing water with a small splash of bleach.
Wash, rinse, sanitize in that order. Strain food scraps from bucket one and pack them out. Never dump soapy water within 100 feet of a stream or lake.
Gray Water Disposal
Strain food particles, pack them out, and broadcast gray water over a wide area of bare soil at least 200 feet from any water source. In established campgrounds, use the designated gray water disposal station.
If your campground has a dishwashing sink, use it. The three-bucket system is for dispersed and backcountry camps.
Trash and Recycling
Pack out everything you pack in. Crush cans and flatten cardboard to save space. Keep a small trash bag inside your kitchen bin so wrappers never end up on the ground.
Some sites have bear boxes or dumpsters. Use them. If not, store your trash in your vehicle between meals to avoid attracting wildlife.
Common Camp Kitchen Mistakes to Avoid
Every road tripper I know has made at least one of these mistakes. Learn from us so you don’t have to learn the hard way.
Overpacking Gear You Won’t Use
The most common rookie mistake is bringing a full home kitchen on the road. You don’t need a blender, an air fryer, or three different skillets for a week-long trip. Bring one versatile pan, one pot, and basic utensils. Add specialty items only after you have run five or more trips and know what you actually use.
Forgetting Wind Protection for the Stove
Wind kills stove efficiency. A 10 mph wind can double your fuel use and double your cook time. Pack a folding windscreen that fits around your specific stove. Wind is the number one reason cold-weather campers think their stove is broken.
Not Pre-Planning Meals
Winging meals on a road trip means sad grocery store sandwiches and overpriced campground hot dogs. Pre-plan dinners for the first half of the trip and a flexible protein-based menu for the second half. Freeze one or two meals to double as ice blocks.
Ignoring Vehicle Organization
If you can’t find your spatula in under a minute, your kitchen is too disorganized. Designate a spot for every item and put it back after every meal. Five minutes of daily tidying beats an hour of digging every evening.
Skipping the Pre-Trip Cooler Test
Do a 24-hour cooler test before any multi-day trip. Load it with food, ice, and your normal access pattern. If the ice is gone in a day, your cooler setup is wrong. Adjust before you hit the road.
Road Trip Camp Kitchen Tips from Real Travelers
The best road trip camp kitchen advice comes from people who log 50+ nights a year. Here are the most useful tips shared in camping forums and tested by the community.
Most experienced road trippers prefer a U-shaped kitchen layout. Set up a picnic table on one side, a personal folding table on the other, and your vehicle tailgate or a third surface at the back. This shape lets you pivot between zones without crossing the cooking flame.
A two-burner stove is popular, but most road trippers only use one burner at a time. Save 6-8 pounds by going with a quality single-burner unless you regularly cook for four or more people.
The Coleman two-burner remains the most recommended entry-level stove for budget-conscious road trippers. It is heavy, but it is reliable, cheap, and serviced at every outdoor store in North America.
Weight matters more than gear count. A 25-pound fully loaded kitchen that sets up in 10 minutes beats a 50-pound kitchen that needs 30 minutes of assembly every night.
Finally, every long-haul road tripper I have asked swears by a dedicated camp kitchen box. Once you label and load your chuck box, your camp kitchen road trip routine becomes automatic, freeing your brain to enjoy the trip instead of running logistics.
Frequently Asked Questions
What are the essential items for a camp kitchen?
The essential items for a camp kitchen are a two-burner or single-burner stove, fuel, a stable table or surface, a 10-inch skillet, a 3-quart pot, a cutting board, a sharp knife, mixing bowls, a cooler with ice, biodegradable soap, and three buckets for wash, rinse, and sanitize. Pack spices, oil, and a fire starter in a small kit you can grab with one hand.
How do you set up a cooking area at a campsite?
Set up a cooking area at a campsite by choosing a flat, downwind spot at least 15 feet from tents and trees. Place your stove on a stable table or tailgate, set up a prep zone next to it, and position a cleanup zone with three buckets six feet away. Test the layout by walking through an imaginary meal before you start cooking.
What stove is best for car camping?
The best stove for car camping is a two-burner propane stove like the Camp Chef Everest or Coleman Classic. They light instantly, run on inexpensive propane, and deliver strong heat for full meal prep. Solo travelers and weight-conscious road trippers should pick a single-burner isobutane stove like the MSR PocketRocket instead.
How do you organize a camp kitchen?
Organize a camp kitchen by storing all gear in a single chuck box labeled by zone, nesting cookware to save space, and keeping spices, oils, and tools in small bins within arm’s reach of the stove. Set up the same three-zone layout at every site so you build muscle memory and find everything in seconds.
What food storage solutions work best for camping?
The best food storage solutions for camping are a hard rotomolded cooler for cold items, airtight bins for dry goods, and bear-resistant canisters in bear country. Layer frozen meat on the bottom, dairy in the middle, and drinks on top. Use block ice instead of cubes and drain meltwater daily to keep food cold for 3-5 days.
Final Thoughts on Your Camp Kitchen Road Trip Setup
A great camp kitchen road trip setup is built on three zones, a reliable stove, and a chuck box you trust. Start with the basics in this guide, run a few short trips to refine your kit, and your outdoor cooking will quickly outpace anything you can get at a restaurant or gas station.
Pick your stove, pack your zones, and hit the road. Your best camp meal is the one you cook yourself after a long day of driving, and it’s easier to pull off than you think. Safe travels in 2026 and beyond.