
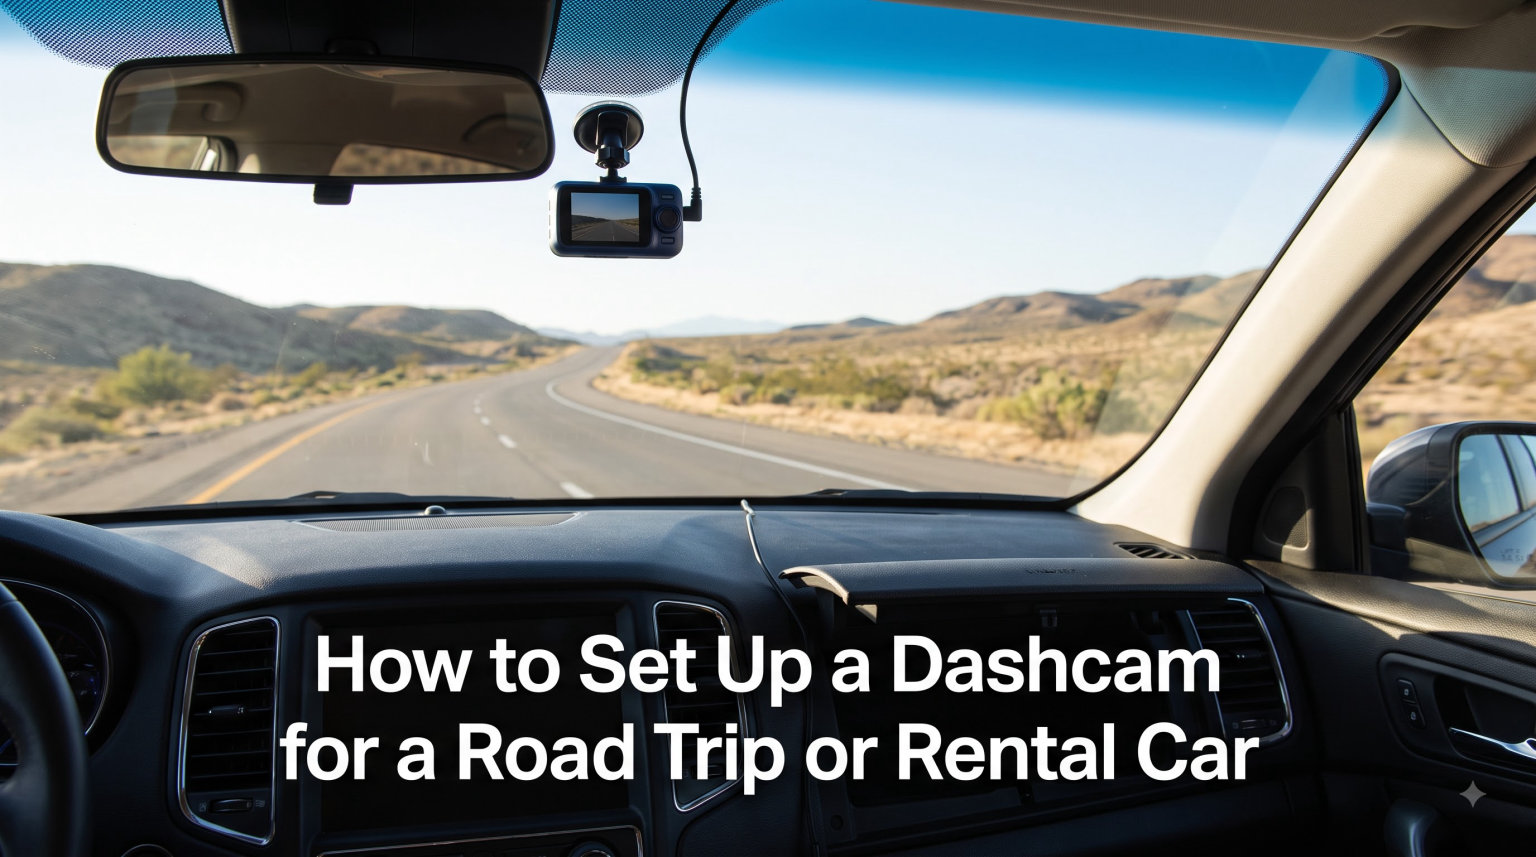
Picture this: you are driving an unfamiliar rental car on a winding mountain road hundreds of miles from home, and someone runs a stop sign right in front of you. Without a dashcam, it is your word against theirs. Learning how to set up a dashcam for a road trip or rental car gives you an impartial witness that never blinks, never forgets, and never takes sides.
I have installed temporary dashcams in everything from compact economy rentals to full-size SUVs over the past several years of road trips. The process is simpler than most people think, and a portable setup that takes ten minutes can save you thousands in bogus damage claims or disputed accident liability.
This guide walks through every step, from choosing a rental-friendly camera to powering it without permanent wiring, configuring the right recording settings, and removing it all without leaving a trace when you return the car.
Table of Contents
Choosing a Rental-Friendly Dashcam
The right dashcam for a rental car is one you can install in minutes, remove cleanly, and move between vehicles without tools. That rules out most hardwired systems and anything that requires fuse taps or permanent adhesive. What you want instead is a compact, battery-powered or plug-and-play camera that uses suction cups or a magnetic mount.
Forum users on Reddit’s r/Dashcam and r/roadtrip communities consistently recommend portable models for travel. They value cameras that come home with them and pull double duty in their personal vehicle between trips. The key is avoiding anything that leaves residue, requires disassembling interior trim, or draws power from the fuse box.
Portable vs Hardwired: What Works for Rentals
Hardwired dashcams connect directly to your vehicle’s fuse panel and offer features like 24-hour parking mode. They are the gold standard for a personal daily driver. For a rental car, though, they are a terrible choice. You would need to pull fuses, run wires behind the A-pillar trim, and potentially modify the electrical system of a car you do not own.
Portable dashcams, by contrast, plug into a 12V cigarette lighter socket, a USB port, or an OBD-II adapter. They mount with suction cups or removable adhesive pads. You can install one in five minutes and remove it in two. That is the only realistic option for a rental.
Key Features to Prioritize for Travel
When you are shopping for a travel dashcam, focus on these features. Loop recording ensures the camera never stops recording by overwriting old footage automatically. A G-sensor detects sudden impacts and locks the current clip so it cannot be overwritten. Night vision is essential because road trips often involve driving after dark on unlit highways.
Built-in Wi-Fi lets you review and download footage directly to your phone without pulling the memory card. GPS tracking stamps your recordings with location and speed data, which strengthens evidence if you ever need it for a dispute. A wide field of view, ideally 140 degrees or more, captures more of the road and adjacent lanes.
Look for a model with a capacitor instead of a lithium-ion battery if you will be traveling in extreme heat. Capacitors survive hot dashboards far better and will not swell or leak in a car parked under the summer sun.
How to Set Up a Dashcam for a Road Trip or Rental Car: Step by Step
The full installation process breaks down into six steps that take about ten to fifteen minutes total. You do not need any special tools, and every step is completely reversible.
Step 1: Select a Non-Damaging Mount
Start by choosing a mount that will not damage the rental car’s windshield or interior. Suction cup mounts are the most rental-friendly option because they attach and release without any adhesive. They grip the glass mechanically and leave zero residue.
Magnetic mounts that use a small metal pad with removable 3M adhesive are another option. The pad stays on the windshield during your trip, and you pull it off when you return the car. Quality removable adhesive strips peel cleanly without marking the glass, but test a corner first if you are unsure.
Avoid permanent double-sided tape or epoxy-style adhesives. These bond permanently to glass and will either damage the windshield or require solvent to remove, both of which can trigger cleaning fees from the rental company.
Step 2: Choose Your Power Source
Your three realistic power options for a rental car are the cigarette lighter socket, a USB port, or an OBD-II adapter. The 12V cigarette lighter is the simplest and most universal choice. Nearly every rental car has one, and most dashcams ship with a car charger that plugs directly into it. The downside is that the cable needs to reach from the dash to wherever you mount the camera.
USB power is clean and convenient if the rental car has a powered USB port near the dash. Not all ports stay live when the engine is off, so check before relying on this method. USB is also lower amperage, which means some cameras may not support parking mode on USB alone.
OBD-II adapters are the hidden gem for rental cars. Every car sold since 1996 has an OBD-II port under the steering wheel, and a special power adapter converts it into a clean 5V USB output. Forum users on Reddit’s r/Dashcam community swear by this method because it keeps the cigarette lighter free for phone charging and the wiring runs neatly along the floor. Route the OBD-II cable behind the driver’s seat and up the A-pillar for a tidy install.
Step 3: Position and Attach the Camera
Mount the dashcam high on the windshield, just below the rearview mirror and centered behind it. This position gives you the widest unobstructed view of the road and keeps the camera out of your direct sightline. It also hides the camera from outside view, which discourages break-ins when you park.
Make sure the lens is clean before you attach it. A single fingerprint smear can ruin an entire day of footage. Check that the camera is level by looking at the horizon line in the live preview on the screen or app. A tilted camera captures more sky or dashboard than road, which weakens the value of your recordings.
Be careful not to place the camera in the area swept by the windshield wipers, as this is sometimes restricted. In some states, laws limit where devices can obstruct the driver’s view, so staying behind the mirror keeps you compliant everywhere.
Step 4: Route the Power Cable Cleanly
A loose power cable dangling across your dashboard looks bad and can snag on controls or the steering column. Tuck the cable along the top edge of the windshield, pressing it under the headliner where the glass meets the roof. Most headliners have enough flex to accept a thin USB cable without any tools.
Continue routing the cable down the A-pillar on the passenger side, tucking it behind the rubber door seal. Run it along the bottom edge of the dashboard toward the center console or wherever your power source is. Use the seal itself to hold the cable in place without tape or clips.
If your rental has a glovebox that opens toward the passenger, you can loop excess cable behind it to keep things neat. The goal is a clean look that does not obstruct your view, your controls, or your passengers. None of these cable-routing steps require any tools or modifications.
Step 5: Configure Loop Recording and Event Lock
Once the camera is mounted and powered, format the microSD card inside the camera itself. Do this through the camera’s menu rather than on a computer, because the camera creates the specific folder structure it needs for loop recording and event storage. A fresh format prevents file errors that can corrupt footage.
Enable loop recording and set the segment length to three minutes. This divides your drive into three-minute clips that automatically overwrite the oldest files when the card fills up. You never have to manually delete anything, and the camera records indefinitely.
Turn on the G-sensor, which is sometimes called collision detection or impact detection. When the sensor detects a sudden jolt or sharp deceleration, it locks the current clip so loop recording cannot overwrite it. Set the sensitivity to medium for most driving. Too high and it locks clips on every pothole. Too low and it might miss a real collision.
Set the correct date and time. This sounds obvious, but a dashcam with the wrong timestamp is nearly useless as evidence. Check it after the camera has been powered off, because some models reset to a default date when they lose power. Disable audio recording if you prefer, since passenger conversations are captured by the built-in microphone.
Step 6: Test Everything Before You Drive
Before you pull out of the rental lot, sit in the driver’s seat and check the live preview. Confirm the camera is recording, the timestamp is correct, and the framing captures the road, lane markings, and the hood of the car. Record a short one-minute clip, then play it back to verify the video and audio quality.
Check that the memory card has free space after formatting. Tap the windshield near the camera to trigger the G-sensor and confirm that the event file gets locked. This confirms your impact detection is working before you actually need it.
Take the car for a short test drive around the block. Listen for rattles from a loose mount, and check that the cable routing does not interfere with the pedals, shifter, or parking brake. Fix any issues now while you are parked rather than discovering them on the highway at 70 miles per hour.
Understanding Recording Laws and Privacy
Dashcam laws vary significantly across states, and they generally fall into two categories: windshield obstruction rules and audio recording consent laws. The windshield obstruction issue is straightforward in most states. Mounting behind the rearview mirror keeps you compliant because the camera does not block the driver’s field of view. A few states like California restrict windshield-mounted devices more tightly, so check local rules before your trip.
Audio recording is more complicated. Most states follow one-party consent, which means you can record audio as long as one person in the conversation consents. Since you are the one party, you are covered. However, a dozen states require all-party consent, meaning everyone in the car must agree to being recorded. If you are driving through California, Florida, Illinois, Maryland, Massachusetts, Michigan, Montana, Nevada, New Hampshire, Pennsylvania, Washington, or Connecticut with passengers, consider disabling audio to stay on the safe side.
Visual recording from a public roadway is generally legal everywhere in the United States. You are recording from a public space, and there is no reasonable expectation of privacy for other drivers on the road. The main legal friction points are audio recording inside the vehicle and where you physically place the camera on the windshield.
If you are renting a car internationally, research the destination country’s dashcam laws before you travel. Some countries restrict or prohibit dashboard cameras outright, and others have strict data privacy rules about recording in public spaces.
What to Do If You Capture an Incident
If you witness or are involved in an accident, the first priority is safety. Move to a safe location, check for injuries, and call emergency services if needed. Once the situation is stable, protect your footage immediately.
Remove the microSD card from the camera and lock it in a safe place. Do not let the camera keep running in loop mode after a serious incident, because it will eventually overwrite critical footage. Transfer the clip to your phone using the camera’s Wi-Fi app, or copy it to a laptop if you have one with you. Cloud-connected cameras can upload directly, which is ideal for irreplaceable evidence.
Document the rental car’s condition at the scene as well. Take wide photos of all four sides of the vehicle, close-ups of any damage, and shots of the license plate. This baseline documentation protects you from damage claims that predate your rental period. Many disputes arise from damage the previous renter left behind, not from anything that happened during your trip.
Rental Car Removal Checklist: Leave No Trace
When your trip ends, removing the dashcam properly is just as important as installing it. No competitor guide covers this step, but it is a real pain point for travelers worried about damage fees. Follow this checklist to return the car exactly as you received it.
Start by turning off the camera and removing the microSD card. Disconnect the power cable from the camera, then unplug the charger from the cigarette lighter or the adapter from the OBD-II port. If you used an OBD-II adapter, make sure the port cover, if there was one, clicks back into place.
Remove the suction cup mount by flipping the release lever and peeling the cup off the glass gently. If you used a magnetic mount with adhesive, pull the pad off slowly at a flat angle rather than yanking straight out. Any faint adhesive residue comes off with a small amount of isopropyl alcohol on a paper towel. Never use a razor blade or abrasive cleaner on rental car glass.
Pull out any cable you tucked behind the headliner and door seals. Run your fingers along the headliner edge and A-pillar to confirm nothing is left behind. Check the floor area near the driver’s seat for any clips or zip ties you may have used. Finally, inspect the windshield where the camera sat. Hold a piece of white paper behind the glass to spot any faint marks you might miss otherwise.
Common Mistakes to Avoid When Setting Up a Dashcam
Here are five common mistakes that undermine an otherwise solid dashcam setup, especially in rental cars.
1. Forgetting to format the microSD card. A card pulled straight from the package without formatting will fill with fragmented files and eventually cause recording errors. Always format inside the camera before your first drive.
2. Mounting the camera too low on the windshield. A camera mounted in the center of the glass captures too much dashboard and not enough road. It also obstructs the driver’s view, which can violate windshield laws in some states. Mount high behind the mirror.
3. Setting the G-sensor sensitivity too high. A maximum sensitivity locks a clip every time you hit a speed bump or pothole. This fills your card with locked files and prevents loop recording from working. Use medium sensitivity for normal road conditions.
4. Leaving audio recording on without knowing consent laws. In all-party consent states, recording passenger conversations without their knowledge can create legal headaches. Know the laws in the states you are driving through or disable audio to keep things simple.
5. Not checking the camera after the rental car is returned. Many travelers leave their dashcam in a rental car by mistake. Make removing the camera part of your pre-return checklist, right alongside filling the gas tank and gathering your belongings.
FAQs
Can you use a dash cam in a rental car?
Yes, you can use a dash cam in a rental car as long as you use non-damaging mounts and power sources. Suction cup mounts, USB chargers, and OBD-II adapters leave no permanent marks. Avoid hardwiring, fuse taps, or permanent adhesive. Always remove the camera and any residue before returning the vehicle.
What are 5 common mistakes to avoid when using a dashcam?
The five most common dashcam mistakes are: not formatting the microSD card before first use, mounting the camera too low on the windshield, setting the G-sensor sensitivity too high so it locks clips on every bump, leaving audio recording on in all-party consent states, and forgetting to remove the camera when returning a rental car.
Will your insurance go down if you have a dash cam?
Some insurance companies offer discounts of 5 to 15 percent for dashcam users, but it is not universal. The main financial benefit is not a premium discount but rather stronger evidence if you need to file a claim. Clear footage can prevent unjustified rate increases after a disputed accident.
Is there a dash cam without wires?
Yes, battery-powered dashcams exist and require no external wiring during use. These models run on internal batteries for a limited time, typically one to three hours per charge. They are ideal for short trips or rental cars, though you still need to charge them via USB or a wall adapter between drives.
Wrapping Up
Knowing how to set up a dashcam for a road trip or rental car is one of those small skills that pays off enormously when you need it. A portable camera with a suction cup mount, an OBD-II or cigarette lighter power source, and properly configured loop recording gives you a reliable witness in any vehicle you drive.
The setup takes about fifteen minutes, the removal takes five, and the peace of mind lasts your entire trip. Format your card, test your G-sensor, route your cables cleanly, and drive with confidence knowing that if something goes wrong, you have the evidence to prove what happened.
Before your next trip, pick up a compact dashcam with a suction cup mount, a high-capacity microSD card, and an OBD-II power adapter. Pack them with your travel gear, and you will never drive a rental unprotected again.