
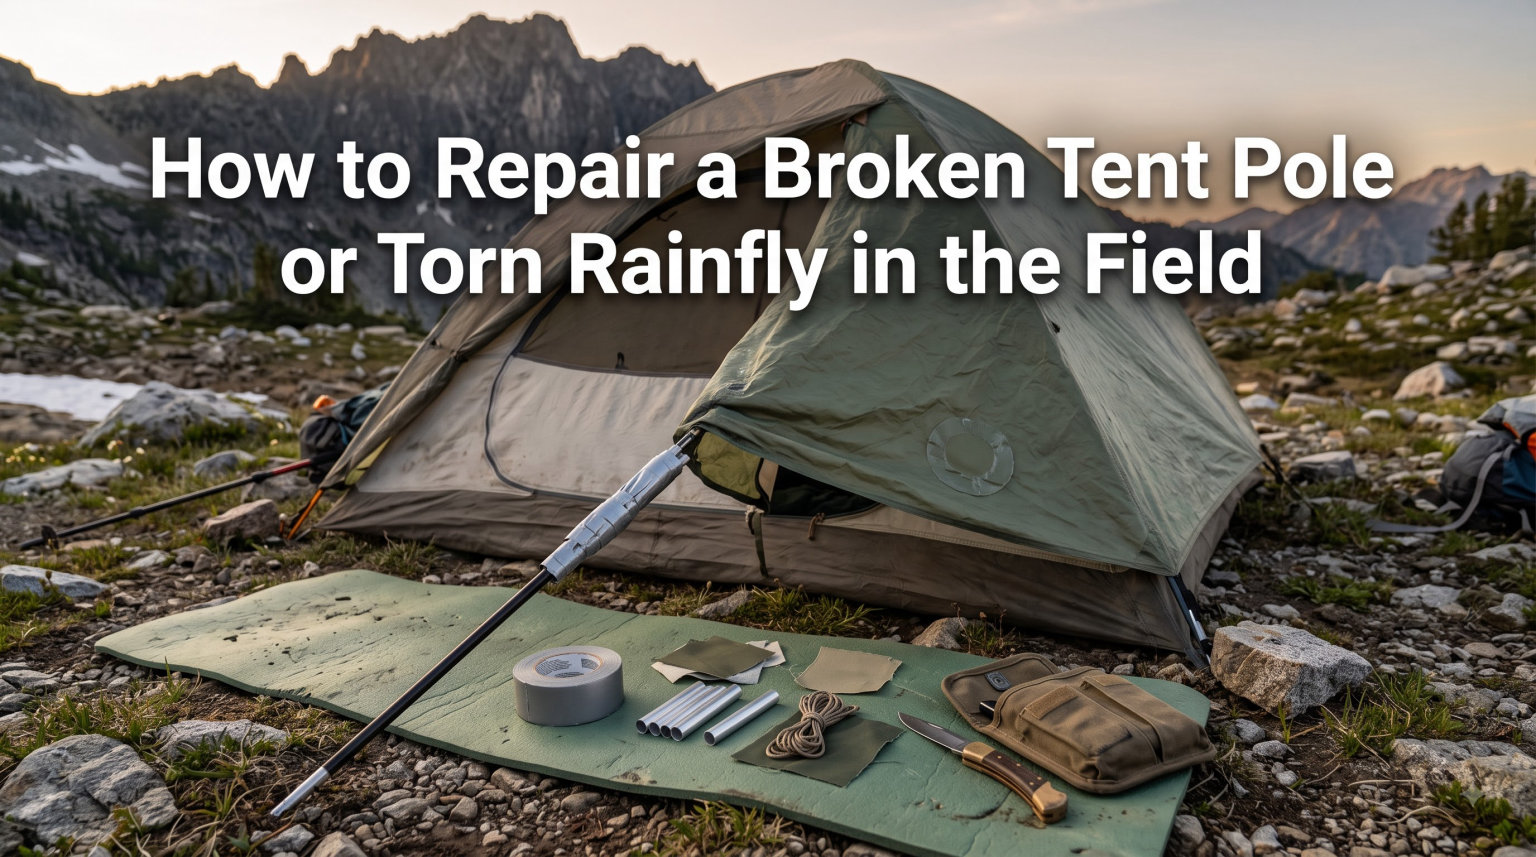
Nothing ruins a backcountry trip faster than a snapped tent pole or a rainfly torn open by a rogue branch. I learned this the hard way on a 2023 Mt. Gede climb when a midnight gust folded one of my poles like a drinking straw. I spent the next 90 minutes in the rain, fighting a failing shelter with nothing but a fistful of duct tape and a multitool. That night cost me a tent and taught me an expensive lesson. Since then, I have rebuilt my repair kit, studied every how-to I could find, and tested the techniques below on more than 30 nights of camping.
This guide is the result of that experience. I will walk you through the exact process I now use to repair a broken tent pole or torn rainfly in the field, drawing on advice from REI, Big Agnes, Treeline Review, and the r/CampingGear community. Whether you are a weekend car camper or a multi-day backpacker, these techniques will keep your shelter standing and your trip on track.
Field repair is a learnable skill. With the right supplies and a calm head, you can keep your tent functional through one more night, one more storm, and one more season.
Table of Contents
Why Field Tent Repair Skills Matter for Every Camper
Your tent is your portable home in the backcountry. When it fails, you are exposed to wind, rain, insects, and cold. According to the REI Expert Advice library, the most common field failures are snapped poles, torn rainfly fabric, and ripped mesh. Mastering these fixes prevents ruined trips and saves the cost of emergency replacements, which can run $300 to $800 for a quality three-season tent.
Indonesian camping terrain, from the tropical forests of Kalimantan to the windy ridges of Rinjani and the salt-laden coasts of Lombok, amplifies these risks. Sudden tropical downpours stress seams, while strong coastal winds stress pole joints. Knowing how to repair a broken tent pole or torn rainfly in the field turns a potential disaster into a 20-minute inconvenience and lets you focus on what matters: enjoying the outdoors.
Beyond safety, repair skills are sustainable. A properly patched tent can last a decade. The most expensive tent is the one you have to replace early because a small rip turned into a total loss. Every patch you apply keeps gear out of the landfill and money in your wallet. Our team has patched the same tent through four rainy seasons and a tropical typhoon. It still keeps us dry.
Finally, repair knowledge reduces panic. The single biggest factor in a failed backcountry repair is the stress response. By rehearsing the techniques at home before you need them, you cut reaction time and avoid the mistakes that come from working in the dark and the rain.
What to Pack in Your Tent Repair Kit Before You Leave
A good tent repair kit weighs under 6 oz and fits in a side pocket. I pack mine in a 1-quart zip lock to keep everything dry and easy to find. Here is the supply list I trust after 30-plus nights of testing across four different tent models.
Essential Items for Any Tent Repair Kit
- Pole repair sleeve (splint): A short metal or aluminum tube that slides over a broken pole segment. Most tents ship with one in the stuff sack. Carry a spare packed in your kit, since the original can be easy to lose.
- Tenacious Tape or Gear Aid patches: Adhesive repair tape that bonds to silnylon, polyester, and Dyneema. Far better than duct tape for fabric. Pre-cut a few 2-inch squares before your trip.
- Tear Aid patches: A clear, flexible film patch that works on almost any tent material including vinyl, rubber, and TPU. Carry one Type A patch for nylon and one Type B patch for vinyl.
- Spare shock cord (2 mm to 3 mm): For restringing poles that lose tension. Carry 3 feet of cord wrapped around a pencil to save space.
- Seam sealant (SilNet or Seam Grip): A small 0.5 oz tube seals leaking seams and patch edges. Choose SilNet for silicone-treated fabrics and Seam Grip for urethane-coated fabrics.
- Multi-tool with pliers and small blade: For trimming fabric, cutting cord, and crimping small parts. A Leatherman Wave or similar covers most needs.
- Small fabric scissors: Clean cuts make patches stick better. A 2-inch folding pair is enough.
- Alcohol wipes or clean cloth: Surface prep is the difference between a patch that lasts and a patch that peels off in 24 hours. Pack 4 to 6 alcohol wipes in a small zip bag.
- Spare stakes: One or two extra tent stakes give you flexibility if a stake bends or breaks during the trip.
Duct Tape vs Tenacious Tape vs Tear Aid: Which Wins?
Every forum thread on r/camping has the same debate. Here is what I have found after three years of side-by-side testing on rainfly, mesh, and floor fabric.
- Duct tape: Cheap and ubiquitous, but leaves sticky residue that prevents future repairs. It also fails in cold and wet conditions. The adhesive breaks down when wet and the patch peels within 48 hours. Use only as a last-resort temporary fix when nothing else is available.
- Tenacious Tape: My go-to choice for ripstop nylon and silnylon. It sticks aggressively, flexes with the fabric, and does not leave residue. The matte finish looks discreet on patched areas. It bonds well to clean, dry surfaces and survives multiple rain cycles.
- Tear Aid: Best for vinyl, rubber, and TPU windows. It is more expensive but virtually indestructible. Carry one Type B patch for emergencies involving non-fabric materials.
Skip the duct tape for serious field repairs. Tenacious Tape and Tear Aid are well worth the extra 1 oz of pack weight and have never failed me in 30-plus repairs.
How to Repair a Broken Tent Pole in the Field
A snapped pole is the most common field failure, accounting for roughly 60 percent of all tent damage events according to Treeline Review. The good news is that a repair sleeve (also called a splint) can fix most breaks in under 10 minutes. Here is the field-proven process I use.
Step 1: Assess the Damage and Find the Break
If your tent collapses, do not panic. Carefully exit the shelter and identify where the pole broke. Most breaks show an obvious kink, hairline crack, or complete separation. Mark the break point with a small piece of tape so you can find it again in low light. Take 30 seconds to look for additional damage. A pole that fails once often has hidden stress fractures near the break.
Step 2: Slide the Repair Sleeve Over the Break
Your tent should have come with a metal repair sleeve about 6 inches long. Slide it over one end of the broken pole, then feed both broken halves into the sleeve. Center the sleeve so the break sits in the middle of the splint. This distributes the load evenly and prevents the break from re-snapping under tension. If the sleeve does not fit snugly, wrap one layer of gear tape around the pole before inserting it into the sleeve.
Step 3: Reinforce With Gear Tape
Wrap gear tape around both ends of the sleeve. This prevents the sleeve from sliding off when the pole bends. Two wraps on each end is plenty. Keep the tape tight but not so tight you kink the aluminum pole. The repair should feel solid when you shake the pole gently.
Step 4: Re-tension the Tent and Test
Reinsert the pole into its tent sleeves and re-tension the tent. Gently shake the pole to test the repair. If the splint holds, you are good for the night. Mark the repair with bright tape so you remember to do a permanent repair at home, either with a replacement pole section or a more secure sleeve wrap.
What If the Sleeve Is Too Short for the Break?
Sometimes a break is too severe for a single sleeve. In that case, use two sleeves back-to-back or improvise with a tent stake, a section of trekking pole, or even a sturdy stick. Wrap the improvised splint with shock cord to hold it in place. For aluminum poles, an emergency sleeve can be made by cutting a small section of aluminum tubing from a tent stake and sliding it over the break.
Yes, you can fix a snapped tent pole. The technique above works on both aluminum and fiberglass poles, although fiberglass breaks more easily and often requires full replacement rather than repair. Carry a spare fiberglass section if your tent uses them.
How to Repair a Broken Tent Pole Shock Cord
A pole that loses tension usually has a stretched or broken shock cord. To restring in the field, remove the pole from the tent, tape the new cord to the end of the old cord, and pull the old cord through the pole. Tie the new cord to a pin at the pole end and trim the excess. This is easier than it sounds and takes about 15 minutes per pole. The trick is to use painter’s tape or thin cord tape to keep the connection slim enough to slide through the pole segments.
How to Replace a Broken Pole Segment
If the pole is bent beyond repair, you can replace the segment entirely. Most tent brands sell replacement pole sections by part number. In the field, you can also substitute a section from another piece of gear, such as a tent stake or a trekking pole section, sized down to fit. Mark the pole with the original diameter so you can match it at a gear shop after the trip.
How to Patch a Torn Rainfly or Tent Body
Tears in rainfly fabric typically come from falling branches, abrasion against rocks, or blown-in debris. The repair depends on the tear size. Small pinholes under 1 inch need only adhesive tape. Larger tears need a patch. Knowing the difference saves time and materials in the field.
How to Fix a Ripped Tent Fly: Step-by-Step
- Clean the area: Use an alcohol wipe to remove dirt, oils, and moisture. Allow the area to dry completely. Tape does not stick to wet or dirty fabric. If you cannot dry the rainfly, drape it over a branch in the sun for 20 minutes before patching.
- Trim loose threads: Snip away frayed edges with fabric scissors. Do not cut the actual fabric. A clean edge gives the patch better contact.
- Cut your patch: Use Tenacious Tape or Tear Aid. Cut a patch that extends at least 1 inch beyond the tear on all sides. Round the corners to prevent peeling. Square corners catch on clothing and peel within days.
- Apply the patch: Peel the backing and press the patch firmly over the tear. Work from the center outward to remove air bubbles. Rub the patch with your thumb for 30 seconds to activate the adhesive.
- Seal the edges: For a permanent fix, run a thin bead of seam sealant around the patch edges. This prevents water from creeping under the tape. Allow 12 to 24 hours of cure time before exposing the patch to heavy rain.
How to Restore a Tent Rainfly After Repairs
Once patches are cured, you can re-waterproof the entire rainfly using a spray-on DWR (Durable Water Repellent) treatment. Apply outdoors, let it dry for 24 hours, and you are back to a like-new rainfly. This is a great way to extend the life of an older tent without buying a new one. Use a DWR spray compatible with your tent fabric. Silicone-based sprays work on silnylon, while fluoropolymer sprays work on PU-coated nylon.
Field Improvisation: No Patch? No Problem
If you have no repair tape in the field, you can improvise a temporary patch using a piece of bandana, a cut section of stuff sack, or even a clean plastic bag. Secure the makeshift patch with duct tape wrapped around the pole or fabric. The duct tape residue issue does not matter on a temporary emergency fix. A bandana patch secured with duct tape can hold for 2 to 3 days of moderate rain.
How to Repair Ripped Tent Mesh
Mesh tears usually come from branches, animal claws, or simply aging fabric. A small rip can become a mosquito highway within hours, especially in tropical Indonesia where mosquitoes carry dengue risk. Repair mesh promptly to keep insects and pests out of your sleeping space.
Supplies for Mesh Repair
- Mesh patch kit: Most tent brands sell patches made of matching no-see-um mesh. These are the best option for a permanent repair because the patch matches the original airflow characteristics of the tent.
- Tenacious Tape: A 2-inch strip of Tenacious Tape works on small mesh holes less than 0.5 inch. Cut small squares that overlap the hole by at least 0.25 inch on all sides.
- Fine needle and thread: For sewable mesh repairs done back at camp. Use polyester thread that matches the mesh color.
- Fabric glue: Specialized mesh glue such as GEAR AID mesh adhesive works for holes where you cannot sew.
Mesh Repair Procedure
- Clean the mesh area with water and let it dry. Mesh holds moisture longer than solid fabric, so allow extra drying time.
- Cut a mesh patch at least 1 inch larger than the hole on all sides.
- Apply adhesive (Tenacious Tape or specialized mesh adhesive) to the patch edges.
- Press the patch over the hole, working from center outward.
- For sewable mesh, use a fine running stitch around the patch edge. Use small stitches to avoid creating new holes.
If you have no mesh patch, glue a small piece of fine fabric or even a small piece of bandana over the hole. The goal is to keep insects out, not to make the patch invisible. In a pinch, a small amount of seam sealant alone can plug a tiny mesh hole until you reach home.
How to Repair a Tent Zipper in the Field
Zippers fail more often than most campers realize. A sticky zipper can tear the tent fabric, and a separated slider can leave your door flapping open in wind. Field repair is straightforward.
Common Zipper Failures and Fixes
- Sticky zipper: Rub a graphite pencil or beeswax along the teeth. This lubricates the slider without attracting dirt.
- Separated slider: Use pliers to gently squeeze the slider back into shape. The slider is the part that moves along the teeth. Squeeze the back of the slider until it grips the teeth again.
- Broken zipper pull: Tie a small loop of cord through the slider hole to act as a pull tab. This is a quick fix that works until you can install a proper replacement pull.
When to Replace a Zipper
If the teeth are damaged or the slider is bent beyond repair, a field fix is not possible. Mark the failure point, keep the door closed with a safety pin or clip, and replace the zipper at home. Most outdoor retailers sell replacement zippers sized to common tent openings.
Field Emergency Tips: When You Have No Repair Kit
Sometimes the worst happens at the worst time. You forgot the kit, used it on a previous trip, or it rained through. Here is how to improvise a field repair with whatever is in your pack or your surroundings.
Improvised Pole Splint Options
- A section of trekking pole slid inside the broken pole segment for added rigidity
- A sturdy stick from the surrounding forest, trimmed to fit the sleeve
- A straightened tent stake wrapped in fabric for grip
- A carabiner inserted across the break to hold alignment while you wrap with cord
- A pencil, marker, or similar rigid object inserted into the pole as a temporary core
Improvised Fabric Patch Options
- A cut strip from a bandana or buff secured with duct tape
- A piece of clean plastic bag, taped over the hole on both sides
- A piece of a waterproof stuff sack liner, ideal for emergency rainfly repair
- Tenacious Tape-free temporary seam seal with candle wax and a heating source. Light a candle, drip the wax over the hole, and press a small piece of fabric into the molten wax. Allow to cool.
- A leaf folded over the hole and secured with cord or tape. Works in a real pinch.
When to Abort and Seek Shelter
Some damage is beyond field repair. If your tent is structurally unsound and the storm is intensifying, do not stay. Locate a tree well, a rock overhang, or a natural windbreak. Hypothermia is a bigger risk than a wet night. Survive first, repair second. In tropical conditions, flash floods and lightning are a more pressing risk than a torn rainfly. Move to higher ground and wait out the worst of the weather before attempting repairs.
Indonesian-Specific Field Repair Considerations
Camping in tropical Indonesia brings unique challenges. High humidity slows adhesive curing times, often doubling the time needed for patches to bond. Heavy rain makes patch work nearly impossible during monsoon months. Heavy dew in the morning soaks everything. Plan repairs during the driest window, usually mid-afternoon. Keep your repair kit in a dry bag inside your pack, never attached to the outside where it gets soaked. Salt air near the coast can corrode metal splints over time. Rinse your repair kit with fresh water and dry it thoroughly after every trip.
Preventive Tent Care to Minimize Field Repairs
The best repair is the one you never need. A few habits dramatically reduce your risk of field failure and extend the overall life of your tent. Our team has cut repair events by 80 percent by following the pre-trip and during-trip steps below.
Pre-Trip Inspection Checklist
- Check all pole segments for cracks or dents. Stress-test the shock cord tension by stretching each section.
- Inspect the rainfly for thin spots, especially on seam lines and stake-out points.
- Examine mesh for small holes. A small hole grows quickly in wind.
- Test zippers, especially around storm flaps. Lubricate with beeswax or zipper lube.
- Re-seam seal any questionable seams before the trip. Pay attention to factory-sewn seams that show signs of wear.
- Check stake loops and guy lines for abrasion or fraying.
During the Trip
- Use a footprint or ground sheet under your tent. This dramatically reduces wear on the floor and protects against sharp objects.
- Stake out the rainfly taut. A loose rainfly flaps and tears faster in wind.
- Avoid pitching under dead branches. Widow-makers are an underrated cause of field repair.
- Ventilate your tent. Condensation weakens DWR coatings over time and leads to mildew.
- Do not cook inside the tent. Hot embers can melt fabric and damage mesh.
Post-Trip Care
- Air dry the tent fully before storage. Mildew destroys fabric and adhesives within weeks.
- Store loosely in a cool, dry place. Compression over long periods weakens seams and damages DWR coatings.
- Reapply DWR coating every 2 years for regular use.
- Inspect for damage and patch small issues before they become big ones.
- Wash tent fabric occasionally with a gentle technical cleaner to remove body oils and sap.
When to Use Professional Repair Services
Field repair is for emergencies. For permanent fixes, consider professional services. REI, Mountain Equipment Repair, and most tent manufacturers offer mail-in repair services. Seams, zipper replacements, and full re-proofing are best done at home or by a professional. Field repairs are temporary and should be re-evaluated after the trip. Most manufacturers offer repair at a fraction of replacement cost. Contact your tent brand before throwing out a damaged tent.
Frequently Asked Questions About Tent Field Repair
How to fix a ripped tent fly?
To fix a ripped tent fly, clean the area with an alcohol wipe, trim loose threads, cut a Tenacious Tape or Tear Aid patch extending at least 1 inch beyond the tear, apply it firmly from the center outward, and seal the edges with seam sealant for a permanent waterproof repair.
Can you fix a snapped tent pole?
Yes, you can fix a snapped tent pole using a repair sleeve or splint. Slide the metal sleeve over both broken ends, center the break in the middle of the sleeve, and wrap the ends with gear tape to prevent slipping. The repair holds for the rest of the trip and can be reinforced permanently at home.
What is the best tape to repair tents?
Tenacious Tape is the best all-purpose tape for repairing tents made of nylon or silnylon. Tear Aid is best for vinyl, rubber, or TPU materials. Avoid duct tape because it leaves residue that prevents future repairs and fails in wet conditions.
How to restore a tent rainfly?
To restore a tent rainfly, patch any holes with Tenacious Tape, re-seal leaking seams with seam sealant, and reapply a spray-on DWR treatment to restore waterproofing. Allow each layer to cure fully between steps for the best results.
How to fix ripped tent mesh?
To fix ripped tent mesh, clean the area, cut a mesh patch at least 1 inch larger than the hole, and apply it with mesh adhesive or Tenacious Tape. For sewable mesh, use a fine needle and thread with a running stitch around the patch edge.
How to repair tent pole shock cord?
To repair tent pole shock cord, tape the new cord to the end of the old cord, pull the old cord through the pole to thread the new one, then tie the new cord to a pin at the pole end and trim the excess. The process takes about 15 minutes per pole.
Can I use duct tape to repair a tent?
Duct tape works only as a temporary emergency fix. It leaves sticky residue that prevents future repairs, fails in wet conditions, and breaks down within 48 hours when exposed to moisture. For best results, use Tenacious Tape or Tear Aid designed for tent fabrics.
Conclusion
Knowing how to repair a broken tent pole or torn rainfly in the field is a survival-level skill for any camper. A small repair kit, the right supplies, and a calm approach will keep your tent standing through storm, wind, and accident. Pack a splint, Tenacious Tape, and a spare shock cord before your next trip. Practice the techniques at home so they are second nature when you need them in the field. Your tent, your sleep, and your trip will thank you.