
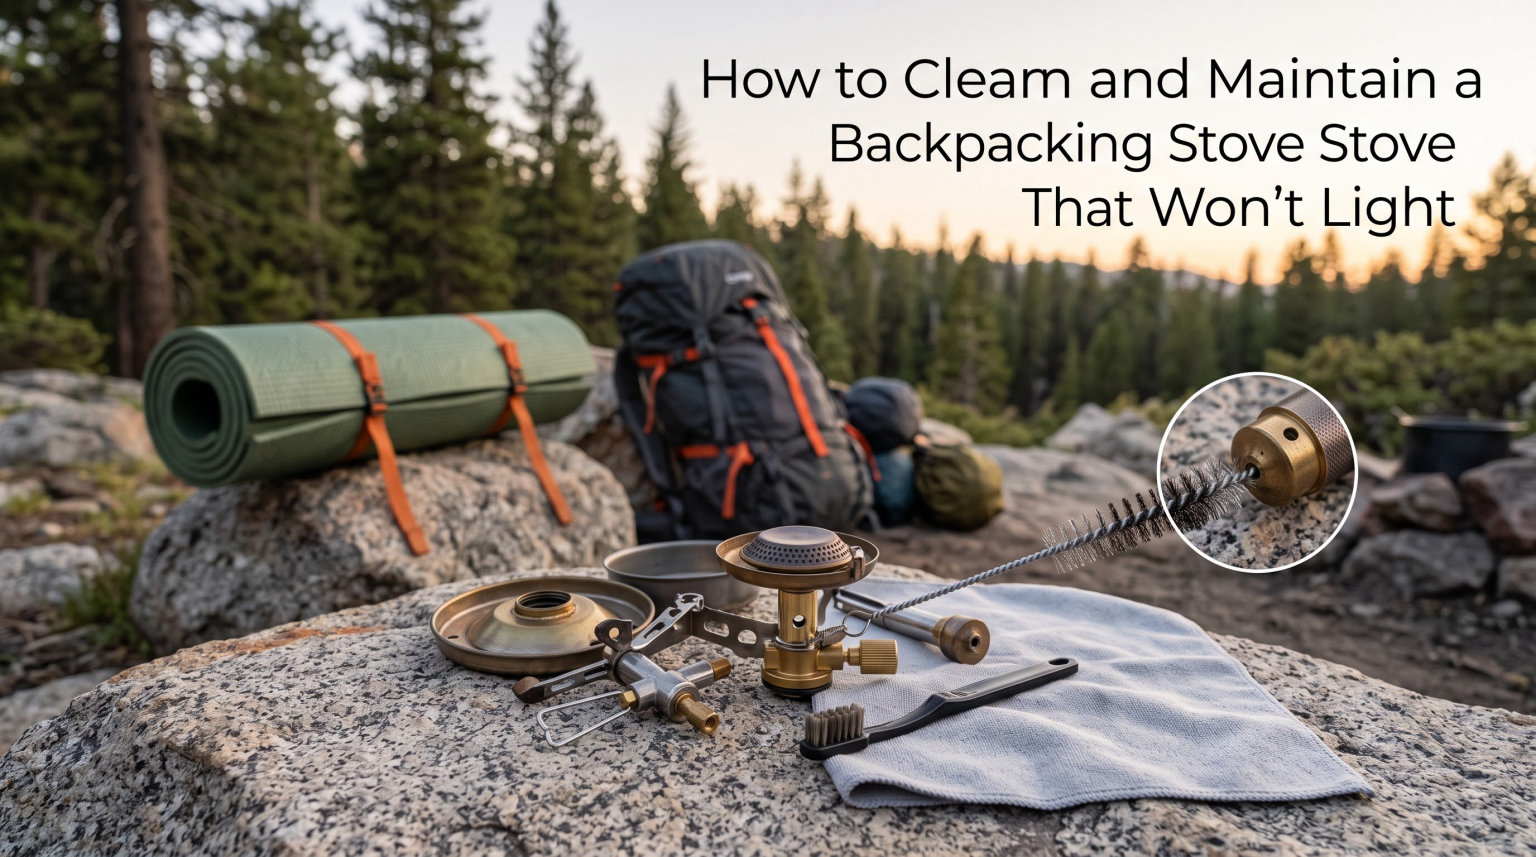
There is nothing worse than settling into camp after a long day on the trail, only to find your backpacking stove won’t light. No hot meal, no warm drink, and a long cold night ahead. After years of backpacking and more than a few stubborn stoves myself, I can tell you that almost every ignition failure comes down to one of a handful of fixable causes.
This guide walks you through exactly how to clean a backpacking stove that won’t light, from quick field fixes to full at-home deep cleaning. I will cover canister stoves, liquid fuel stoves, and enclosed system stoves like the MSR Reactor and Windburner. You will also find a clear troubleshooting checklist, a list of the tools you actually need, and the safety warnings every backpacker should know before poking around a fuel jet.
Most “dead” stoves are not dead at all. They are dirty, clogged, or suffering from a loose connection that takes two minutes to fix. Let’s get your stove firing again.
Table of Contents
Why Your Backpacking Stove Won’t Light: Common Causes
A backpacking stove fails to light for four main reasons: the fuel is not reaching the burner, the jet is clogged, the igniter is broken, or the air-to-fuel mixture is off. Pinpointing which one is the real problem is half the battle.
The single most common cause is a clogged jet or burner port. Carbon buildup, leftover fuel residue, and tiny debris particles collect inside the brass jet over time. Once the opening narrows, fuel either cannot pass through or comes out in a weak, sputtering stream that will not catch.
The second most common issue is a faulty piezo igniter. These push-button sparkers are fragile and fail often, especially on budget stoves. The good news is that a dead piezo does not mean a dead stove. You can still light the burner with a lighter or match while you sort out a permanent fix.
Fuel flow problems rank third. A loose canister connection, a partially closed valve, or a kinked fuel line can all stop gas from reaching the burner. Many backpackers assume the stove is broken when the canister simply was not threaded on fully.
Finally, the air-to-fuel ratio matters. If too much air sits in the burner tube, the spark will click but no flame will appear. This happens most with liquid fuel stoves that have been sitting unused for a season.
How to Clean a Backpacking Stove: Troubleshooting Checklist
Follow these steps in order to diagnose and fix a stove that won’t light. I have arranged them from the fastest, easiest checks to the ones that require more disassembly.
Step 1: Check the fuel canister connection. Unscrew the stove, inspect the threads, and reattach it firmly. A loose or cross-threaded connection is the number one reason a canister stove fails to deliver fuel. Make sure the canister itself is not empty.
Step 2: Listen for gas flow. Open the valve slowly with the stove away from your face and any flame. If you hear a steady hiss, fuel is flowing and the problem is likely the igniter or jet. If you hear nothing, the valve, line, or canister is the culprit.
Step 3: Test the piezo igniter in the dark. Cup your hand over the burner to block light and click the igniter. You should see a small blue spark arc across the electrode. No spark means the piezo is dead and you will need a lighter to confirm the stove otherwise works.
Step 4: Try lighting with a match or lighter. If the stove lights fine with a flame held near the burner, your igniter is the only problem. The stove itself is healthy.
Step 5: Blow gently across the burner from the side. This simple trick, shared widely in backpacking forums, works when the air-to-fuel mixture is too lean to catch. A gentle puff adds just enough turbulence to help the gas ignite.
Step 6: Clean the jet with a needle. If the stove still will not light or burns yellow and weak, the jet is clogged. Use the cleaning needle that came with your stove, or a fine sewing needle, to ream out the jet opening. See the stove-specific sections below for details.
Step 7: Use the shaker needle if your stove has one. Liquid fuel stoves like the MSR WhisperLite have a built-in shaker needle inside the fuel line. Flip the stove upside down and shake it vigorously a few times to clear the jet.
Step 8: Deep clean at home. If none of the above works, the stove needs a full teardown and cleaning. The sections below walk you through that process for each stove type.
How to Clean Canister Stoves
Canister stoves like the MSR PocketRocket, Snow Peak GigaPower, and Jetboil Zip are the most popular backpacking stoves on the trail. They are also the easiest to maintain, because isobutane fuel burns cleanly and leaves little residue. Most cleaning is about keeping the burner head clear and the jet open.
In-Camp Quick Cleaning
In the field, your goal is to keep the burner ports clear and remove food debris before it bakes on. Let the stove cool completely, then brush the burner head gently with a soft nylon brush or the corner of a bandana. Never use a metal tool or abrasive pad on the burner, because scratching the brass and aluminum parts causes corrosion.
If a burner port is visibly blocked, use the tip of a safety pin to gently clear the opening. Work from the outside in and avoid pushing debris deeper into the jet. Blow the loosened particles away from the burner.
Wipe the piezo igniter electrode with a dry cloth. Carbon can build up on the tip and weaken the spark. A clean electrode produces a stronger, more reliable arc.
At-Home Deep Cleaning
At home, detach the stove from the canister and disassemble any parts the manufacturer allows. Soak the burner head in warm water with a few drops of mild biodegradable detergent. Use a soft toothbrush to scrub away baked-on food and carbon. The Great Outdoors magazine recommends a white vinegar and water mix or a baking soda paste for stubborn deposits, and both work well on brass and aluminum parts without causing corrosion.
Rinse every part thoroughly with clean water. Shake out excess moisture and let all components air dry completely before reassembly. Trapped water inside the fuel path can cause sputtering on your next trip.
Run the cleaning needle through the jet opening two or three times to clear any carbon you cannot see. Reassemble the stove, attach a canister, and test-fire it on a low setting before packing it away. A quick test now saves a cold dinner later.
Never submerge a canister stove in water while it is attached to the canister. Never spray it with WD-40 or any petroleum-based lubricant. The residue will burn, smoke, and contaminate your food on the next lighting.
How to Clean Liquid Fuel Stoves
Liquid fuel stoves like the MSR WhisperLite, DragonFly, and SimmerLite burn white gas, which leaves more carbon and soot than canister fuel. These stoves need more frequent cleaning, but they are also designed for it. Most have built-in field-cleaning features that let you fix a clog in under a minute.
Field Cleaning with the Shaker Needle
The shaker needle is your best friend on the trail. Inside the fuel line of most MSR stoves, a tiny weighted needle sits poised above the jet. When the stove starts burning yellow, sputtering, or losing power, the jet is clogging. Turn the stove upside down and shake it sharply three or four times. The needle punches through the carbon and clears the opening.
Pump the stove back up, open the valve, and relight. In most cases the flame returns to a clean blue immediately. This is the single most useful field repair skill a liquid-fuel stove owner can learn.
If the shaker needle does not solve it, let the stove cool fully and remove the fuel line. Use the supplied cleaning needle to manually ream the jet from the outside. Spin the needle gently rather than forcing it, so you do not widen the precision opening.
At-Home Deep Cleaning
At home, disassemble the stove according to the manual. Remove the fuel line, jet, and burner assembly. Soak the metal parts in warm soapy water and scrub with a soft brush. Pay close attention to the fuel line connection points, where white gas residue tends to collect and harden.
The pump cup, the small leather or plastic seal on the pump plunger, needs occasional oiling to stay airtight. A drop of mineral oil worked into the cup keeps the pump holding pressure. A dry pump cup is a common cause of weak fuel flow that mimics a clogged jet.
Inspect the fuel bottle cap and pump check valve for debris. Replacing a worn O-ring costs almost nothing and prevents frustrating pressure loss. Reassemble, pressurize the bottle, and test-fire the stove outdoors before your next trip.
If you have stored the stove with fuel in the line for more than a few months, flush the system with fresh white gas before relying on it. Stale fuel turns gummy and is a frequent cause of a stove that won’t light after long storage.
How to Clean System Stoves (Reactor and Windburner)
System stoves like the MSR Reactor and Windburner pair a sealed burner with an integrated pot. They are the most wind-resistant and efficient stoves on the market, but their enclosed design means cleaning is different from open burner stoves.
The burner on a system stove sits inside a radiant heat reflector, protected from wind and most food splatter. This means it stays cleaner for longer. In most cases, all you need to do is wipe the inside of the pot and the burner housing with a damp cloth after each use.
If the stove starts underperforming, the most likely cause is a blocked pressure regulator or fuel port, not a dirty burner head. Remove the pot support and inspect the small fuel port at the base of the burner assembly. Clear it gently with the supplied needle.
Do not attempt to disassemble the pressure regulator or internal valve. These are sealed units, and opening them voids the warranty and can create a serious safety hazard. If cleaning the visible port does not restore performance, contact the manufacturer for service.
The Windburner’s pot has a non-stick ceramic coating. Clean it with a soft sponge and mild detergent only. Abrasive scrubbers and steel wool will scratch the coating and shorten the pot’s life.
Safety Warnings: Backburn and Clogged Jets
Before you poke anything into your stove, you need to understand two serious dangers. These are not theoretical risks. Real backpackers have been burned, and in rare cases, equipment has been destroyed.
Backburn happens when the flame reverses direction and burns back through the fuel line toward the canister or fuel bottle. It occurs when a clogged jet creates enough pressure to push the flame backward, or when the burner head is blocked and fuel ignites at the wrong point. The result is a fire inside the stove body that you cannot easily extinguish.
To prevent backburn, never operate a stove with a severely clogged jet. If the flame is yellow, sputtering, or producing soot, shut it down and clean the jet before continuing. A healthy flame is blue and steady.
Clogged jet pressure is the second danger. A fully blocked jet can allow pressure to build in the fuel line. When you finally clear the blockage, fuel can spray unexpectedly. Always point the jet away from your face and any ignition source when clearing it.
Never submerge a pressurized canister or any part of a canister stove in water while it is attached to a fuel source. Water that enters the fuel path will cause irregular burning and can damage the internal valve. Always detach the canister before any wet cleaning.
Never use petroleum products like WD-40, gasoline, or kerosene as cleaning agents on the burner head. These leave flammable residue that ignites unpredictably on the next use. Stick to mild detergent, white vinegar, baking soda, or isopropyl alcohol.
Signs Your Stove Needs Maintenance
Catching problems early prevents trail failures. Watch for these warning signs between trips and during use.
A yellow or orange flame instead of a blue one means the jet is partially clogged or the air-to-fuel mixture is off. This is the most common early warning sign and the easiest to fix with a cleaning needle.
Sputtering, popping, or an uneven flame indicates fuel flow is inconsistent. The jet may be dirty, the pump cup may be dry, or the fuel line may have debris in it.
A weak click or no spark from the piezo igniter means the electrode is dirty, misaligned, or broken. Clean it first before assuming it has failed.
Reduced boil times, even with a full canister, suggest the burner ports are partially blocked. Compare your current boil time to the stove’s rated performance.
A smell of fuel when the stove is off indicates a leak in the connection or fuel line. Stop using the stove immediately and inspect every seal.
Tools and Supplies for Stove Maintenance
You do not need a workshop to keep a backpacking stove running. A small maintenance kit that fits in a stuff sack handles 95 percent of trail repairs. Here is what to carry.
A cleaning needle is the most important tool. Most stoves ship with one, but a fine sewing needle or the wire from a twist tie works in a pinch. Use it to clear the jet opening.
A soft nylon brush or old toothbrush removes food debris and carbon from the burner head. MSR recommends avoiding anything abrasive, because brass and aluminum parts scratch easily.
A small bottle of isopropyl alcohol (90 percent or higher) dissolves stubborn fuel residue. Forum users report soaking clogged parts for several hours restores flow. Alcohol evaporates cleanly and leaves no harmful residue.
A multi-tool with pliers lets you tighten connections and remove hot parts safely. Look for one with a fine tip for gripping small components.
A backup lighter or matches keeps you cooking if the piezo igniter fails. This single item has saved more backpacking dinners than any other.
For liquid fuel stoves, add a small bottle of mineral oil for the pump cup and a few spare O-rings sized for your model. These weigh almost nothing and prevent the most common field failures.
Preventive Care Tips to Keep Your Stove Lighting
The best repair is the one you never need. A few habits, practiced every trip, keep a stove lighting reliably for years.
Always let the stove cool before packing it. A hot stove tossed into a stuff sack melts pots, melts plastic, and bakes food residue into permanent carbon.
Wipe the burner head after every use while it is still warm. A quick swipe with a cloth removes spills before they carbonize.
Run the cleaning needle through the jet after every few trips, even if the stove is working fine. Preventive clearing is faster than field troubleshooting in the cold.
Store liquid fuel stoves dry. Empty the fuel line and burn off residual fuel at the end of each season. Stale white gas turns to varnish inside the line and is the leading cause of springtime ignition failures.
Pack the stove in a dedicated bag separate from food. This keeps dirt and food particles out of the burner and jet.
Cleaning Tough Substances Off Your Stove
Sometimes your stove gets dirty in ways that go beyond normal use. Here is how to handle the worst cases.
Saltwater exposure causes rapid corrosion on brass and aluminum parts. If your stove gets splashed at the coast or on a kayak trip, rinse every part with fresh water as soon as possible. Dry thoroughly and apply a light film of mineral oil to bare metal surfaces before storage.
Melted plastic on the burner or pot support is a nightmare. Let the stove cool, then peel off what you can by hand. Soften the remaining plastic with a few drops of isopropyl alcohol and scrape gently with a wooden or plastic tool. Never use a metal scraper, which will gouge the metal underneath.
Heavy carbon buildup on the burner head responds well to a baking soda paste. Mix baking soda with a little water, apply it to the deposit, let it sit for 15 minutes, then scrub with a soft brush and rinse.
Spilled food in the burner ports requires patience. Pick out large pieces with a toothpick, then flush the area with warm soapy water and air dry completely. Test-fire on low to confirm every port is open before relying on the stove.
When to Send Your Stove for Professional Repair
Some problems are beyond field repair. If your stove leaks fuel when the valve is closed, has a cracked or deformed burner head, or has internal regulator damage on a system stove, stop using it and contact the manufacturer.
MSR and other major brands offer repair services and sell replacement parts directly. A worn fuel line, a damaged pump, or a failed pressure regulator are all replaceable for far less than the cost of a new stove. Attempting to rebuild sealed components yourself risks a fuel leak or backburn.
If the stove is more than 15 years old and parts are no longer available, replacement is usually the safer and more economical choice. Older seals and valves degrade even without use, and a failure at altitude or in cold weather is not worth the risk.
FAQs
Why is my camping stove not lighting?
Your camping stove is not lighting because of a clogged jet, a faulty piezo igniter, a loose fuel canister connection, or an incorrect air-to-fuel mixture. Start by checking the canister connection, then listen for gas flow, test the igniter in the dark, and clean the jet with a needle. Most stoves that click but produce no flame have either a blocked jet or a dead igniter.
How to clean a backpacking stove?
To clean a backpacking stove, let it cool fully, detach the fuel source, brush the burner head with a soft nylon brush, clear the jet with a cleaning needle, and wipe the piezo electrode. For a deeper clean at home, soak removable metal parts in warm soapy water or a white vinegar solution, scrub with a soft toothbrush, rinse, and air dry completely before reassembly.
How to clean a stove burner that won’t light?
To clean a stove burner that won’t light, first remove any visible debris from the burner ports with a safety pin or the supplied cleaning needle. Soak the burner head in warm soapy water, scrub gently with a soft brush, and ream the jet opening two or three times with a fine needle. Rinse, air dry fully, and test-fire on a low setting to confirm every port is open.
Why is my stove not lighting after being cleaned?
If your stove still will not light after cleaning, the piezo igniter is likely dead. Test by clicking it in the dark to look for a spark. If there is no spark, light the stove with a match or lighter. If it lights manually, replace the igniter. Other causes include a still-clogged jet, trapped water in the fuel path that was not fully dried, or a loose canister connection that needs re-threading.
Conclusion
Learning how to clean a backpacking stove that won’t light is one of the most practical skills a backpacker can develop. Almost every ignition failure traces back to a clogged jet, a dead igniter, a loose connection, or a fuel flow problem, and all of these are fixable with a small kit and a few minutes of patience.
Work through the troubleshooting checklist in order, clean your stove by type, and respect the safety warnings about backburn and clogged jets. Carry a backup lighter, run your cleaning needle after every few trips, and store liquid fuel stoves dry between seasons. Do that, and your stove will keep lighting reliably on trip after trip, no matter how far you are from the trailhead.
If your stove has a cracked burner head, a leaking valve, or a failed sealed regulator, contact the manufacturer for professional repair rather than risking a field fix. Your safety on the trail is worth more than any piece of gear.