
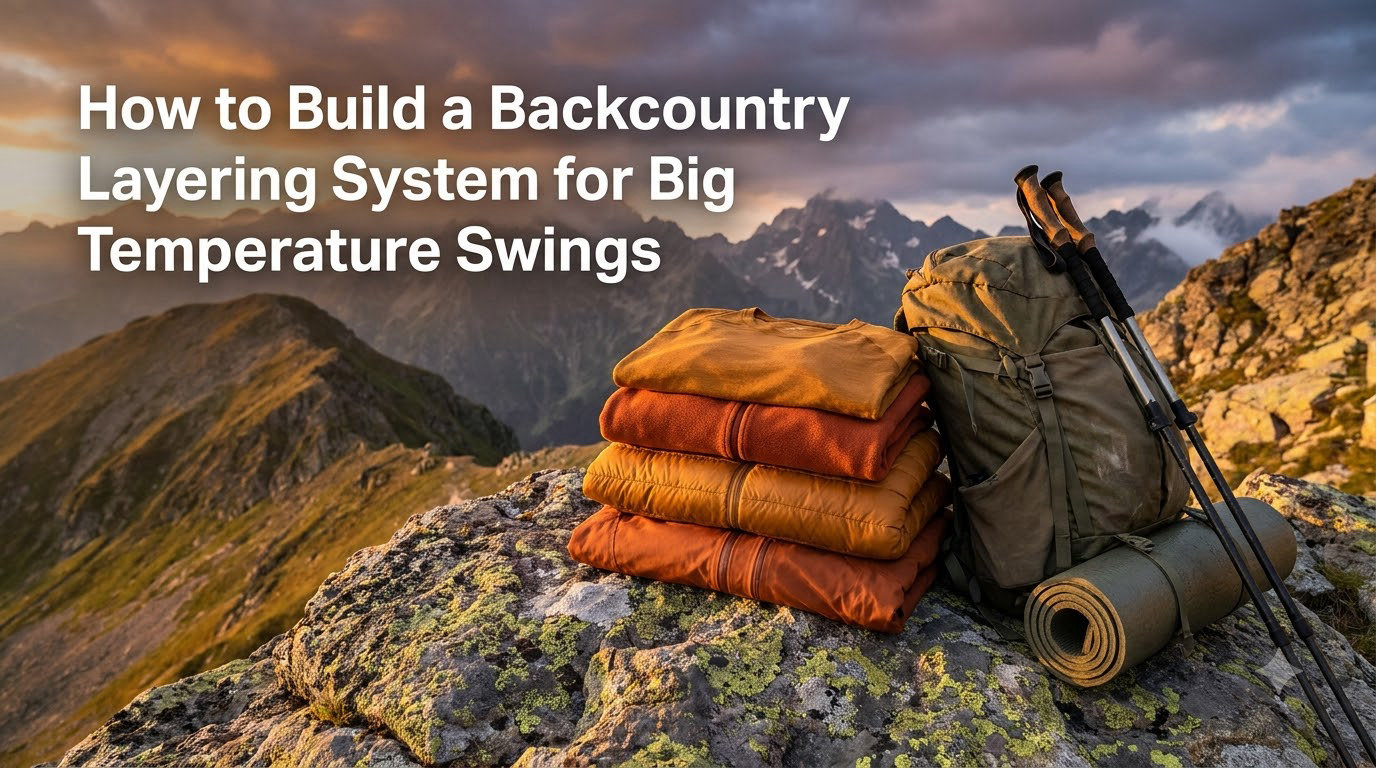
Picture this. You start your climb at dawn in a frosty 18 degrees, work up a full sweat by mid-morning as the sun hits the slope, then strip down to a single layer. By the time you reach the ridgeline, the wind cuts through everything and the thermometer has swung 45 degrees in the other direction. That whiplash is exactly why a good backcountry layering system matters more than any single jacket you own.
I have spent years getting the temperature regulation piece wrong before it finally clicked. The secret is not buying the warmest gear. It is building a system where every piece has a specific job, works with the others, and lets you add or shed warmth in seconds when the conditions flip. This guide walks through exactly how to build that system for trips where the temperature can swing 40 degrees or more in a single day.
Here is what you will learn: how the three-layer system actually functions, how to choose between merino wool and synthetic materials, how to pick the right insulation for wet versus dry cold, and the specific tactics backcountry veterans use to manage wild temperature swings without freezing or soaking themselves in sweat. By the end, you will have a repeatable system you can adapt to any trip, any season, and any activity level.
Table of Contents
What Is a Backcountry Layering System?
A backcountry layering system is a coordinated set of clothing layers designed to manage your body temperature and moisture during outdoor activities in cold, variable conditions. Each layer does one specific job: move sweat away from your skin, trap warm air around your body, or block wind and water from getting in. Stack them together and you get a system that adapts as your effort and the weather change.
The key word is system. A random pile of warm clothes is not a layering system. A true system means the layers are chosen to work together, layer on and off quickly, and pack down small so you can carry spares without weighing yourself down.
Why does this matter? Because getting it wrong is not just uncomfortable, it is dangerous. Overdress on the climb and you soak your insulation in sweat, which then freezes the moment you stop moving. Underdress on the descent and you risk hypothermia. The backcountry does not forgive bad temperature management.
Who needs this? Backcountry skiers, ski tourers, splitboarders, winter hikers, ice climbers, mountaineers, and anyone spending extended time outdoors where the conditions shift fast. If your trip involves climbing and then standing still, you need a layering system.
How to Build a Backcountry Layering System for Big Temperature Swings
Building a backcountry layering system for big temperature swings comes down to one principle: every layer must earn its place by either moving moisture, trapping heat, or blocking weather, and you must be able to add or remove layers without breaking stride. The classic approach is the three-layer system, and it still works because the physics behind it are sound.
The base layer sits against your skin and wicks sweat outward. The mid layer sits over the base and traps the warm air your body produces. The outer shell blocks wind, rain, and snow while letting moisture escape. Get those three jobs right and the system handles almost anything.
For trips with big temperature swings, you add flexibility on top of that foundation. This means carrying a lightweight insulating layer you can throw on for stops, choosing pieces that vent aggressively, and organizing your pack so layers are reachable in under thirty seconds. The goal is to never be too hot or too cold for more than a few minutes.
The Three-Layer System Explained
Let me break down the jobs so the system makes sense before we get into material choices.
Base layer (moisture management): Snug against the skin, this layer pulls sweat away from your body and spreads it across a large surface area so it can evaporate. It should never hold moisture, because wet fabric against skin steals heat fast.
Mid layer (insulation while moving): This is your active warmth layer, usually a fleece or thin synthetic pullover. It traps a pocket of warm air around your core while still letting moisture pass through to the shell.
Shell layer (weather protection): The outer barrier that stops wind, rain, and snow from getting in while letting water vapor from your sweat escape outward. Without it, the inner layers lose all their insulating value in wind or wet conditions.
On top of those three, most backcountry travelers add a dedicated stop layer, a warm puffy jacket that lives in the pack and comes out for belays, summits, lunch breaks, and emergencies. That piece is not part of the active system, but it is the layer that saves you when the temperature drops and you stop moving.
Base Layer: Your Moisture Management Foundation
The base layer is the most underrated piece of the whole system. Get this wrong and no amount of expensive insulation will save you, because wet skin loses heat up to twenty-five times faster than dry skin. Your base layer’s only job is to keep your skin dry.
There are two materials that actually work for backcountry use: merino wool and synthetic fabrics. Cotton is completely out, because it holds moisture and turns into a cold sponge against your body.
Merino Wool vs Synthetic Base Layers
Merino wool is the gold standard for most backcountry users. It wicks moisture well, stays warm even when damp, and naturally resists odor so you can wear it for days on a multi-day trip without stinking up the tent. The downside is it dries slower than synthetic and costs more. A good merino base layer can run two to three times the price of an equivalent synthetic.
Synthetic base layers (polyester and nylon blends) dry faster than merino, cost less, and hold up better to abrasion and repeated washing. They are the better choice for high-output activities where you will be sweating heavily and need the fabric dry again fast. The trade-off is they stink after one hard day and lose some insulation value when wet compared to wool.
My rule of thumb: choose merino for multi-day trips and moderate output where odor resistance matters. Choose synthetic for single-day high-output missions like race-pace ski touring where you will be soaked and need fast drying. For big temperature swing trips that span several days, merino wins because you can re-wear it and it stays warm through damp spells.
Base Layer Weight Choices
Base layers come in three general weights, and the weight you pick sets the baseline temperature range for your whole system.
Lightweight (around 150 GSM): Best for high-output activities and warmer conditions. Thin enough to wear under everything without bulk, dries the fastest, and gives you the most flexibility to add warmth on top. This is the most versatile choice if you can only own one base layer weight.
Midweight (around 200-250 GSM): The all-around workhorse for cold conditions. Warm enough for winter use on its own under a shell, but still manageable when you heat up. This is what most backcountry skiers reach for on typical winter days.
Heavyweight (300+ GSM): Built for extreme cold and low-output activities like ice climbing belays or winter camping. Too warm for most active climbing, so it usually functions as a second layer or a dedicated rest layer rather than an active base.
Mid Layer: The Heat Trap
The mid layer is where you store the warmth you generate while moving. It sits over your base layer and under your shell, trapping a layer of warm air against your body. The two main options are fleece and thin synthetic insulation, and they behave differently enough that many backcountry travelers carry one of each.
Fleece Mid Layers
Fleece is the most popular mid layer for good reason. It breathes exceptionally well, stays warm when damp, dries quickly, and handles repeated layering without losing loft. Micro-grid fleece has become the favorite among backcountry skiers and climbers because the grid pattern traps warmth in the squares while letting moisture move through the channels. It is also lighter and more packable than traditional thick fleece.
The weakness of fleece is wind. A strong breeze cuts straight through most fleece and strips away the warm air it is supposed to hold. That is fine when you are moving and want ventilation, but it means you should never rely on fleece alone in exposed conditions.
Synthetic Insulation Mid Layers
Thin synthetic pullovers and jackets work as a warmer, more wind-resistant alternative to fleece. They trap more heat per ounce than fleece, block wind better, and still insulate when wet. The trade-off is they breathe less than fleece, so you risk overheating on hard climbs.
My approach for big temperature swings is to carry a light micro-grid fleece for the climb and a thin synthetic puffy for the transition and stops. The fleece vents when I am working hard, and the synthetic adds instant warmth the moment I stop or hit a cold stretch. That two-piece mid layer combo handles more conditions than any single piece could.
Insulating Layer: Down vs Synthetic Puffy
The insulating layer is your stop layer, the warm puffy jacket that comes out for summits, belays, lunch breaks, and emergencies. This is the warmest piece in your pack, and the choice between down and synthetic insulation comes down to one question: how wet will it get?
Down Insulation
Down offers the best warmth-to-weight ratio of any insulation on the market. Nothing else keeps you as warm for as little weight and packed size. Quality down also lasts for decades if you care for it. Fill power is the rating you will see, ranging from about 600 to 900-plus. Higher fill power means more loft and warmth per ounce, which means you can carry serious warmth in a package the size of a cantaloupe.
The catch is down’s fatal flaw: it loses almost all its insulating value when wet. A soaked down jacket becomes a cold, clumpy liability. Hydrophobic down, treated to resist moisture, extends the working window in damp conditions, but it is not a substitute for a waterproof shell. Down is the right call for cold, dry conditions like high-altitude mountaineering, desert winter trips, or anywhere precipitation is unlikely.
Synthetic Insulation
Synthetic insulation, made from polyester fibers, keeps working when wet. If your puffy gets soaked in a storm, a synthetic jacket still traps heat and dries fast. It is also easier to wash and generally costs less than equivalent-quality down.
The downside is synthetic is heavier and bulkier than down for the same warmth. A synthetic jacket that matches a high-fill down jacket for warmth might weigh a third more and take up twice the pack space. For most backcountry trips where weight matters, that trade-off is real.
Down vs Synthetic: The Decision Guide
Choose down when you expect cold, dry conditions and weight is your priority. Choose synthetic when you expect wet weather, high humidity, or frequent soakings. For a big temperature swing trip in a maritime climate where conditions flip from sunny to stormy in an afternoon, synthetic is the safer bet. For a dry continental winter trip where you need maximum warmth for the weight, down wins.
My personal setup is a high-fill down puffy for cold, dry objectives and a synthetic puffy for everything else. If I had to own just one, I would pick synthetic because the cost of a wet, useless insulating layer in the backcountry is too high to risk.
Shell Layer: Your Wind and Water Defense
The shell is the layer that makes the rest of the system work. Without a windproof, waterproof barrier, your base and mid layers lose their insulating value the moment the weather turns. Wind strips warm air out of fleece and insulation. Wet layers conduct heat away from your body. The shell stops both.
Hardshell vs Softshell
Hardshells are fully waterproof and windproof jackets built around a membrane like Gore-Tex. They handle the worst weather, shed heavy precipitation, and block wind completely. The trade-off is they breathe less than softshells, so moisture can build up inside during hard effort. For full storm conditions and big temperature swings where rain or wet snow is in the forecast, a hardshell is non-negotiable.
Softshells are stretchy, highly breathable jackets that shed light precipitation and block most wind while letting moisture escape freely. They are the better choice for high-output activities in cold, relatively dry conditions. I run a softshell on the skin track almost every time because it breathes well enough to keep me dry during the climb and still cuts the wind on the descent.
Breathability Is Everything
For backcountry use, breathability matters as much as waterproofing. A shell that does not breathe traps the sweat your base layer is trying to move outward, and you end up just as wet from the inside as you would from rain. Look for shells with a proven breathable membrane and, just as importantly, effective ventilation features.
Core vents are the single most important feature on a backcountry shell. These are long underarm zippers (pit zips) and sometimes thigh vents on pants that let you dump heat fast without taking the jacket off. Forum veterans consistently rank core vents as essential for temperature regulation during variable output. If a shell lacks pit zips, keep looking.
Managing Big Temperature Swings on the Trail
This is the part most layering guides skip, and it is the whole reason you are here. Big temperature swings, meaning a forty-degree or larger change in a single day, break the standard advice. You cannot just pick the right layers for the forecasted temperature, because the forecasted temperature only covers one moment of your day.
The real challenge with swings is moisture timing. You sweat heavily during the warm, high-output part of the day. Then the temperature drops and the wind picks up. That sweat, trapped in your layers, turns cold against your skin. This is how people get into trouble, even with good gear.
Layer Access Strategy
The number one rule for handling swings is to keep your layers accessible. A puffy buried at the bottom of your pack might as well be at home if it takes you five minutes of standing still in a cold wind to dig it out. By the time you have it on, you are already chilled and behind.
I organize my pack so the layers I will swap on and off all day ride at the top, within arm’s reach. The puffy and shell go in first, against the back panel, with the fleece and a spare base layer right on top. Things I will not touch until camp, like sleeping clothes, go at the bottom. This sounds obvious, but it is the difference between adapting in thirty seconds and shivering for ten minutes.
Ventilation Timing
Ventilation is how you stay dry before the temperature drops. Open your pit zips at the first sign of warmth, before you start sweating, not after. The goal is to manage heat so you never soak your base layer in the first place. A damp base layer that dries on the move is fine. A soaked base layer that freezes when you stop is a problem.
Unzip your shell partway on mellow sections. Pull the collar of your mid layer open. Small adjustments made early prevent the big temperature swings from catching you soaked and cold. The backcountry veterans on the forums all say the same thing: stay slightly cool while moving so you have a buffer for the stops.
Activity-Specific Layering by Output Level
The right layering combo depends entirely on how hard you are working. The same temperature feels completely different when you are grinding up a skin track versus standing still at a belay. Here is how I layer for the three main output levels.
High Output (Skinning, Climbing, Fast Hiking)
For high-output activity, the goal is maximum ventilation with just enough coverage to keep the wind off. My typical high-output kit is a lightweight merino base layer, a micro-grid fleece or nothing, and a softshell or unzipped hardshell on top. Legs get a light base layer and softshell pants.
The trick is to start cold. You should feel slightly chilled for the first ten minutes of the climb. Once you warm up, you stay perfectly regulated without having to stop and strip layers. If you start the climb already comfortable, you will be overheating in twenty minutes.
Medium Output (Approach, Traversing, Moderate Climbing)
Medium output is the hardest to dress for because you generate enough heat to sweat but not enough to stay warm when you pause. Here I run a midweight merino base, a light fleece, and a softshell or lightly vented hardshell. I keep the pit zips cracked and stay ready to add or drop the fleece as the terrain and temperature shift.
Low Output (Belay, Summit, Camp, Breaks)
Low output is when the stop layer earns its keep. The moment you stop moving, your heat production drops to near zero and the sweat you generated starts cooling fast. Add the puffy immediately, before you feel cold. At camp, layer on a dry base layer, the puffy, a warm hat, and thick gloves. Treat every stop as a temperature swing event, because that is exactly what it is.
Start Cold: The Golden Rule of Backcountry Layering
Every experienced backcountry traveler I have talked to repeats the same advice: start cold. The principle is simple. Begin your activity wearing fewer layers than feels comfortable, accepting that you will be chilly for the first few minutes. Your body heat from moving will bring you to a comfortable temperature, and you avoid soaking your layers in sweat before the day even gets going.
The execution is straightforward. At the trailhead, wear your base layer and shell, with the fleece and puffy packed. Walk briskly for ten minutes. If you are still cold after warming up, add one layer. If you are sweating, you started with too much.
When does start cold fail? When you start in genuinely dangerous cold, like sub-zero approaches where being chilled for ten minutes risks frostbite. In those conditions, dress for warmth from the beginning and rely on aggressive ventilation instead. For everything else, start cold and you will stay drier and warmer all day.
Temperature-Specific Layering Guide
Here are concrete layer combinations for common backcountry temperature ranges. Use these as a starting point and adjust for your own metabolism, the forecast, and your activity level.
20 to 30 Degrees Fahrenheit
This is classic winter backcountry territory. For the climb, run a midweight merino base layer top and bottom, a micro-grid fleece, and a softshell jacket and pants. Carry a high-fill down or thick synthetic puffy for stops and a hardshell in case the weather turns. Add a warm beanie and two glove systems: thin liners for the ascent and insulated mittens or gloves for the descent and stops.
30 to 50 Degrees Fahrenheit
This is the swing zone where temperature management gets tricky because you will be hot on the climb and cold on the descent. Run a lightweight merino base layer, skip the fleece on the way up or carry a very thin one, and use a softshell for wind protection. Carry a light synthetic puffy for stops. The key here is fast layer swaps, so keep everything accessible.
Transition Season (Spring and Fall Swings)
Spring and fall bring the most extreme swings, often a forty-degree range between dawn and afternoon. The strategy is a thin, flexible system: lightweight merino base, a packable fleece, a light synthetic puffy, and a breathable shell. Plan for a hot afternoon and a cold morning, and carry a layer for each extreme. Expect to swap layers three or four times across the day.
Common Layering Mistakes to Avoid
Most layering failures come down to a handful of repeat mistakes. Here are the ones I see most often, and how to fix them.
Mistake 1: Wearing cotton. Cotton holds moisture and loses all insulation value when wet. A cotton hoodie on a backcountry trip is a hypothermia risk. Leave it at home, every time, no exceptions.
Mistake 2: Overdressing on the ascent. Dressing warm for the climb guarantees you will sweat through your layers, then freeze when you stop. Dress for the work, not the air temperature, and add layers for the breaks.
Mistake 3: Burying layers in the pack. If your puffy takes five minutes to find, you will not bother until you are already cold. Keep swap layers at the top of your pack where you can grab them in seconds.
Mistake 4: Ignoring the stop layer. Many beginners carry only active layers and have nothing warm for breaks. A dedicated puffy, even on warm days, is your insurance for unexpected cold, injury, or a longer-than-planned stop.
Mistake 5: One glove system. Thin gloves let you grip poles on the climb but freeze your fingers at the summit. Thick gloves are too hot to climb in. Carry both and swap as your output changes.
Sleeping Warm on Multi-Day Trips
If your backcountry trip spans multiple days, sleep warmth becomes part of the system. A cold first night ruins the whole trip. A few habits make a big difference.
Always carry a dedicated dry base layer and a dedicated pair of merino socks just for sleeping. Never wear your day layers to bed, because they carry moisture and trail grime that cools you down. Change into the dry set the moment you hit camp.
Throw your puffy over your sleeping bag or quilt if the night is colder than expected. Eat a calorie-dense snack right before bed, because your body generates heat digesting food. And fluff your bag fully before getting in, because loft is what traps the warm air around you.
FAQs
How to layer up for extreme cold weather?
For extreme cold, start with a heavyweight merino wool base layer, add a thick fleece or synthetic mid layer, top it with a high-fill down puffy, and finish with a windproof, waterproof hardshell. Cover your head with a warm beanie, use two glove systems, and always carry a dedicated stop layer for breaks.
What is the warmest base layer for extreme cold?
The warmest base layer for extreme cold is a heavyweight merino wool top and bottom, typically rated at 300 GSM or higher. Merino wool stays warm even when damp and resists odor over multi-day trips, making it the most reliable choice for sustained extreme cold.
What is the 3 layer rule for winter?
The 3 layer rule for winter is a clothing system made of a moisture-wicking base layer against the skin, an insulating mid layer that traps warm air, and a protective outer shell that blocks wind and water. Each layer has one job, and together they let you add or remove warmth as conditions change.
How many layers do I need for 50 degree weather?
For 50 degree weather, you typically need a lightweight merino base layer and a breathable shell for the climb, plus a light synthetic puffy packed for stops and wind exposure. Plan for a 20 to 30 degree swing across the day, so carry one warm layer you can throw on quickly when the temperature drops.
How do I avoid sweating and then freezing on the trail?
To avoid sweating and then freezing, start your activity slightly cold, open your pit zips before you feel hot, and dress for your work output rather than the air temperature. Carry your puffy at the top of your pack so you can add it the instant you stop moving, before the sweat on your skin turns cold.
Conclusion
A backcountry layering system built for big temperature swings is not about owning the warmest gear. It is about choosing layers that each do one job well, keeping them accessible for fast swaps, and managing your heat before the swings catch you off guard. Start cold, ventilate early, and treat every stop as a temperature event.
The system that works is the one you actually use in the field. Build it around merino or synthetic base layers, a breathable mid layer, the right insulation for your conditions, and a shell with real ventilation. Practice your layer swaps at home so they become second nature. When the temperature swings forty degrees on your next trip, you will be ready. That is how to build a backcountry layering system for big temperature swings that keeps you warm, dry, and moving all day.