
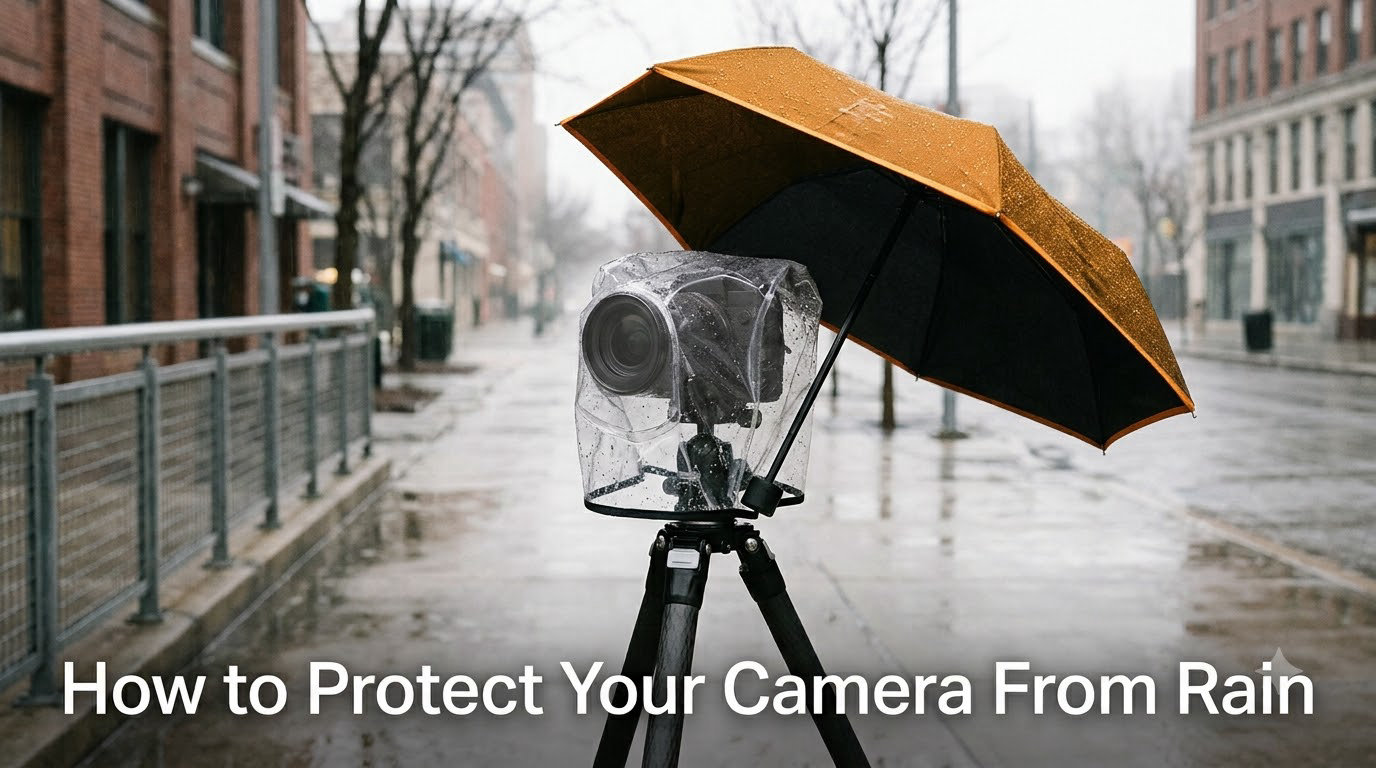
I have shot in downpours in the Scottish Highlands, drizzle on coastal cliffs, and monsoon-season rain in Southeast Asia. Every single time, the question running through my head was the same: is my gear going to survive this? Learning how to protect your camera from rain is not optional if you shoot outdoors regularly. It is the difference between capturing the shot of a lifetime and sending your camera off for expensive repairs.
Water damage is one of the most common and costly problems photographers face. A single drop in the wrong place can cause a short circuit, corrosion, and permanent failure of your camera’s electronics. Even weather-sealed cameras are not immune to pooled water, condensation buildup, and the corrosive effects of saltwater spray.
In this guide, our team breaks down every method we have tested in the field, from free DIY tricks using plastic bags and shower caps to professional rain covers trusted by wildlife photographers. You will also find post-rain care tips that no other guide covers, condensation management strategies, and advice for protecting your smartphone camera too.
Table of Contents
Know Your Camera’s Weather Sealing First
Before you decide how much protection you need, you have to understand what your camera can already handle. Not all cameras are built the same, and knowing your weather sealing level will save you from both unnecessary panic and careless mistakes.
Weather-sealed cameras have rubber gaskets and seals at buttons, dials, seams, and lens mounts. These are designed to resist light rain and splashes, not full submersion. Professional DSLRs and mirrorless bodies like the Canon EOS R5, Nikon Z9, or Sony A1 series offer the highest level of sealing. Entry-level and mid-range bodies often have minimal or no weather sealing at all.
Here is a quick way to think about it. If your camera has an IP rating, you can look up exactly what it handles. The Canon EOS R5, for example, has an IP53 rating, meaning it resists limited dust and spraying water. Most cameras do not carry an official IP rating, so treat them as splash-resistant at best, never waterproof.
A common question we hear is how much rain is too much. Our rule of thumb: light drizzle is fine for a weather-sealed camera with a sealed lens for short periods. Steady rain means you need a cover, no exceptions. Heavy downpours can overwhelm even the best sealing, so always wrap up before the sky opens.
One thing people overlook: weather sealing only works when the lens is sealed too. A weather-sealed body with a non-sealed lens leaves a massive entry point at the mount. Check both before you trust your gear in the wet.
How to Protect Your Camera From Rain: Top Methods at a Glance
Here is a quick summary of every protection method we cover in this guide. Pick the ones that match your situation, budget, and shooting style.
- Plastic bag DIY cover – free, fast, and works in a pinch
- Shower cap cover – elastic fits around the lens, great for travel
- Umbrella technique – simple and effective with practice
- Lens hood – always on, deflects droplets from the front element
- Microfiber cloths – keep several on hand for wiping
- Professional rain cover – best for heavy use and wildlife shooting
- Tripod setup – frees your hands for umbrella and cloth management
- Gloves – protect your hands so you do not fumble or drop gear
- Natural cover – use trees, awnings, and doorways when available
- Waterproof bag for storage – keep gear dry when not actively shooting
Now let us walk through each of these in detail.
DIY Camera Rain Cover: The Plastic Bag Method
This is the method every photographer should know, because you can do it with supplies from any grocery store. We have used this trick on assignments where we got caught in unexpected rain with no dedicated cover on hand.
Here is how to make a DIY camera rain cover step by step:
- Get a clear plastic bag – a gallon-size zip-top bag or a simple grocery bag works. Clear bags let you see your camera controls.
- Cut a hole for the lens – make the hole slightly smaller than the lens diameter so it stretches tight around the barrel for a snug fit.
- Slip the bag over the camera – push the lens through the hole first, then drape the rest of the bag over the body.
- Secure with a rubber band – wrap a rubber band around the lens where the bag meets it to keep water from running down into the opening.
- Cut a small hole for the viewfinder – if you need to use the optical viewfinder, make a slit and tape the edges to the rubber eyecup.
- Operate controls through the plastic – you can press buttons and turn dials through the bag, though it takes getting used to.
Reddit photographers confirm this works. One user in r/AskPhotography said their garbage bag with rubber bands setup got them through a full day of shooting in steady rain without a single drop reaching the camera. Another pointed out the one big drawback: plastic bags are loud. In wind they flap and rustle, which scares wildlife and draws unwanted attention at quiet events.
For that reason, this method is best for landscape and street photography where noise is not a concern. If you shoot wildlife, keep reading for quieter options.
The Shower Cap Trick: A Forum Favorite
This is one of those tips that comes straight from photography forums and is surprisingly effective. Hotel shower caps make excellent emergency rain covers, and many photographers stash a few in their camera bag at all times.
The reason shower caps work so well is the elastic edge. You stretch the elastic around the lens barrel and it grips snugly without any rubber bands or tape needed. The cap drapes over the rest of the camera body, creating a protective dome that sheds water easily.
I first tried this on a trip to Iceland where the weather changes every twenty minutes. The hotel shower cap I grabbed cost nothing and protected my camera through three separate rain squalls that day. They are lightweight, take up almost no space, and you can swap a wet one for a dry one in seconds.
The limitation is the same as the plastic bag: it does not cover a large telephoto lens well. For standard and wide-angle lenses, though, this is one of the best free tricks out there.
Using an Umbrella While Shooting
Sometimes the simplest solution is the best one. A small folding umbrella held in one hand while you shoot with the other can keep both you and your camera dry in light to moderate rain.
The challenge is managing the umbrella, the camera, and your settings all at once. Our team found that a compact umbrella with a wrist strap works best because you can grip it loosely while operating the camera. A larger golf umbrella offers more coverage but becomes unwieldy in wind.
Combining an umbrella with a tripod is where this method really shines. Set your camera on the tripod, angle the umbrella to cover the camera, and you have both hands free for composition and adjustments. This setup is ideal for landscape photography where you are working from one position for a while.
Wind is the enemy of the umbrella method. Gusts can turn an umbrella inside out or send rain blowing sideways under the canopy. In windy conditions, switch to a bag or cover method instead.
Lens Protection: Hoods, Cloths, and Droplet Control
Keeping water off your lens glass is just as important as protecting the camera body. Water droplets on the front element ruin photos with soft spots, streaks, and blur that no amount of editing can fully fix.
Always use a lens hood. A lens hood does more than reduce flare. It creates a physical barrier that prevents rain from hitting the front element directly. In light drizzle, a hood alone can keep your lens dry enough to keep shooting. Our team never removes hoods when shooting in wet conditions.
Carry multiple microfiber cloths. One cloth is not enough because it gets soaked quickly. Pack at least four to six clean microfiber cloths and rotate them as they get wet. A wet cloth just smears water across the glass instead of removing it.
Focus.picfair.com shares a great technique we use constantly: cup your hand over the top of the lens hood to create an extra shield. This blocks rain from hitting the front element while you are composing your shot, and you only remove your hand at the moment of exposure.
When wiping the lens, use a gentle dabbing motion first to absorb the bulk of the water, then a single sweep with a dry section of cloth. Wiping across wet glass with a dirty cloth can scratch coatings, so keep your cloths clean.
Professional Rain Covers: When to Invest
If you shoot in rain regularly or work professionally where you cannot afford to miss a shot, a dedicated rain cover is worth every cent. These are designed specifically for cameras, with clear windows for viewing controls, sleeves for your hands, and adjustable closures for different lens sizes.
Several brands come up again and again in forum discussions among working photographers:
- Think Tank Photo – their Emergency Rain Cover series is a favorite among wedding and event photographers. Folds compactly and deploys fast.
- Lenscoat – popular with wildlife and nature photographers. Offers camouflage patterns and fits large telephoto lenses. Nicolas Stettler’s detailed review highlights the quality fabric and velcro closures.
- Movo Storm – budget-friendly option that several Reddit users report using successfully in field conditions.
- OP/TECH USA Rainsleeve – ultra-lightweight, inexpensive, and comes in packs. Great to keep in your bag as a backup.
A professional rain cover solves the problems that DIY methods cannot. They are quiet, so they will not scare wildlife. They fit securely over large lenses. And they let you operate your camera controls comfortably through clear vinyl windows.
When should you invest? If you shoot wildlife, sports, or weddings where rain is a regular possibility, buy one now. If you only occasionally encounter rain, a pack of OP/TECH Rainsleeves at a low cost will serve you well without a big investment.
Shooting with a Tripod in the Rain
A tripod is an unsung hero of rain photography. When you are juggling an umbrella, lens cloths, and camera controls in the wet, having your camera mounted on a stable base changes everything.
With the camera on a tripod, you can use both hands to manage your umbrella or rain cover. You can take your time composing without worrying about dropping anything. And for long-exposure rain shots, a tripod is essential for sharp results.
The trick is protecting the tripod itself. Carbon fiber legs handle moisture fine, but the leg locks and rubber feet can collect grit and water. Give everything a wipe-down after your shoot, and let the tripod dry fully before storing it in its bag.
If wind picks up during your shoot, lower the tripod center column to reduce vibration and weight the bottom by hanging your camera bag from the hook if your tripod has one.
Protecting Your Hands: Gloves Matter Too
This might sound like a side topic, but it is critical. Cold, wet hands lead to fumbling, and fumbling leads to dropped gear. We learned this the hard way on a wet coastal shoot where a numb finger nearly sent a lens tumbling onto rocks.
Wear gloves that keep your hands warm and dry while still letting you operate camera controls. Touchscreen-compatible gloves are ideal because you can use your camera’s LCD and any smart device without removing them. Look for thin but water-resistant materials that maintain dexterity.
Keep a dry towel in your bag for your hands too. Switching between wet conditions and handling sensitive gear is much safer when you can dry off between shots.
Saltwater and Coastal Spray: Extra Caution Needed
Rain is one thing, but saltwater spray is in a different category of danger. Salt is corrosive to metal contacts, internal circuitry, and lens mechanisms. Even a light mist of saltwater can cause damage that builds up over time and is far harder to clean than freshwater.
If you shoot along coastlines, near waterfalls with heavy spray, or on beaches, treat saltwater with maximum respect. Use a full rain cover or underwater housing rather than a simple bag. Pay extra attention to the lens mount area, where salt residue can accumulate unseen.
After any coastal shoot, wipe down your entire camera with a damp freshwater cloth to remove salt residue, then dry thoroughly. Nicolas Stettler’s guide warns specifically about saltwater corrosion and rust, and we agree: this is not something to take chances with.
One more tip from our field experience: avoid changing lenses near the ocean. Every time you open the camera body, you expose the sensor and interior to salt-laden air. Change lenses indoors or in your vehicle before heading to the coast.
Smartphone Camera Rain Protection
Most guides ignore smartphones entirely, but if you are like us, your phone is often your secondary camera on any trip. Phones are more vulnerable to water than dedicated cameras in some ways, with large flat screens and charging ports that act as water entry points.
Modern flagship phones often carry IP68 ratings, meaning they can survive submersion in freshwater for short periods. But that rating does not account for saltwater, soaps, or high-pressure jets. Do not assume your phone is safe just because it has a water resistance rating.
For light rain, simply keeping your phone in a pocket and pulling it out only for the shot works well. Wipe the camera lens with a microfiber cloth before each shot to avoid water spot artifacts.
For heavier rain, a waterproof phone pouch is a cheap and effective solution. These let you operate the touchscreen through clear plastic while keeping water completely out. They cost very little and take up minimal space in a bag or jacket pocket.
Post-Rain Camera Care: How to Dry Your Gear Safely
This is the section no other guide covers, and it might be the most important one here. What you do after the rain matters just as much as what you did during it. Improper drying can cause condensation, mold growth, and long-term corrosion that ruins gear weeks or months later.
Step 1: Wipe down immediately. As soon as you are out of the rain, use a dry microfiber cloth to wipe every surface of your camera and lens. Pay attention to seams, buttons, and the lens mount where water can pool.
Step 2: Remove the battery and memory card. Open the battery and card compartments and let them air out. This lets any trapped moisture escape and prevents corrosion on the electrical contacts.
Step 3: Watch for condensation. This is the hidden danger. When you bring a cold, wet camera into a warm environment, condensation forms inside the lens and body. To prevent this, put your camera in a sealed plastic bag before entering a warm building or car. Let it warm up gradually inside the bag, then remove it once the temperature has equalized.
Step 4: Use silica gel packets. Place your camera in a bag or container with several silica gel desiccant packets overnight. These absorb residual moisture from the air inside the camera. Save the packets that come with new shoes, electronics, and food packaging for exactly this purpose.
Step 5: Never use heat. Do not use a hair dryer, heater, or oven to speed up drying. Heat can warp plastic components, damage adhesives, and melt internal wiring. Room temperature air circulation is all you need.
If your camera got truly soaked, not just splashed, do not turn it on to check if it works. Powering up a wet camera can cause a short circuit that causes permanent damage. Leave it in a dry environment with silica gel for 48 hours minimum, and if you are unsure, take it to a professional for inspection.
Quick Checklist: Rain Photography Essentials
Here is everything you should pack for a rain photography session. Print this out or screenshot it for your next wet-weather shoot:
- Professional rain cover or pack of disposable rainsleeves
- 2 to 3 clear plastic bags and rubber bands for DIY backup
- 2 to 3 shower caps from your hotel
- 6 or more clean microfiber cloths
- Lens hood attached to every lens you bring
- Compact folding umbrella with wrist strap
- Waterproof camera bag or dry bag for storage
- Touchscreen-compatible gloves
- Dry hand towel
- Silica gel packets for post-shoot drying
- Sealed plastic bag for condensation prevention when moving indoors
Frequently Asked Questions
How do you keep your camera safe in the rain?
Use a combination of a rain cover or plastic bag over the body, a lens hood to deflect water from the glass, and multiple microfiber cloths to wipe droplets. Keep your camera in a waterproof bag when not actively shooting, and never expose non-weather-sealed cameras to more than light drizzle without protection.
How do you make a rain cover for a camera?
Take a clear plastic bag, cut a hole slightly smaller than your lens diameter, push the lens through the hole, and secure the bag to the lens with a rubber band. Cut a small slit for the viewfinder if needed. A shower cap stretched over the camera with the elastic around the lens works just as well for shorter lenses.
Can you use a non-weatherproof camera in the rain?
Yes, but only with full protection. Wrap the camera in a plastic bag or rain cover before stepping into the rain, keep exposure time short, and never let water sit on the body. Non-sealed cameras have no protection at buttons and seams, so even light rain can cause damage without a cover.
How much rain is too much for a camera?
Light drizzle is manageable for weather-sealed cameras with sealed lenses for short periods. Steady rain requires a cover regardless of sealing. Heavy downpours can overwhelm even professional-grade weather sealing, so always cover your gear before conditions worsen. If water is pooling on the camera body, you have waited too long.
What does putting vaseline on a camera do?
Putting vaseline on a camera is an old trick some photographers use on a UV filter, not the lens itself, to create a soft-focus dreamy effect for portraits. It has nothing to do with rain protection and should never be applied directly to lens glass, as it damages coatings and is extremely difficult to remove.
Conclusion
Knowing how to protect your camera from rain is what separates photographers who capture incredible images in any condition from those who stay home when the weather turns. The methods in this guide range from free tricks that take two minutes to professional covers built for years of heavy use.
Start with the basics: always keep a lens hood on, carry plenty of microfiber cloths, and stash a few plastic bags or shower caps in your kit. If you shoot in rain often, invest in a proper rain cover. And whatever you do, do not skip the post-rain care steps, because drying your gear correctly prevents the slow damage that catches up with you later.
Rain creates some of the most dramatic, moody, and beautiful light a photographer will ever see. With the right protection, you can be out there shooting it instead of watching from a window. Pack your kit, check the forecast, and get out there.