
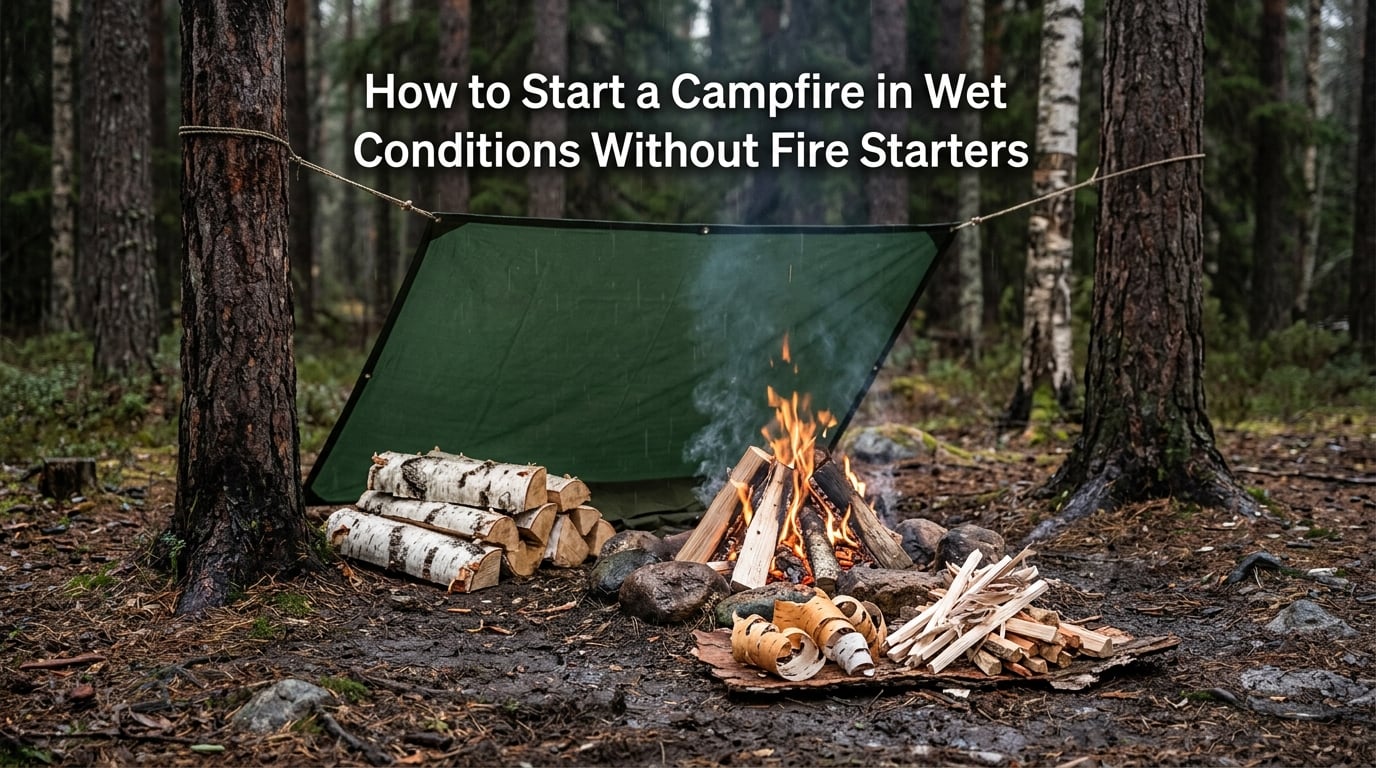
Learning how to start a campfire in wet conditions without fire starters is one of the most valuable outdoor skills you can develop. I have been caught in downpours on backpacking trips more times than I care to admit, and I can tell you that the right technique makes all the difference between a warm meal and a cold, miserable night.
The process comes down to five core steps: find dry tinder from protected sources, split wet wood to expose dry interiors, build a raised platform over damp ground, construct a sheltered fire structure, and feed the flame progressively with larger wood. None of these steps require commercial fire starters, matches soaked in chemicals, or accelerants.
This guide walks you through every step I use, including techniques I picked up from bushcraft forums, scouting traditions, and years of trial and error in rainy backcountry conditions. Whether you are dealing with a light drizzle or a full-on storm, these methods will get your fire going.
Table of Contents
Why Wet Conditions Defeat Most Campfires
Understanding why fires fail in wet weather helps you work around the problem instead of fighting it. Moisture affects fire in two ways: it cools the fuel below its ignition temperature, and it creates steam that chokes out the flame before it can spread.
When wood contains water, your heat energy goes into boiling that water instead of raising the wood temperature to the combustion point. This is why damp wood smokes and sputters rather than catching fire. The wood literally steams before it burns.
The second problem is the ground itself. Damp soil wicks heat away from your fire base and saturates the bottom layer of tinder and kindling. I have watched countless fires die because the builder placed everything directly on wet earth. A dry platform solves this completely.
Rain falling directly on the flame is the most obvious enemy, but wind-driven drizzle is actually worse. It sneaks in from the side and cools your kindling faster than you can react. Sheltering the fire from wind-driven rain is just as important as protecting it from above.
How to Find Dry Tinder in Wet Conditions
Tinder is the fine, fluffy material that catches a spark or small flame and grows it into something larger. In dry conditions, tinder is everywhere. In wet conditions, you have to know exactly where to look.
The single best source of dry tinder is the underside of branches on standing dead trees. Fallen logs on the ground absorb moisture quickly, but branches still attached to a dead tree stay remarkably dry underneath. Snap off a few small dead branches and peel away the wet outer layer to find bone-dry wood underneath.
Here are the best tinder sources I rely on in wet weather:
1. Birch bark – Peels off birch trees in papery layers and contains natural oils that burn even when damp. The outer bark sheds water so the inner layers stay dry.
2. Pine needles and resin – Dead pine needles caught in the crotches of branches stay dry and are loaded with flammable resin. Pine sap itself is highly combustible.
3. Inner bark (cambium layer) – The living layer just under the outer bark of dead trees is often dry even when the exterior is soaked. Shave it off with a knife to create fine, curly tinder.
4. Dead grass and ferns under overhangs – Look under rock overhangs, dense evergreen canopies, and fallen logs where rain has not penetrated.
5. Old man’s beard and lichens – These hanging lichens trap air and often stay dry even during rain, especially closer to the trunk of the tree.
Gather two to three times more tinder than you think you need. I cannot stress this enough. Running out of dry tinder halfway through the process is the number one reason wet-weather fires fail.
How to Split Wet Wood to Reach Dry Interior
Even in a downpour, the inside of a thick branch or log is often bone dry. Wood is a natural water barrier, and the outer inch or two absorbs almost all the moisture. Split that wood open and you have perfectly dry fuel.
The technique is called the baton method, and it is a core bushcraft skill. Place your knife blade across the end of a short log, then strike the spine of the blade with a thick stick (your baton) to drive it through the wood. The log splits along its grain, exposing the dry heartwood inside.
You do not need an axe for this. A sturdy fixed-blade knife and a heavy stick will split most wood up to wrist thickness. Aim for pieces about 4 to 6 inches in diameter for best results.
Once split, you will see the contrast clearly. The outside is dark and damp while the freshly split face is pale and dry to the touch. Use these split pieces immediately before they absorb moisture from the air. Shave the dry faces into thin curls and shavings for kindling, and save larger split chunks for your main fuel.
Creating a Dry Base: Building Your Fire Platform
This step separates beginners from experienced fire builders. A dry platform isolates your fire from damp ground and is absolutely essential in wet conditions.
Start by clearing away any wet leaves, mud, or snow from a patch of ground about two feet square. Lay down a bed of the thickest, driest bark or split wood pieces you can find. Hardwood works best because it resists burning through, but any thick dry wood will work.
Arrange the platform pieces side by side with minimal gaps. The goal is a solid raised surface that keeps your tinder and kindling off the wet earth below. If you can find flat pieces of bark from fallen trees, these make an excellent first layer.
Build the platform two layers thick for serious wet ground. The bottom layer acts as a moisture barrier while the top layer gives you a clean, dry surface to work on. This platform also reflects heat back upward, which helps dry wet fuel you place around the fire later.
I learned this the hard way on a trip in the Cascades where I skipped the platform and lost three attempts before realizing the ground was killing my fire. A proper platform takes ten minutes to build and saves you an hour of frustration.
How to Start a Campfire in Wet Conditions Without Fire Starters: Step by Step
Now that you have dry tinder, split wood, and a raised platform, here is the complete process for building your fire. Follow these steps in order and resist the urge to skip ahead.
Step 1: Place your tinder bundle in the center of the platform. Form a loose bird’s nest shape with your driest tinder. Birch bark, pine needles, and inner bark shavings go at the very center. Leave air gaps throughout the bundle because fire needs oxygen.
Step 2: Build a small teepee of pencil-thin kindling around the tinder. Use your driest split sticks, leaning them against each other in a cone shape. Leave an opening on the side facing the wind so you can reach the tinder with your flame.
Step 3: Add a second layer of thumb-thick sticks around the first teepee. These provide sustained heat once the inner kindling catches. Do not pack them too tight. Airflow is critical in the early stages.
Step 4: Light the tinder at the center. Use whatever ignition source you have, whether that is a ferro rod, a lighter, or a magnifying lens. Hold the flame to the tinder until it catches and spreads to the birch bark or resin-rich materials.
Step 5: Let the teepee structure collapse naturally. As the kindling burns, the sticks will fall inward and create a bed of coals. Do not rush this part. The collapsing structure feeds itself.
Step 6: Add progressively larger split wood as coals build. Start with wrist-thick pieces, then move to larger logs once you have a solid coal bed. Place wet logs around the perimeter of the fire to dry them before adding.
Step 7: Shield the fire from rain and wind. Use a tarp, natural shelter, or your own body to block wind-driven rain during the first critical minutes. Once the fire is established with good coals, it becomes much more resilient.
The Feather Stick Technique: A Bushcraft Skill That Saves the Day
Feather sticks are one of the most reliable fire-starting tools in wet conditions, and almost no one outside bushcraft circles talks about them. This technique is a genuine game-changer for rainy weather.
To make a feather stick, take a split piece of dry wood and make repeated downward cuts with your knife, stopping before the shaving detaches completely. Each curl stays attached at the top and fans out below, creating a cluster of thin, dry wood shavings that catch flame instantly.
Make 15 to 20 curls on a single stick. The thinner the curls, the faster they ignite. Feather sticks expose maximum surface area of dry wood to your flame, and because the shavings are still attached to the stick, they do not absorb ground moisture the way loose shavings would.
Prop two or three feather sticks around your tinder bundle and light them. They burn hot and steady, giving your kindling the sustained heat it needs to catch even in damp air. I carry a knife specifically for this purpose on every wet-weather trip.
Sheltering Your Fire from Rain
Even the best fire will struggle if rain hits it directly during the first few minutes. You need some form of shelter, and you have two options: artificial or natural.
A simple tarp strung between two trees at a height of 4 to 6 feet provides excellent overhead protection. Angle it so water runs off away from your fire pit. Keep the tarp high enough that heat and sparks will not melt or ignite it. A 6 by 8 foot tarp is plenty for a small cooking fire.
If you do not have a tarp, look for natural shelters. The dense canopy of an evergreen tree provides surprising rain protection. Rock overhangs, cliff faces, and the underside of large fallen trees all create dry microclimates. Large boulders can block wind-driven rain from one side.
Pay attention to wind direction. Rain rarely falls straight down. Wind drives it at an angle, so position your shelter and fire so the wall or tarp blocks the prevailing wind. I always check wind direction before I start building.
Build your fire slightly larger than usual if rain is ongoing. A bigger fire generates more heat to overcome the cooling effect of rain and creates a wider dry zone around itself.
Maintaining a Fire in Ongoing Rain
Getting the fire started is half the battle. Keeping it going in steady rain requires a different strategy than dry-weather fire maintenance.
The key insight from experienced outdoorsmen is to keep the fire small at first and grow it gradually. A small fire that is well-fed and sheltered will outlast a big fire that burns through its fuel too fast. Add wood steadily rather than in large batches.
As your fire grows, place wet logs in a ring around the perimeter. The radiant heat dries them out over 10 to 15 minutes so they are ready to burn when you add them. This creates a continuous drying cycle that keeps your fuel supply going even in ongoing rain.
Build up a deep coal bed. Coals burn much hotter than flames and are far more resistant to rain. Once you have a solid coal base, the fire becomes surprisingly self-sustaining. Feed it with larger split logs that burn slowly and maintain the coal bed overnight.
Keep spare dry tinder and kindling under your tarp or shelter. You may need to restart the fire if a gust of wind or heavy downpour knocks it out. Having dry materials ready saves you from scrambling in the rain.
Alternative Tinder Sources: What to Use Instead of Fire Starters
When natural tinder is scarce or you want extra insurance, several alternatives work well without being commercial fire starters. These are items you may already have or can improvise from common materials.
Birch bark strips remain the gold standard. Even partially damp birch bark burns because of its natural betulin oil content. Collect it from fallen birch trees or peel loose pieces from living trees without damaging them.
Pine sap and resin are highly flammable. Look for hardened resin on the bark of pine trees where branches have broken off. Scrape it off and mix it with dry tinder for an instant boost.
Dryer lint packed in a ziplock bag is a classic backpacker trick. It is incredibly light, catches a spark easily, and burns for several seconds. Some campers mix it with a dab of petroleum jelly for longer burn time.
Wax-coated paper or cardboard burns slowly and steadily. If you have a candle stub, drip wax onto paper or cardboard strips to create a slow-burning tinder that resists moisture.
Dried pine cones found under dense tree canopies are loaded with resin and catch quickly. Crack them open to expose the inner layers if the outside is damp.
Cattail fluff ignites with even a weak spark. Find cattails in marshy areas and collect the fluffy seed heads. They burn fast, so use them to ignite slower tinder like bark or shavings.
Safety Considerations for Wet Weather Fire Starting
Fire safety matters even more in wet conditions because the consequences of failure are higher. A fire that escapes in dry weather is dangerous. A fire that escapes when you are cold, wet, and possibly hypothermic can be deadly.
Always build your fire at least 15 feet from tents, tarps, and overhanging branches. Wet conditions can make you careless about placement because you are focused on just getting it lit. Take 30 seconds to clear the area properly.
Keep water or dirt nearby to extinguish the fire. In wet conditions you may be tempted to let the rain put it out, but wind can carry embers far from the pit. Douse the fire thoroughly before leaving or sleeping.
Never use gasoline, lighter fluid, or other accelerants. This should go without saying, but forum discussions show people still try it in desperation. Accelerants cause explosive flare-ups that can cause serious burns, especially when you are working close to a wet fire pit.
Watch for wind shifts. Rain often comes with gusty wind, and a sudden shift can blow flames toward your shelter or into dry brush you did not notice. Build a small rock ring around your fire to contain embers.
Common Mistakes to Avoid
After years of watching people struggle with wet-weather fires, the same mistakes come up repeatedly. Avoid these and your success rate will jump immediately.
Gathering too little tinder is the number one failure. You need a massive pile of dry tinder. If your bundle looks small enough to hold in two hands, go get more. When in doubt, triple it.
Placing fire directly on wet ground kills more fires than rain itself. Always build a platform. I have never seen a ground-level fire survive in truly wet conditions.
Adding wood that is too large too fast smothers a young fire. The flame needs to build through progressively larger fuel sizes. Jumping from kindling to full logs too early snuffs it out.
Not sheltering the early flame means wind-driven drizzle cools your kindling faster than it can spread. Shield the fire for the first 5 to 10 minutes until it is well established.
FAQs
How do you start a campfire when everything is wet?
Split wet wood open with a knife using the baton method to expose the dry interior, gather tinder from standing dead trees and birch bark, build a raised platform of dry wood over the wet ground, and construct a sheltered teepee fire structure. The inside of fallen logs and branches stays dry even during heavy rain.
How do you start a campfire without a fire starter?
Use natural tinder like birch bark, pine needles, and the dry inner cambium layer of dead trees. Ignite the tinder with a ferro rod, lighter, or magnifying lens, then build progressively larger kindling around it. Feather sticks made from split dry wood provide excellent sustained flame without any commercial fire starter.
What can I use instead of a fire starter?
Birch bark, pine resin, dry inner bark shavings, feather sticks from split wood, dryer lint with petroleum jelly, wax-coated paper, dried pine cones, and cattail fluff all work as effective fire-starting tinder. The key is finding materials that are dry on the inside even when the outside is wet.
Can you start a fire while it is raining?
Yes, you can start a fire in the rain by building a raised dry platform, gathering tinder from protected sources like standing dead trees, sheltering the early flame with a tarp or natural cover, and using feather sticks for sustained heat. The fire becomes self-sustaining once a deep coal bed forms.
Can a campfire burn in the rain?
Yes, once established with a solid coal bed, a campfire can keep burning in moderate rain. Place wet logs around the perimeter to dry them before adding, maintain a large hot coal bed, and shelter the fire from wind-driven rain. Coals burn much hotter than flames and resist rain better.
What is the best tinder for wet conditions?
Birch bark is the best natural tinder for wet conditions because its natural oils make it burn even when damp. Pine resin, feather sticks from split dry wood, and the dry inner bark of standing dead trees are also excellent choices. Always gather far more tinder than you think you need.
Final Thoughts
Mastering how to start a campfire in wet conditions without fire starters comes down to preparation and patience. Find dry tinder from protected sources, split wood to reach dry interiors, build a raised platform, construct a sheltered fire, and feed it progressively.
Practice these techniques before you actually need them. Next time the forecast calls for rain on your camping trip, you will be ready instead of worried. A warm fire in a downpour is one of the most satisfying feelings in the outdoors.