
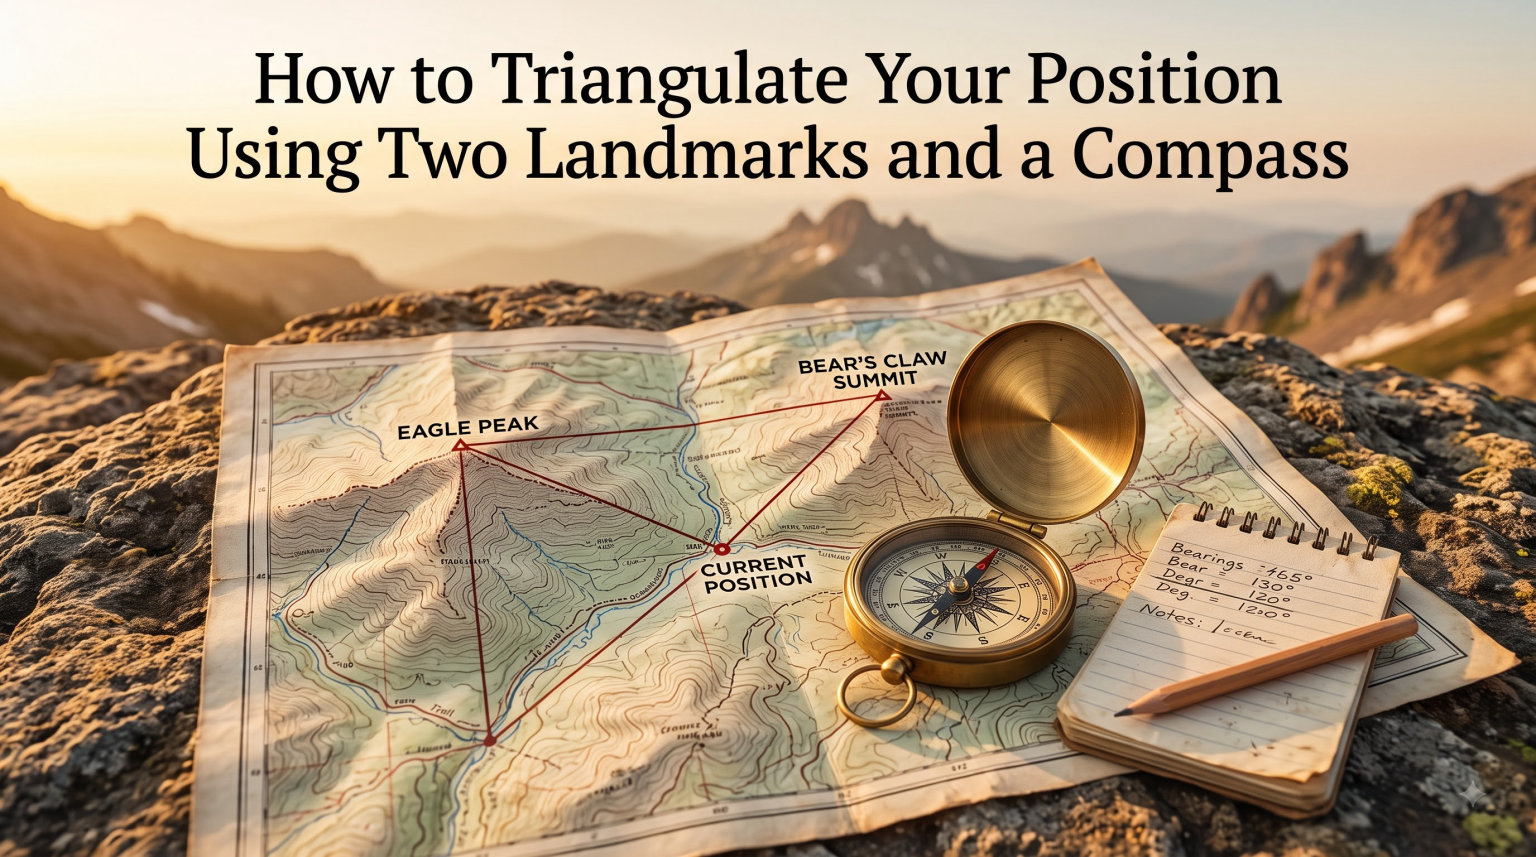
Learning how to triangulate your position using two landmarks and a compass is one of the most reliable skills you can carry into the backcountry. I have used this method in dense Pacific Northwest forests, on open alpine ridges, and once on a foggy ridge in the Adirondacks when my GPS battery died. It still works when the cloud cover rolls in, when your phone screen goes dark, and when the trail sign is missing. This guide walks you through every step, the math behind it, the mistakes that wreck it, and the small habits that make it accurate.
Table of Contents
What Is Triangulation and Why It Matters in the Wilderness
Triangulation is a navigation method that determines your position by taking compass bearings to two or more visible landmarks and plotting where those bearing lines cross on a map. The crossing point is your location. It is built on a simple geometry rule called the angle-side-angle theorem, where the two known landmarks form one side of a triangle, your bearings form the angles, and the intersection closes the shape.
I treat triangulation as a fallback skill, but in real life it is often the primary skill. A 2022 review of search and rescue incidents in the western United States found that cell phones were unreliable in 38 percent of backcountry cases due to dead batteries, water damage, or no signal. A compass, a paper map, and the knowledge to use them weigh four ounces and never run out of power.
You only need three things for triangulation to work. You need a landmark you can see from where you stand. You need to be able to find that same landmark drawn on your map. You need a compass that can give you an accurate bearing to that landmark. When all three are present, two landmarks are enough to fix your position to within a few hundred feet, sometimes much closer.
Triangulation vs Resection: A Quick Terminology Fix
Outdoor writers use the words triangulation and resection interchangeably, and most readers do not notice. The traditional definitions are different, and knowing the difference helps you search for clearer instructions when you need them.
Triangulation is what surveyors do. They start with two known points, measure the angles from each, and find a third point. In the classic land navigation textbook, the military calls the same activity resection, because the navigator is finding their own position by resecting lines back from the landmarks.
For practical purposes in the field, you will hear both words for the same action, taking bearings to landmarks and plotting the intersection. I use triangulation in this article because that is the word most hikers search for, but if you trained with the military or a search and rescue team, you probably learned the same process under the name resection. Same lines, same compass, same intersection, different label.
Tools You Need Before You Start
You do not need much gear, but every item on this list matters. Skip one and your accuracy drops fast.
- A baseplate compass with a rotating bezel, an orienting arrow, and a clear direction-of-travel arrow. A lensatic compass works but is harder to use while standing.
- A topographic map of the area with a scale of 1:24,000 or 1:25,000. Trail maps and tourist maps rarely show enough detail for landmark matching.
- A pencil or fine-tip pen for plotting lines. I keep a mechanical pencil in my map case because it does not smear in the rain.
- A flat, dry surface to write on. The back of a map case, a sit pad, or a wide-brimmed hat all work.
- Optional but helpful: a protractor or compass rose printed on the map, plus a straightedge for longer lines.
Before you head out, check that your compass is not broken. The needle should swing freely and settle on north within a few seconds. If it sticks or wobbles for more than 10 seconds, replace it. A sticky compass will cost you miles.
How to Triangulate Your Position: Step-by-Step
This is the core of the process. Take your time on each step, especially the first one. I have seen experienced hikers get lost because they misidentified a peak and the entire intersection shifted off the map.
Step 1: Identify Two Landmarks You Can Match on the Map
Look around and pick two landmarks that are clearly drawn on your map and that sit at a wide angle from each other, ideally 60 to 120 degrees apart as seen from your position. Good choices include mountain peaks, named lakes, radio towers, and large distinct road bends. Avoid landmarks that sit too close together because their bearing lines will run nearly parallel and the intersection will be unreliable.
Confirm each pick by checking the map. Match the shape of the ridge, the position of the lake, and the direction relative to other features. If the map shows the peak north of a saddle and you see it south, you are looking at the wrong mountain.
Step 2: Orient Your Map to North
Set your map on a flat surface and align it so that north on the map points to true north in the terrain. The easiest way is to place your compass on the map with the direction-of-travel arrow pointing to the top of the map, then rotate the map and compass together until the compass needle aligns with the orienting arrow inside the bezel. The map is now oriented.
Orienting the map helps you visualize where you are and which landmarks line up with which features. You can also take bearings without an oriented map, but I find that beginners make fewer mistakes when the map matches what they see.
Step 3: Take a Bearing to the First Landmark
Hold the compass level at waist height, point the direction-of-travel arrow straight at the first landmark, and rotate the bezel until the orienting arrow lines up with the red end of the magnetic needle. This is the classic “put the red in the shed” move. Read the number on the bezel at the index pointer. That number is your magnetic bearing.
Stand still while you take the bearing. I lean against a tree or a rock to steady myself if the wind is up. Take the reading twice, write it down, and confirm both numbers match within two degrees. If they do not, take it a third time.
Step 4: Take a Bearing to the Second Landmark
Repeat the process for the second landmark, aiming the direction-of-travel arrow directly at it and rotating the bezel until the orienting arrow sits over the red end of the needle. Write this number down too. Two bearings, two clean numbers, on a piece of paper or directly on the corner of your map.
If your second bearing comes out within a few degrees of the first, your two landmarks are too close together on the landscape. Pick a third landmark if one is visible, because parallel or near-parallel bearing lines will not give you a precise intersection.
Step 5: Convert Bearings for Declination
Your compass reads magnetic north, but the map is drawn in true north. Magnetic declination is the angular difference between the two, and it changes depending on where you stand on Earth. In much of the western United States the difference is 10 to 15 degrees east, and in the east it is 10 to 15 degrees west.
To convert a magnetic bearing to a true bearing, add the declination if it is west and subtract if it is east. For example, with a magnetic bearing of 70 degrees and a west declination of 12 degrees, the true bearing is 82 degrees. The declination value is printed in the map legend, usually near the scale bar.
Some compasses let you set the declination once and read true bearings directly. I use this feature on long trips, but I still know how to do the math in case the compass breaks.
Step 6: Plot Both Bearings and Find the Intersection
Place your compass on the map with one edge running through the symbol for the first landmark. Rotate the compass around that point until the orienting lines on the baseplate match the north-south meridians on the map, with north going up. Draw a light pencil line along the edge of the compass, going away from the landmark in the direction of the bearing.
Repeat the process for the second landmark. The two lines should cross at one point. That intersection is your position. Circle the spot and label it with the time so you remember when you took the bearings.
If the lines do not cross cleanly, do not panic. Small errors in reading the bearing or the map often push the lines into a wide triangle. Your real position sits somewhere inside that triangle, usually closer to the angle that matches the cleaner reading.
Orienting Your Map and Handling Magnetic Declination
Magnetic declination is the silent killer of triangulation accuracy. I learned this the hard way on a 14-mile loop in the Wind River Range when I forgot to adjust for a 13-degree east declination and ended up a full ridge off from where I thought I was. The fix is straightforward, but it has to be done every time.
Start by reading the declination value from the map legend. Check the date on the legend because declination drifts slowly each year. If the value is more than five years old, the printed number may be off by a degree. Updated values are available from the National Geospatial-Intelligence Agency and from most GPS apps.
When you plot a bearing on the map, use the true bearing you calculated. Place the compass on the map so the orienting lines line up with the map’s meridians, with the top of the compass pointing to true north on the map. Draw the line in the direction the bearing points. Forget this step and you will draw a line that is off by however many degrees your declination is worth, multiplied by the distance to the landmark.
A simple rule of thumb: if your declination is 10 degrees and your landmark is 5 miles away, a missed adjustment will put your plotted line about half a mile off course. That is enough to send you down the wrong valley.
Common Mistakes to Avoid When Triangulating
After years of teaching navigation classes, I see the same handful of errors trip people up. Avoid these and you will already be ahead of most hikers in the field.
- Misidentifying the landmark. A distant peak with a similar shape to the one on your map will throw every line off. Confirm by checking the position of the landmark relative to other features you can see.
- Forgetting declination. The single most common error. Always convert magnetic bearings to true bearings before plotting, or set your compass to compensate.
- Standing too close to metal. Belt buckles, cars, fencing, and even some rocks can deflect a compass needle. Move 10 to 15 feet away and retake the bearing.
- Using landmarks that are too close together. Two landmarks within 30 degrees of each other on the landscape produce near-parallel lines and a fuzzy intersection.
- Aiming at the wrong part of the landmark. Aim at the base of a tower or the summit of a peak, not the top edge. The map symbol represents the ground point, not the highest point.
- Drawing lines in the wrong direction. A bearing of 90 degrees is east. Always draw the line away from the landmark, in the direction you would travel to reach that bearing.
Run through this list mentally before you start. It takes 30 seconds and saves hours.
Practical Tips for Better Accuracy in the Field
Accuracy is the difference between being on the trail and being on the wrong ridge. These tips come from outdoor forums, search and rescue volunteers, and my own mistakes.
Use a third landmark whenever possible. Three bearing lines form a small triangle, called a triangle of error, and your real position is somewhere inside it. The smaller the triangle, the better your fix. Two landmarks are enough to get a position, but three will confirm it.
Hold the compass steady and at the same height each time you read. I keep my elbows tight against my ribs to reduce sway. If the wind is strong, kneel behind a pack or rock to block the gust. A bearing read with a wobbling needle can be off by five degrees or more.
Match the landmark against the map before you take the bearing, not after. A 2021 thread on the Wilderness Backpacking subreddit asked about triangulation errors and the top answer was the same point I am making here. People who match the feature first take bearings that are more accurate, because they commit to the right peak and do not second-guess the reading.
Write the bearing down the moment you read it. Memory drifts in stressful moments, especially in bad weather. A pencil mark on the map corner beats a guess every time.
When Triangulation Fails: Limitations You Should Know
Triangulation is not magic, and there are real conditions where it breaks down. Knowing these limits is part of using the skill well.
Heavy tree cover, fog, or darkness will hide your landmarks. If you cannot see two identifiable points, you cannot take bearings. In dense forest, narrow the search to linear features like a ridgeline or a river bend and use those instead, although the accuracy drops.
If the only landmarks you can see are not drawn on your map, the technique fails. Tourist maps and trail maps often leave out peaks, saddles, and small lakes. Always carry a topographic map for navigation, even if you also have a trail map for route descriptions.
When the two bearing lines cross at a very shallow angle, even small reading errors create a large spread in the intersection. The fix is to pick landmarks that are 60 to 120 degrees apart on the landscape. A right angle, or close to it, gives the cleanest intersection.
Finally, magnetic declination errors compound with distance. A landmark 10 miles away will magnify a 2-degree mistake into a 0.35-mile position error. For long-distance work, take bearings on closer landmarks and treat the long-distance ones as confirmation only.
Frequently Asked Questions
How do you triangulate your position with a compass?
To triangulate your position with a compass, identify two visible landmarks you can match on your map, take a magnetic bearing to each, convert those bearings to true bearings using the local magnetic declination, and plot both lines on the map. Where the two lines cross is your approximate position.
Can you triangulate with two points?
Yes, you can triangulate with two points. Two bearings to two known landmarks are enough to fix your position at the intersection of the two plotted lines. Three landmarks are more accurate, but two will work in a pinch.
What is the difference between triangulation and resection?
Triangulation traditionally means finding an unknown point by measuring angles from two known points. Resection traditionally means finding your own unknown position by sighting back to two or more known landmarks. In modern outdoor use the two words are often used for the same activity, taking bearings to landmarks and plotting the intersection.
Why does triangulation fail in the field?
Triangulation fails when landmarks are hidden by fog or trees, when features cannot be matched on the map, when magnetic declination is not adjusted, when the chosen landmarks sit too close together, or when a metal object deflects the compass needle. Each of these can move your plotted position by hundreds of feet or more.
Practice This Skill Before You Need It
Triangulating your position with two landmarks and a compass is one of those skills that feels awkward the first few times and becomes second nature after a handful of practice runs. Pick a local park with two identifiable features, bring a topographic map and a baseplate compass, and work through the steps twice. Once you can do it in under five minutes, the skill is yours for life.
Take a moment to learn how to triangulate your position using two landmarks and a compass before your next trip. The whole process takes less gear than a water filter and works when nothing else does. Carry the skill the same way you carry a first aid kit. Hope you never need it, but be grateful it is there when you do.