
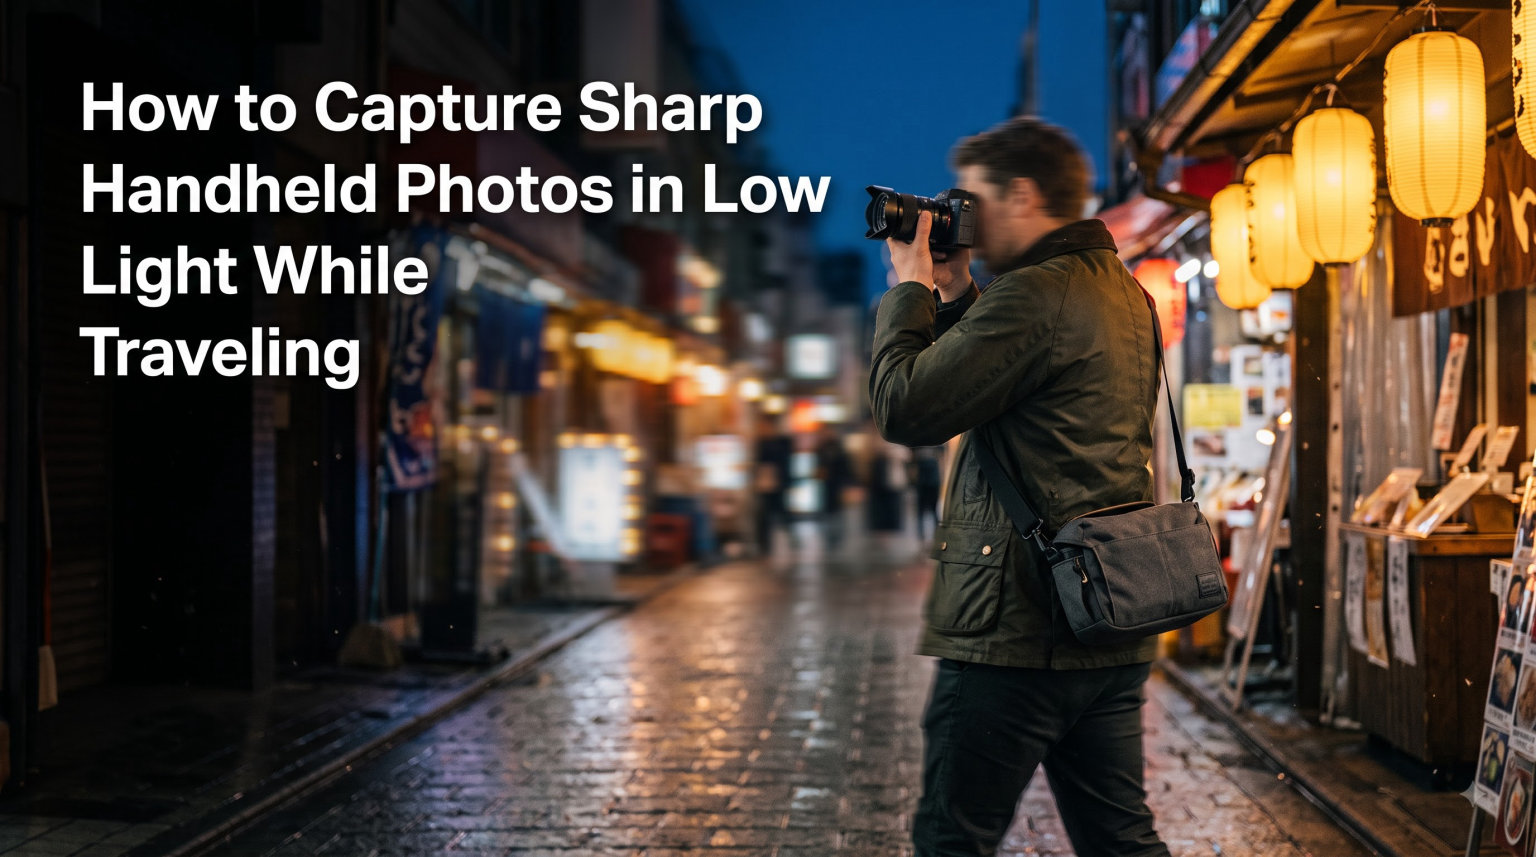
Last summer I stood inside a candlelit chapel in a small Italian village. My tripod was back at the hotel, the ceiling was breathtaking, and my shutter speed was hovering around 1/15s. I came away with nine blurry frames and one sharp one. That trip pushed me to actually learn how to capture sharp handheld photos in low light while traveling, not just wing it.
Low light is the silent killer of travel photos. The temples, lanterns, narrow alleys, and golden hour streets that make a destination feel alive are exactly the moments where a poorly chosen shutter speed ruins everything. After that chapel I rebuilt my approach from scratch, combining body stability, breathing control, and smarter settings. The methods below work on mirrorless, DSLR, and even serious compacts. They take a little practice but no extra gear.
This guide gives you the exact techniques I now use. You will learn how to capture sharp handheld photos in low light while traveling using a structured stance, the modern reciprocal rule, image stabilization, burst mode, and autofocus tricks. I have also added travel-specific scenarios at the end because generic tips rarely cover what you actually face at a night market or a candlelit dinner.
Table of Contents
Master the Tuck and Brace Stance
The first step in learning how to capture sharp handheld photos in low light while traveling is to turn your body into a human tripod. Stand with your feet shoulder-width apart, one foot slightly forward, and your weight centered over both legs. This gives you a stable base before your hands even touch the camera.
Tuck both elbows firmly against your ribcage. Do not let them flare out. Pressing your elbows into your torso creates a closed chain of bones and muscle that absorbs micro-tremors instead of letting them travel into the camera. When I started doing this consistently my keeper rate jumped from roughly one in five to one in three on slow shutter shots.
Cradle the lens from below with your left hand and bring your right hand tight to your body, with the elbow tucked in. Grip the camera body firmly but do not death-grip it, since tension adds shake. Your dominant hand should rest the index finger on the shutter and the thumb on the back for support.
Finally, slightly lean into the camera to add downward pressure through your forearms. This tiny forward lean is what most beginners skip, and it is one of the simplest ways to learn how to capture sharp handheld photos in low light while traveling without buying any gear.
Quick checklist for the stance:
- Feet shoulder-width apart, one foot forward
- Both elbows tucked tight against ribs
- Left hand under the lens, not gripping from the side
- Slight forward lean through the forearms
- Relaxed grip, not a death grip
Control Your Breathing for Sharper Shots
Your chest moves more than you think. Each breath shifts your ribcage by a few millimeters, and that motion travels straight into your camera. The simplest breathing trick for learning how to capture sharp handheld photos in low light while traveling is to exhale slowly before you press the shutter.
Take a calm breath in. Exhale about halfway, then hold that gentle pressure for the shutter press and the exposure itself. You are not holding your breath until your face turns purple. You are simply pausing the natural rise and fall of your chest during the critical half-second.
This is one of those techniques that sounds trivial until you try it. On a 1/8s exposure in a temple, I went from about 30 percent sharp frames to over 60 percent just by breathing correctly. It costs nothing and works on any camera.
Tip: combine this with the stance from the previous section. Tuck, brace, exhale, then press. The whole sequence takes about two seconds, but those two seconds are the foundation for how to capture sharp handheld photos in low light while traveling consistently.
Apply the New Reciprocal Rule for Shutter Speed
The classic rule says shutter speed should be at least 1 over the focal length. So a 50mm lens needs at least 1/50s. Modern cameras and stabilization have changed that baseline. The new reciprocal rule doubles it, meaning you should aim for at least 1 over twice your focal length as your starting point.
That means 50mm needs around 1/100s, 35mm needs 1/70s, and 24mm needs about 1/50s. When you are figuring out how to capture sharp handheld photos in low light while traveling, treat this doubled rule as your minimum, not your target. Anything slower is a gamble even with good technique.
For travel photography the tricky math is focal length in full-frame equivalent terms. A 24-70mm zoom on an APS-C body acts like 36-105mm, so at 70mm you really want 1/200s or faster in low light. Slowing down for a moody composition is fine, just know you are trading reliability for atmosphere.
If you want to be conservative for the cleanest results, triple the rule. So a 50mm equivalent means 1/150s as your floor. This is the safest approach when you are learning how to capture sharp handheld photos in low light while traveling and you cannot afford to miss the shot.
Set a Minimum Shutter Speed as Your Safety Net
Modern mirrorless and DSLR cameras let you set a minimum shutter speed inside Auto ISO. This single setting is the secret weapon behind how to capture sharp handheld photos in low light while traveling for many working photographers. Set it to 1 over twice your focal length and let the camera raise ISO until the shutter is fast enough.
On Sony bodies the option is called ISO AUTO Min. SS. On Canon it lives under Auto ISO settings. On Nikon and Fujifilm you can find it under ISO sensitivity settings. Set the floor to 1/100s or 1/125s for general travel and you will rarely get a blurry frame from camera shake.
This is also a great way to build trust with your gear. You focus on composition, framing, and subject. The camera quietly picks the lowest ISO that still keeps the shutter safe. When light gets really tough the ISO climbs, and that is exactly what it is designed to do.
Pair this with a custom upper ISO limit, say 6400 or 12800, so the camera does not push beyond a usable range. This combination gives you an automatic safety net for how to capture sharp handheld photos in low light while traveling without thinking about every shot.
Stack the Odds With Burst Mode
Burst mode is one of the cheapest ways to improve your keeper rate. Set your camera to high-speed continuous shooting and fire 5 to 10 frames every time you press the shutter. Hand-tremors are random, so most of your frames will still have micro-shake, but one or two of them will usually land clean.
On a recent trip to a lantern festival I shot a 1/20s exposure in burst and got 2 sharp frames out of 8. Without burst I probably would have come away with 0. That difference is what makes burst mode a key part of how to capture sharp handheld photos in low light while traveling in dim scenes.
You do not need the fastest burst available. Even 3 frames per second gives you multiple chances per press. Just make sure you have cleared enough buffer space, especially if you shoot RAW. A full buffer turns the camera into a slideshow right when you need it most.
Use burst mode together with a self-timer of 2 seconds when nothing is moving. The timer removes the tiny vibration from your finger pressing the shutter button. This trick alone is one of the most overlooked pieces of how to capture sharp handheld photos in low light while traveling.
Activate and Understand Image Stabilization
If your lens or camera has image stabilization, turn it on and learn when to leave it off. IBIS and VR systems use a gyroscope to shift a lens element or sensor to counter your hand motion. They typically give you 3 to 5 stops of extra handheld range, which is huge for travel.
On a 50mm lens with stabilization you can shoot at 1/8s or 1/4s and still get sharp results. That is a massive difference when you are standing inside a candlelit temple at sunset and want a clean handheld photo. This is the kind of capability that makes how to capture sharp handheld photos in low light while traveling actually feasible.
However, stabilization does not freeze moving subjects. It only counteracts camera shake. So for a person walking through a night market you still need a shutter speed fast enough to freeze their motion, usually at least 1/125s for slow walking and 1/500s for faster action.
Turn stabilization off when you mount the camera on a tripod. Some lenses can hunt or add micro-blur when there is no shake to correct. Also turn it off for very long exposures, like 2 seconds or more, where the system may actually amplify motion. Knowing when to leave it off is part of mastering how to capture sharp handheld photos in low light while traveling like a pro.
Use the Viewfinder Instead of the LCD
Pressing the camera against your face with the viewfinder gives you a third point of contact: forehead, cheek, and hands. That triangle is significantly more stable than holding the camera at arm’s length to look at the rear LCD. When you learn how to capture sharp handheld photos in low light while traveling, switching to the viewfinder is one of the easiest upgrades.
On a recent evening walk through Kyoto I switched from the LCD to the EVF and noticed an immediate drop in missed shots. The reason is simple: three contact points beat two, and the viewfinder also blocks out distractions so you are calmer while shooting.
The viewfinder has another advantage. Bright sunlight makes the LCD nearly unusable, and dim scenes make it hard to judge exposure. A good EVF shows you a real-time preview with brightness and color closer to the final image. That means more accurate focus and fewer surprises when you review your photos.
If you wear glasses, get a soft eyecup or use the diopter adjustment. A small piece of rubber over the EVF softens the contact against your glasses and stops light leaks. These small touches all add up when you are serious about how to capture sharp handheld photos in low light while traveling.
Brace Against Your Environment
Your surroundings are full of free tripods. Walls, railings, door frames, benches, tree trunks, and even your own backpack all give you something to press the camera against. When you are figuring out how to capture sharp handheld photos in low light while traveling, scan for these braces before you raise the camera.
Press the lens or the camera body firmly against the brace. The contact should be solid, not gentle. For a wall, tuck your shoulder in and let the camera press back into the surface. For a railing, set the lens barrel on it like a small perch. For a backpack, sit down and rest your elbows on top.
Some of the best travel photographers I know use the environment so naturally they barely seem to be working at it. I watched one photographer at a night market in Taipei lean his lens against a metal post for a 1-second exposure of a street scene. It was perfectly sharp because the surface did all the stabilization work.
You can also use your camera bag as a support. Set the bag on a low wall, lay the lens on top of it, and shoot. This is the same idea behind a beanbag tripod but uses something you already carry. Smart use of the environment is one of the most practical answers to how to capture sharp handheld photos in low light while traveling without extra gear.
Enable Electronic First-Curtain Shutter
Mechanical shutters create a tiny shock when they open and close. At slow shutter speeds that shock can blur your image. Electronic first-curtain shutter, often called EFCS, starts the exposure electronically and ends it with the mechanical curtain, removing the first shock.
This is one of the more advanced tips in how to capture sharp handheld photos in low light while traveling, but it is also one of the most effective. On a 1/30s exposure of a stained-glass window I got noticeably sharper results after enabling EFCS on my Sony body.
Most modern cameras let you turn EFCS on in the custom settings menu. On Canon it is called Silent Shutter or EFCS, on Sony it is under Shutter Type, and on Nikon it is listed as Electronic front-curtain shutter. The trade-off is that EFCS can cause banding under some artificial lights, so switch back when shooting under fluorescent or LED panels.
For travel scenes lit by candles, lanterns, or natural light EFCS is a free upgrade in sharpness. Turn it on by default for those moments and you will feel it in your files, especially at slower shutter speeds where shutter shock matters most.
Raise ISO Without Fear
The single biggest mindset shift in how to capture sharp handheld photos in low light while traveling is to stop fearing high ISO. Modern sensors from the last few years handle 3200 and 6400 with very little visible noise. A clean, sharp image at ISO 6400 beats a blurry, noise-free shot at ISO 100 every time.
On a Sony A7C II, a Canon R6 II, or a Nikon Z6 III I routinely shoot at 6400 without hesitation when needed. On smaller APS-C sensors I keep ISO below 3200 most of the time but I still go higher when the moment demands it. The point is to use ISO as a tool, not as a number to avoid.
Noise reduction in software has also improved. Lightroom and Capture One can clean up grain without losing detail. Even a phone-like denoise in modern editors handles ISO 12800 reasonably well. Pair that with shooting RAW and you have huge flexibility to recover detail and shadow tones.
One useful rule for travel: if the histogram is healthy and the shutter speed is at least twice your focal length, the photo is fine even at ISO 6400. Stop second-guessing the number and start trusting your settings. This mindset is central to how to capture sharp handheld photos in low light while traveling with confidence.
Nail Focus in Low Light: Autofocus Tips
Autofocus struggles when there is not much light. The contrast detection system needs edges to lock onto, and low light hides those edges. A few simple tricks make focus much more reliable when you are figuring out how to capture sharp handheld photos in low light while traveling in dim conditions.
First, switch to single-point AF and place the point over a high-contrast edge in your scene, like a lamp post against a dark sky. The camera locks much faster on a defined edge than on a smooth surface. Avoid trying to focus on a featureless shadow.
Second, use back-button focus. This separates focusing from the shutter press, so you can lock focus with your thumb and then recompose. It also lets you prefocus when the light is briefly better, like when a car passes with headlights on, and then wait for the moment.
Third, turn on focus peaking if your camera has it. The highlighted edges tell you exactly where focus is, which is invaluable in dim temples or night markets. Manual focus with peaking is faster than fighting an unreliable autofocus system in very dark scenes.
Fourth, use a small flashlight or your phone light to help the AF system acquire focus, then turn the light off before shooting. This trick is simple and works for any camera. It is the kind of practical fix that turns shaky low light attempts into reliable keepers.
Travel-Specific Scenarios: Real-World Low Light
Generic advice is fine but travel has its own quirks. The next three scenarios are the ones I get asked about most often. Each one shows how to capture sharp handheld photos in low light while traveling in a specific setting.
Night Markets and Street Food Stalls
Night markets mix neon signs, fluorescent tubes, halogen bulbs, and steam from food stalls. The light is uneven, the colors are intense, and there are people everywhere. Your best settings for these scenes are shutter priority at 1/125s, Auto ISO capped at 6400, and continuous AF with subject tracking.
Brace your elbow against a stall counter when you can. Most night market vendors do not mind a photographer leaning on a corner for a moment, especially if you buy something afterward. Combine this with burst mode and you will capture sharp, lively shots of vendors and customers.
White balance is tricky under mixed lighting. Shoot RAW so you can adjust it in post without quality loss. If you shoot JPEG, set a custom white balance on a gray card or a white napkin held under the dominant light source. Both tricks help you how to capture sharp handheld photos in low light while traveling in colorful chaos.
Indoor Temples, Mosques, and Cathedrals
Religious buildings often ban tripods and flash. That means you are shooting handheld at very slow shutter speeds, sometimes down to 1/8s. Lean against a column, sit on the floor, or rest the camera on a pew to stabilize.
Use the widest aperture your lens offers, typically f/1.8 or f/2.8, and let ISO climb. On a recent temple visit I shot at ISO 8000 and 1/15s braced against a stone railing. The photos were sharp, the mood was intact, and no one complained.
Turn on EFCS to reduce shutter vibration, switch to the viewfinder for stability, and shoot in burst. These three changes together are the practical recipe for how to capture sharp handheld photos in low light while traveling through sacred spaces without disrupting the atmosphere.
Evening Streets and Golden Hour to Blue Hour
The transition between golden hour and blue hour is the most magical time for travel photography, but it is also a low light trap. Light changes every minute, so set Auto ISO with a minimum shutter speed and trust the camera to make adjustments while you focus on composition.
For street portraits in low light, ask your subject to stand near a window, lamp, or storefront light. Posing subjects near light sources is a tip I learned from forum photographers and it makes a huge difference in sharpness because both AF and shutter speed improve.
Wide angle lenses help with handheld stability. A 24mm lens at 1/50s is far easier to handhold than a 85mm at 1/125s. Choose wide primes or wide zooms for evening street scenes and you will spend less time fighting blur and more time enjoying the walk.
Your Quick Checklist Before the Next Trip
Before your next travel day, work through this checklist. It condenses everything in this guide into a short routine you can repeat in any city.
- Tuck elbows in, brace against ribs, lean forward slightly
- Exhale halfway, then press the shutter
- Set minimum shutter speed to twice the focal length
- Turn on image stabilization for handheld shots
- Enable electronic first-curtain shutter for non-LED scenes
- Use the viewfinder for an extra contact point
- Brace against walls, railings, or your camera bag
- Shoot 5 to 10 frame bursts to stack the odds
- Raise ISO until the shutter speed is safe
- Use back-button focus with focus peaking in dim areas
Run this list once at the start of a travel day and the techniques become automatic by sunset. That is the goal: not to remember ten tips in the moment, but to make them a habit so you can focus on the scene in front of you.
Frequently Asked Questions
How do I take sharp images in low light handheld?
Brace your elbows against your ribs, exhale halfway, and use a shutter speed of at least twice your focal length. Raise ISO until the shutter is fast enough, turn on image stabilization, and shoot in burst to stack the odds. Brace against walls or your bag for extra support when possible.
How do I take sharp photos in low light?
Combine a stable stance, controlled breathing, and modern camera settings. Use a wide aperture, the new reciprocal rule for shutter speed, and a minimum shutter speed floor in Auto ISO. Brace against the environment and use the viewfinder for a third contact point.
How do I take pictures in low light without flash?
Raise the ISO, open the aperture to its widest setting, and use image stabilization. Lean against a wall or any stable surface and shoot in burst mode. RAW files let you recover shadow detail and reduce noise during editing.
How do I get sharp handheld photos at night while traveling?
Use the widest lens you have, set a minimum shutter speed of 1/100s or faster, and let ISO climb to 6400 or higher. Brace against railings, columns, or your backpack, switch to the viewfinder, and enable electronic first-curtain shutter to avoid shutter shock.
Final Thoughts
Learning how to capture sharp handheld photos in low light while traveling is not about buying new gear. It is about turning your body into a tripod, controlling small movements, and trusting your camera to handle the rest. The combination of the tuck and brace stance, breathing control, the new reciprocal rule, burst mode, image stabilization, and a smart use of your environment covers almost every low light situation a traveler faces in 2026.
Practice the ten-step checklist on your next outing. After a day or two the techniques will fade into the background and you will simply take sharper, more confident photos in dim temples, lantern-lit markets, and golden hour streets. That is the moment handheld low light stops feeling hard and starts feeling like second nature.