
Picture this: you are three days into a hiking trip in Costa Rica, and a simple blister turns into an open wound because you packed nothing but a single box of adhesive bandages. Or maybe you are on a business trip in Tokyo and develop a sudden allergic reaction with no pharmacy nearby that carries familiar medication. These situations happen more often than most travelers expect.
The CDC estimates that up to 65% of travelers experience some kind of health problem during their trips. Most of these issues are minor, but without the right supplies, a small problem can become a trip-ruining emergency. That is exactly why building a destination-specific travel first-aid kit matters so much.
A travel first-aid kit is a portable collection of medical supplies and medications customized for your destination, trip duration, and personal health needs. Unlike a home kit, it needs to be compact, organized, and tailored to the specific risks of where you are going.
In this guide, our team breaks down exactly how to build a travel first-aid kit that matches your destination. We cover everything from the essential base supplies to a detailed destination customization matrix, medication planning, TSA guidelines, and practical tips from experienced travelers. By the end, you will have a complete blueprint for assembling a kit that actually fits your trip.
Table of Contents
The Foundation: Essential Supplies Every Travel First-Aid Kit Needs
Every travel first-aid kit starts with a core set of supplies that work regardless of destination. Think of these as your base layer. You will add destination-specific items on top of this foundation, but you should never skip these basics.
Wound Care Essentials
Your wound care supplies handle everything from paper cuts to scraped knees and deeper lacerations. Pack adhesive bandages in multiple sizes because injuries come in all shapes. Include sterile gauze pads (at least 4×4 inch) for larger wounds that need padding and absorption.
Add antiseptic wipes to clean wounds before dressing them. A tube of antibiotic ointment helps prevent infection in cuts and scrapes. Medical tape is non-negotiable for securing gauze that adhesive bandages cannot hold.
Roll an elastic bandage wrap into your kit for sprains and strains. These are especially important if you plan any physical activity on your trip. Include a small pair of blunt-nosed scissors for cutting tape and gauze to size.
Tools and Instruments
A reliable digital thermometer takes almost no space but tells you whether a fever is developing. Tweezers are essential for removing splinters, stingers, and ticks. Include a few pairs of disposable gloves to keep things sanitary when treating wounds.
A small CPR face shield fits in a tiny pouch and could save a life. Safety pins hold bandages in place and take up zero space. A quick-reference first aid card helps you stay calm and follow proper steps during an emergency.
Round out your tools with a cold pack (the instant-activating kind) for reducing swelling. These activate with a simple squeeze and stay cold for 15 to 20 minutes.
The Non-Negotiable Base List
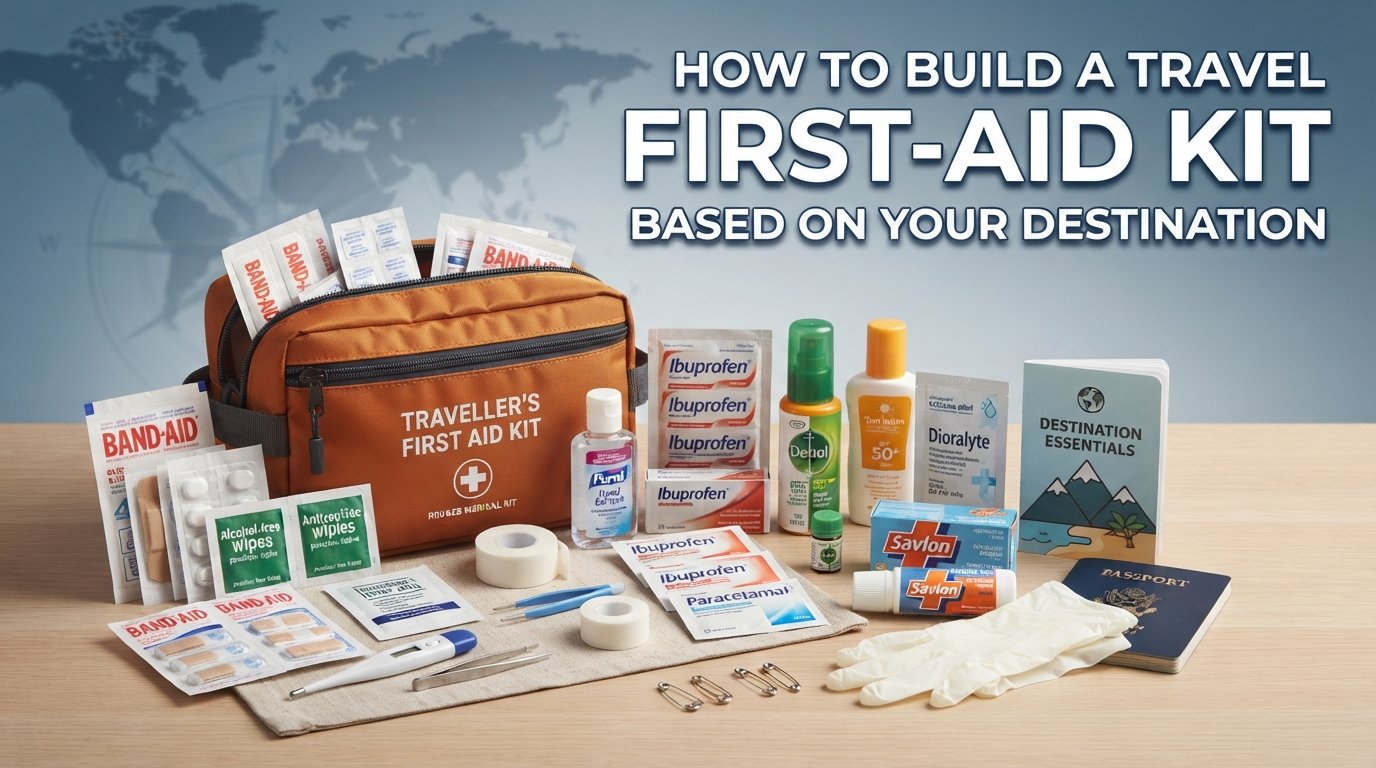
Here is the minimum every travel first-aid kit should contain: 10 to 15 adhesive bandages in assorted sizes, 5 sterile gauze pads, 1 roll of medical tape, 1 elastic bandage wrap, antiseptic wipes (individually packaged), antibiotic ointment, tweezers, scissors (blunt-nosed), digital thermometer, disposable gloves, and instant cold packs.
This base kit weighs under one pound and fits in a small pouch about the size of a paperback book. Everything on this list is available at any pharmacy for a few dollars total. Once you have this foundation packed, you are ready to customize based on your destination.
How to Build a Travel First-Aid Kit in 5 Steps
Building a travel first-aid kit does not need to be complicated. Follow these five steps in order and you will end up with a kit that covers your specific risks without weighing down your luggage.
Step 1: Assess Your Destination Risks
Start by researching the health risks specific to where you are going. The CDC Travelers’ Health website provides destination-specific recommendations for vaccinations, medications, and health precautions. Check government travel advisories for disease outbreaks or health infrastructure concerns.
Ask yourself what types of injuries and illnesses are most common in your destination. Tropical regions carry risks of insect-borne diseases and heat-related illness. Urban areas increase your exposure to foodborne illness. Remote wilderness means you are far from medical help if something goes wrong.
Write down the top five health risks for your destination. This list becomes your shopping list for destination-specific additions.
Step 2: Match Your Activities to Your Supplies
A beach vacation in Hawaii requires different supplies than a backpacking trek through Patagonia. List every activity you have planned, then identify what could go wrong during each one.
Hiking means blister treatment and sprain support. Water activities call for waterproof bandages and ear drops. City sightseeing might only require basic supplies plus extra motion sickness medication for public transit.
Be honest about your activity level. If you tend to overpack activities into a trip, plan for the most demanding one as your baseline.
Step 3: Factor in Personal Health Conditions
Your personal medical history is the most important factor in kit customization. Pack enough of every prescription medication to last the entire trip plus a few extra days in case of delays. Carry copies of your prescriptions and a letter from your doctor for controlled substances.
Consider allergies, chronic conditions, and recurring issues. If you get migraines, pack your specific medication. If you have asthma, include a spare inhaler. Travelers with severe allergies should carry an EpiPen and antihistamines.
Talk to your doctor or a travel medicine specialist at least four to six weeks before departure. Some destinations require vaccinations or prophylactic medications that take time to become effective.
Step 4: Choose the Right Container
Your container matters more than you might think. Experienced travelers on Reddit communities like r/onebag strongly prefer compact, soft-sided pouches with clear compartments for organization. A clear or mesh-panel bag lets you see everything at a glance without unpacking.
Look for a waterproof or water-resistant container, especially for outdoor or tropical trips. Some travelers use simple Ziploc bags organized by category inside a larger pouch. This approach is lightweight, cheap, and surprisingly effective.
Size your container to the trip. A weekend getaway needs a small pouch. A two-week international trip might need a medium-sized organizer bag with multiple compartments.
Step 5: Organize, Label, and Seal
Group items by category: wound care in one section, medications in another, tools in a third. Use small Ziploc bags or pouch dividers to keep categories separated. Label each section clearly so you can find what you need quickly in an emergency.
Seal liquids in individual bags to prevent leaks from ruining other supplies. Check that all medication containers have readable labels and expiration dates. Place your first aid reference card on top where you can grab it immediately.
Do a final inventory check against your list before zipping up. Many travelers realize they forgot something essential only after they need it.
Medications to Pack: OTC and Prescription Guide
Medications are where most travelers either overpack or underprepare. The key is packing enough variety to handle common issues without creating a pharmacy in your bag. Here is what our team recommends based on CDC guidelines and traveler feedback.
Pain Relievers and Fever Reducers
Pack acetaminophen (Tylenol) and ibuprofen (Advil) in travel-sized bottles. These two medications cover headaches, muscle aches, fever, and inflammation. Having both gives you options since some people tolerate one better than the other.
Include aspirin if anyone in your travel group might need it for heart-related emergencies, but check with a doctor first. A small bottle of 24 to 50 tablets of each pain reliever is plenty for most trips.
Stomach and Digestive Medications
Traveler’s diarrhea affects up to 70% of travelers visiting developing countries, according to CDC data. Pack anti-diarrheal medication (loperamide) as your first line of defense. Include oral rehydration salts to replace fluids if illness strikes.
Add antacids for unexpected heartburn from unfamiliar foods. If your stomach is sensitive, consider packing a mild laxative as travel and diet changes commonly cause constipation. Bismuth subsalicylate (Pepto-Bismol) tablets can help prevent and treat mild stomach upset.
Allergy Medications
Antihistamines are essential even if you do not typically suffer from allergies. Unfamiliar environments expose you to new pollens, foods, and insects. Pack cetirizine or loratadine for daytime use since they are non-drowsy.
Include diphenhydramine (Benadryl) for severe allergic reactions, even though it causes drowsiness. It works faster than non-drowsy options for sudden reactions to insect bites or food allergies. Hydrocortisone cream handles topical itchiness from rashes and bug bites.
Prescription Medications
Bring all daily prescriptions in their original labeled containers. Never repackage prescription medications into unlabeled pill organizers when flying internationally, as customs officials may question unmarked pills. Pack enough for the full trip plus a seven-day buffer.
Carry a doctor’s note for any controlled substances, injectable medications, or liquid prescriptions exceeding TSA limits. If you take refrigerated medications, research cold storage options for your destination and bring a small insulated pouch with cold packs.
For international travel, check whether your medications are legal at your destination. Some countries ban medications that are perfectly legal in the United States, including common ADHD medications and certain pain relievers.
Destination-Specific Kit Customization Matrix
This is where most travel first-aid guides fall short. They give you a generic checklist and send you on your way. But a kit for a tropical beach vacation should look very different from one for a winter camping trip. Our team created this destination matrix to help you customize your kit precisely.
Below is a breakdown of what to add to your base kit depending on your destination type. Use this as a supplement to the essential supplies listed earlier, not a replacement.
| Destination Type | Key Risks | Add These Items | Priority Level |
|---|---|---|---|
| Tropical / Jungle | Insect-borne disease, heat illness, fungal infections | DEET repellent (30%+), permethrin spray, antifungal cream, rehydration salts, antimalarials (if recommended) | High |
| Urban / City | Foodborne illness, blisters, motion sickness, jet lag | Blister pads, motion sickness pills, hand sanitizer, extra anti-diarrheal meds | Medium |
| Wilderness / Remote | Trauma, infection, exposure, no medical access | Trauma shears, tourniquet, SAM splint, water purification tablets, suture kit, emergency blanket | Critical |
| Cold Climate | Frostbite, hypothermia, dry skin, respiratory issues | Chemical hand warmers, lip balm (SPF), moisturizing cream, cough drops, extra thermal blanket | High |
| Desert / Arid | Dehydration, sunburn, heat stroke, snake bites | Electrolyte packets, high-SPF sunscreen, aloe vera gel, snake bite kit, extra water purification | High |
| High Altitude | Altitude sickness, sunburn, dehydration | Acetazolamide (with prescription), extra sunscreen, electrolyte mixes, ginger for nausea | High |
| Marine / Beach | Sunburn, jellyfish stings, coral cuts, ear infections | Waterproof bandages, vinegar (for stings), ear drops, aloe vera, reef-safe sunscreen | Medium |
Tropical Destinations: Deep Dive
Tropical environments present the widest range of health risks for travelers. Insect-borne diseases like malaria, dengue fever, and Zika are serious concerns in many tropical regions. Pack DEET-based insect repellent at 30% to 50% concentration for skin application.
Heat-related illness is the other major tropical risk. Include oral rehydration salts and electrolyte packets. Antifungal cream handles the skin infections common in humid environments. If your destination has malaria risk, talk to your doctor about antimalarial prophylaxis well before departure.
Cold Climate Destinations: Deep Dive
Cold weather travel demands supplies for temperature-related injuries. Chemical hand and body warmers are lightweight and can prevent frostbite in emergencies. Pack moisturizing cream and SPF lip balm because cold, dry air and high-altitude UV can severely damage skin.
Include cough drops and throat lozenges since respiratory infections spread easily in cold conditions. An emergency thermal blanket costs about two dollars and reflects up to 90% of body heat, making it one of the best value items in any cold-weather kit.
Wilderness and Remote Destinations: Deep Dive
When you are hours from the nearest medical facility, your kit needs to handle more serious injuries. Add a tourniquet and learn how to use it properly before your trip. A SAM splint can immobilize fractures and severe sprains until you reach help.
Water purification tablets are essential when you cannot trust local water sources. Include a larger quantity of gauze and trauma dressings than a standard kit carries. An emergency whistle and signal mirror help rescuers find you if you become incapacitated.
Activity-Based Kit Building
Your planned activities should shape your kit as much as your destination. Someone spending two weeks hiking the Appalachian Trail needs a very different kit than someone attending conferences in London. Here is how to match your kit to your activities.
Hiking and Backpacking
Hiking kits need to prioritize mobility and trail-specific injuries. Blister treatment is your number one priority, so pack moleskin, blister pads, and athletic tape. Include a small roll of duct tape wrapped around a pencil for emergency gear repairs and impromptu bandaging.
Add a SAM splint for potential fractures. Pack tweezers specifically for tick removal, which is a real concern on wooded trails. Include a small tube of hydrocortisone for poison ivy, oak, and sumac exposure.
Reddit’s r/camping community consistently recommends packing more blister supplies than you think you need. Blisters are the most common hiking injury and can end a trip early if untreated.
Beach and Water Activities
Water activities introduce unique injury risks. Pack waterproof bandages that stay on in water for cuts from coral, rocks, and shells. Include vinegar or a commercial sting relief product for jellyfish stings.
Ear drops that dry out trapped water help prevent swimmer’s ear. Aloe vera gel is essential for sunburn relief. Reef-safe sunscreen protects both your skin and the marine environment at your destination.
Coral cuts are notoriously prone to infection. If you plan to snorkel or dive in coral areas, pack extra antiseptic and antibiotic ointment specifically for these wounds.
Business Travel
Business travelers need a minimalist kit that handles common urban issues without taking up valuable briefcase space. Focus on medications: pain relievers, antacids, antihistamines, and anti-diarrheal pills. Add a few adhesive bandages, antiseptic wipes, and blister pads.
Include motion sickness medication if you will be using taxis, trains, or flights frequently. Melatonin can help adjust to new time zones quickly. Keep your business travel kit small enough to fit in a jacket pocket or laptop bag compartment.
Family Vacations
Traveling with children multiplies the likelihood of minor injuries and illnesses. Pack child-strength versions of pain relievers and antihistamines. Include a thermometer designed for children and any specific pediatric medications your kids regularly need.
Add extra adhesive bandages with kid-friendly designs to make treatment less stressful. Pack diaper rash cream even if your children are past the diaper stage, as it works well for chafing and minor skin irritation. Consider bringing a small bottle of hand sanitizer for the whole family.
Trip Duration: Short Trips vs Extended Travel
How long you travel directly affects how much you need to pack. A weekend city break and a month-long expedition require different approaches to kit sizing.
For trips of three days or less, a compact kit with basic wound care, a few key medications, and your personal prescriptions is sufficient. Focus on the essentials and skip destination-specific extras unless your short trip involves high-risk activities.
Week-long vacations warrant a medium kit. Include the full base supply list plus destination-specific additions. Pack enough medication for the entire trip with a three-day buffer.
Extended travel of two weeks or more requires the most comprehensive approach. Carry a larger kit with duplicate supplies of critical items. Split medications between your carry-on and checked luggage in case one bag is lost. Plan for restocking during your trip by researching pharmacy availability at your destinations.
Flying with Your Kit: TSA and Airline Guidelines
Getting your travel first-aid kit through airport security is a common source of anxiety for travelers. The good news is that most first-aid supplies pass through TSA without issue if you follow a few simple rules.
Liquid Medication Rules
TSA’s 3-1-1 rule applies to liquid medications, but with important exceptions. Prescription liquid medications in quantities exceeding 3.4 ounces are allowed in reasonable amounts for your trip. You must declare these items to security officers at the checkpoint for screening.
Over-the-counter liquid medications like cough syrup or liquid pain relievers must follow the standard 3-1-1 rule. Transfer these to travel-sized containers of 3.4 ounces or less. All liquids must fit in a single quart-sized clear bag.
Gels, including aloe vera and antibiotic ointment, also fall under liquid rules. Pack small tubes under 3.4 ounces in your carry-on, or place larger amounts in checked luggage.
Sharp Items and Tools
TSA allows scissors with blades under 4 inches in carry-on luggage. Most first-aid scissors meet this requirement, but double-check before packing. Blunt-nosed scissors and tweezers pass through security without problems.
Razors and scalpel blades are not permitted in carry-on bags. If your kit includes a suture kit or scalpel for wilderness travel, pack those items in checked luggage. CPR face shields and safety pins are allowed in carry-on bags.
Prescription Documentation
Always carry prescriptions in their original labeled containers. Bring a copy of your prescription or a doctor’s letter for any controlled substances. This documentation is especially important for international travel, where customs officials may inspect medications closely.
Keep all essential medications in your carry-on bag, never in checked luggage. If your checked bag is delayed or lost, you do not want to be without critical medications in a foreign country. Pack a backup supply in a separate bag if your trip is long enough to justify it.
Build vs Buy: Pre-Made vs Custom Kits
One of the most common questions on travel forums is whether to buy a pre-made kit or build your own. The answer depends on your needs, budget, and how much customization you require.
Pre-made kits are convenient and save time. They typically cost between $15 and $50 and come organized in a purpose-built case. The downside is that they often include items you will never use and miss items specific to your destination. Many forum users on Reddit note that pre-made kits contain filler items that add weight without value.
Building your own kit costs roughly the same or slightly less than buying pre-made. The advantage is total control over contents. You include exactly what you need for your destination and nothing you do not. The trade-off is the time investment required to source individual items.
Our team recommends a hybrid approach for most travelers. Start with a small pre-made kit as your base, then remove items you will not use and add destination-specific supplies. This gives you the convenience of a pre-built foundation with the customization of a DIY kit.
For experienced travelers who know exactly what they need, building from scratch is the way to go. Use small Ziploc bags to organize items by category inside a compact pouch. This approach is popular among ultralight travelers who count every ounce.
Kit Maintenance and Restocking Tips
A travel first-aid kit is not a one-time project. Supplies expire, get used, and degrade over time. Regular maintenance keeps your kit ready for action whenever you need it.
Check expiration dates on all medications at least twice a year. Most over-the-counter medications remain effective for one to three years, but heat and humidity can shorten that window. Replace any expired items before your next trip.
After every trip, inventory your kit and restock anything you used. This habit ensures your kit is always trip-ready. Replace items that were damaged or compromised during travel, especially if your kit was exposed to moisture or extreme temperatures.
Update your kit seasonally if you travel year-round. Cold-weather additions can be swapped for tropical supplies depending on your next destination. Keep a master checklist inside your kit so you can quickly verify contents before each trip.
FAQs
How to make a first aid kit for travel?
Start with a compact, water-resistant container and fill it with essential wound care supplies (adhesive bandages, gauze pads, medical tape, antiseptic wipes, antibiotic ointment), basic tools (tweezers, scissors, thermometer, gloves), and key medications (pain relievers, antihistamines, anti-diarrheal pills). Then customize based on your destination, planned activities, personal health needs, and trip duration.
What are the 3 C’s in basic first aid?
The 3 C’s of first aid are Check, Call, and Care. First, Check the scene for safety and assess the injured person’s condition. Second, Call for emergency medical help if the situation is serious. Third, Care for the victim by providing appropriate first aid treatment based on their injuries while waiting for professional help.
Is it cheaper to buy or make your own first aid kit?
Building your own first aid kit typically costs the same or slightly less than buying a pre-made kit. Pre-made kits range from $15 to $50 but often include unnecessary filler items. Building custom lets you spend only on what you actually need, though it requires more time sourcing individual supplies. A hybrid approach works well: start with a basic pre-made kit and customize it.
What should be in a first aid kit for travel?
A travel first-aid kit should include adhesive bandages in multiple sizes, sterile gauze pads, medical tape, an elastic bandage wrap, antiseptic wipes, antibiotic ointment, tweezers, blunt-nosed scissors, a digital thermometer, disposable gloves, instant cold packs, pain relievers (acetaminophen and ibuprofen), antihistamines, anti-diarrheal medication, and any personal prescription medications.
Can I bring a first aid kit through TSA?
Yes, you can bring a first aid kit through TSA checkpoints. Most first-aid supplies pass without issue. Liquid medications follow the 3-1-1 rule for carry-on bags (3.4 ounces or less per container), though prescription liquids in larger amounts are allowed if declared at security. Scissors with blades under 4 inches are permitted in carry-on luggage.
What are the 10 essential travel items?
The 10 essential items for a travel first-aid kit are: adhesive bandages, sterile gauze pads, medical tape, antiseptic wipes, antibiotic ointment, pain relievers (acetaminophen or ibuprofen), antihistamines, anti-diarrheal medication, tweezers, and disposable gloves. These form the foundation that every traveler should carry regardless of destination.
Is it okay to have a Ziploc bag of medicine and pills when flying?
Yes, it is okay to carry pills in a Ziploc bag when flying, but TSA recommends keeping medications in their original labeled containers, especially for prescriptions. For over-the-counter pills in pill organizers, labeling helps avoid delays. For international travel, always keep prescription medications in original containers with pharmacy labels to avoid customs issues.
Conclusion
Learning how to build a travel first-aid kit based on your destination gives you confidence and peace of mind on every trip. Start with the essential base supplies, then layer in destination-specific items using the customization matrix. Factor in your activities, personal health needs, and trip duration to create a kit that truly fits your travel style.
The best kit is one you actually carry and know how to use. Keep it organized, check expiration dates regularly, and restock after every trip. Whether you are heading to a tropical beach, a remote mountain trail, or a busy international city, a well-planned travel first-aid kit ensures you are ready for whatever comes your way in 2026 and beyond.