
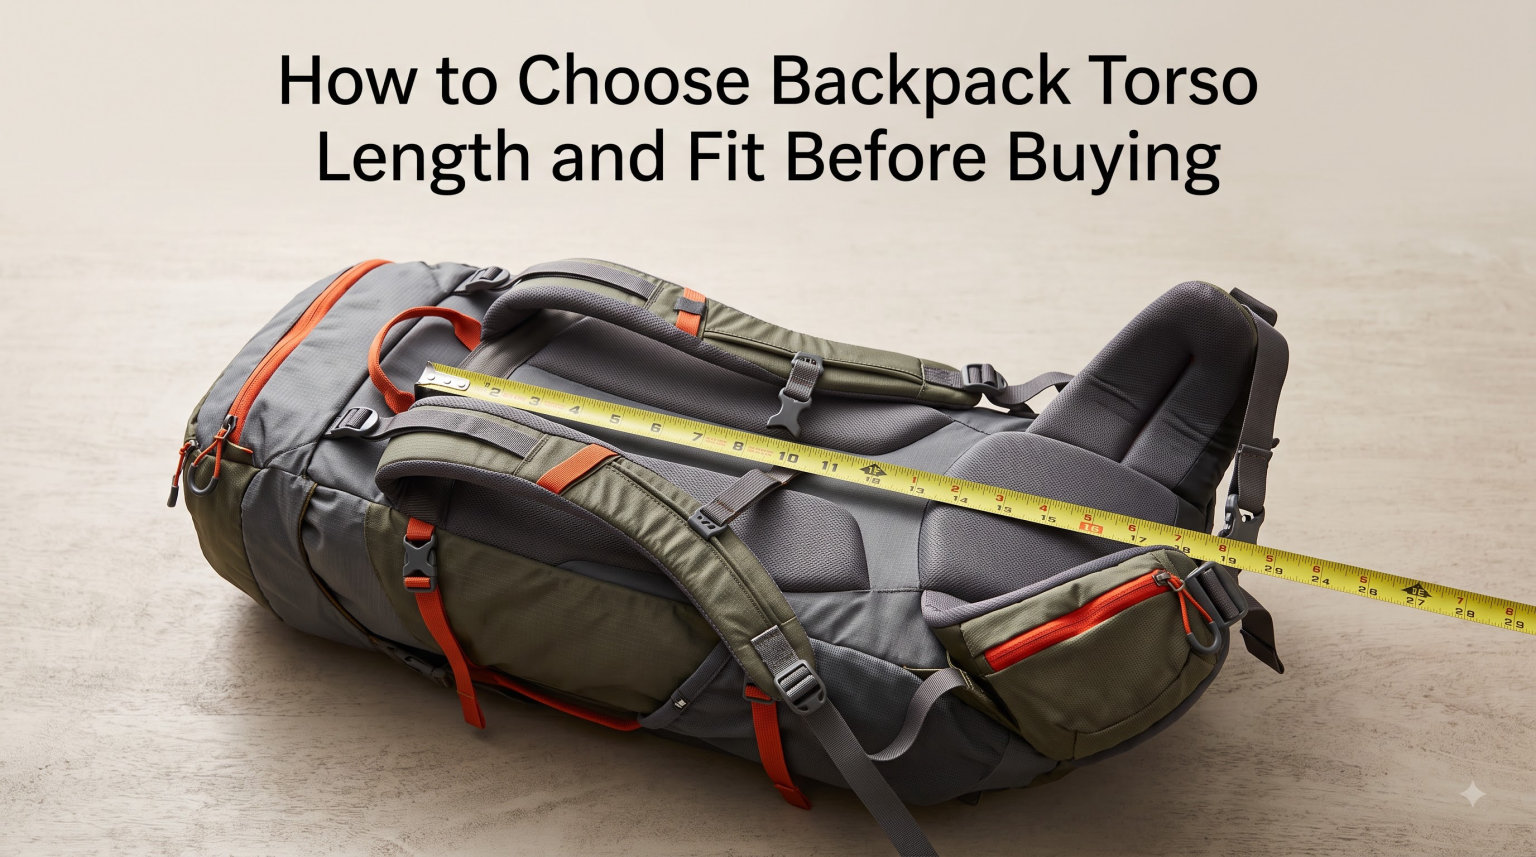
Buying a backpack based on your height is the number one mistake hikers make, and it leads to shoulder pain, lower back aches, and miserable trips. Your torso length, not your overall height, determines which pack size fits you correctly. Two people who are both 5 foot 10 can have completely different torso measurements, which means they need different pack sizes.
Learning how to choose backpack torso length and fit before buying saves you money on returns and prevents months of discomfort on the trail. The process comes down to measuring two points on your body, matching that measurement to a pack size, and then adjusting the hipbelt, shoulder straps, load lifters, and sternum strap in the right order.
I have fitted dozens of packs over the years, and I can tell you that a properly fitted 40-liter pack feels lighter than a poorly fitted 30-liter one. Weight distribution matters more than total weight. When your hipbelt sits correctly on your iliac crest, your hips carry roughly 80 percent of the load and your shoulders handle the remaining 20 percent. That ratio is what separates a great day on the trail from a painful slog.
This guide walks you through every step in plain language. You will learn how to find your C7 vertebra, locate your iliac crest, measure the distance between them, match that number to a sizing chart, and then fine-tune every strap and buckle. I have also pulled together real user complaints from backpacking forums so you can avoid the mistakes that catch people off guard.
By the end, you will know exactly what to look for when you try on a pack, whether you are shopping for a day pack or a multi-day expedition rig. Let us start with the single most important measurement you will ever take for backpack fitting.
Table of Contents
How to Measure Your Torso Length for a Backpack
Torso length is the distance from your C7 vertebra at the base of your neck to the top of your iliac crest where your hip bones meet your spine. This measurement, typically between 15 and 22 inches for most adults, determines which pack size category you fall into. Get this number right and everything else about fitting your backpack becomes dramatically easier.
What You Need to Measure Your Torso
You need two things to measure your torso length accurately. First, a flexible tape measure, the soft kind used for sewing, not a metal construction tape. Second, a friend to help you, because measuring your own back solo leads to errors that can throw off your entire pack fit.
If you do not have a flexible tape measure, grab a piece of string or a non-stretchy cord. You can mark the two points on the string and then measure that against a ruler or yardstick afterward. The key is that your measuring tool must follow the curve of your spine, not cut straight across the air.
Finding Your C7 Vertebra
The C7 vertebra is the seventh cervical vertebra, and it sits at the base of your neck where your shoulders begin to slope outward. To find it, tilt your head forward and bring your chin toward your chest. Run your fingers down the back of your neck from your hairline until you feel a prominent bony bump that sticks out further than the others.
That bump is your C7 vertebra. Some people call it the vertebra prominens because it is the most obvious cervical spine landmark. When you nod your head forward, this bone becomes easier to feel. Have your helper place a finger or a small sticker on this spot so you do not lose track of it during the measurement.
Finding Your Iliac Crest
The iliac crest is the top rim of your hip bone, and it sits roughly at the same level as your belly button on most people. To find it, place your hands on your hips with your thumbs pointing toward your spine. Your thumbs will naturally rest on the top edge of your hip bones, and that top edge is the iliac crest.
Many beginners confuse the iliac crest with the waist, which sits higher and softer. The hipbelt of your backpack should rest on the iliac crest, not on your waist. Forum hikers on Reddit consistently point out that a hipbelt sitting too high on the soft waist area causes the pack to sag and pull backward away from the body.
Taking the Measurement
Stand upright with your shoulders relaxed and your feet shoulder-width apart. Have your helper place the tape measure at the C7 vertebra and run it straight down your spine, following the natural curve of your back, to the top of the iliac crest where your thumbs rest. The tape should lie flat against your spine the entire way.
Read the number where the tape meets the iliac crest line. This distance is your torso length. Most adults measure between 15 and 22 inches, with the average falling around 18 inches for women and 19 inches for men. Write this number down because you will use it to select your pack size.
Tips for an Accurate Measurement
Measure twice to confirm your number. If the two measurements differ by more than half an inch, measure a third time. Wear a thin shirt so the tape sits against your body rather than bunching up in clothing folds. Stand naturally without tensing your shoulders or arching your back, because poor posture changes your torso length by up to an inch.
One common source of confusion is that different brands measure torso length slightly differently. Some measure to the iliac crest, while others measure to the point where an imaginary hipbelt line would cross the spine. These differences are usually small, under half an inch, but they explain why a medium in one brand might feel different from a medium in another. When in doubt, check the manufacturer sizing page for their specific method.
Backpack Sizing Chart: Matching Your Torso to the Right Pack Size
Backpack manufacturers divide torso lengths into four standard size categories: extra small, small, medium, and large. Each category covers a range of about 4 to 5 inches, and most adults fall comfortably into one category. The chart below shows the general ranges that apply across major brands like Osprey, Gregory, Deuter, and REI Co-op.
Standard Backpack Torso Sizing Chart
Use this chart as your starting reference, then confirm against the specific manufacturer chart before buying. Here are the standard ranges:
Extra Small: Torso length under 16 inches (under 40 cm). Typical pack sizes labeled XS or S/XS. Best for shorter torsos, many youth packs, and some women’s-specific models.
Small: Torso length 16 to 18 inches (40 to 46 cm). Covers a large portion of women and shorter men. Many women’s-specific packs max out at this range.
Medium: Torso length 18 to 20 inches (46 to 51 cm). The most common men’s size. Fits average-height men and taller women with longer torsos.
Large: Torso length 20 to 22 inches (51 to 56 cm). Designed for tall hikers and anyone with an unusually long torso relative to their height. Some brands combine Medium and Large into a single Regular size with a wider range.
Extra Large: Torso length over 22 inches (over 56 cm). Less common, available from select brands. If you measure over 22 inches, look for brands that offer extended sizing or adjustable torso systems.
What to Do When You Are Between Sizes
If your measurement falls right on the border between two sizes, you have a decision to make. Forum consensus from backpacking communities leans strongly toward sizing down when you are between sizes. A pack with a slightly short torso measurement tends to ride more comfortably than one that is too long, because an oversized pack causes the frame to press into your lower back or even your tailbone.
I have seen this firsthand. A friend bought a medium pack when her measurement put her at 18 inches exactly, and the frame rode low enough to bruise her sacrum on the first day of a four-day trip. She switched to a small and the pain disappeared entirely. When in doubt, go with the smaller size and rely on the adjustable features to fine-tune the fit.
The exception to the size-down rule is when a brand specifically advises sizing up in their fit guide. Always read the manufacturer recommendation for the exact pack model you are considering, because some brands run small or large compared to the standard chart.
Adjustable Torso Length Systems
Many modern backpacks feature adjustable torso systems that let you slide the shoulder harness up or down to change the effective torso length by 3 to 5 inches. Osprey’s Anti-Gravity system, Gregory’s VersaFit, and Deuter’s VariSlide are all examples of this technology. An adjustable torso pack eliminates the guesswork of falling between sizes.
For first-time buyers, an adjustable torso pack is worth the investment because it gives you a wider margin of error. Even if your measurement is slightly off or you gain or lose weight over the years, the pack adapts. Adjustable systems are especially valuable for growing teenagers, people who share a pack between family members, and anyone buying online without trying the pack in a store first.
One trade-off to know: adjustable torso systems add a few ounces of weight and can feel slightly less rigid than a fixed-size pack. For ultralight hikers counting every gram, a fixed-size pack trimmed to the correct measurement may be preferable. For everyone else, the flexibility is worth the minor weight penalty.
How to Fit a Hipbelt Properly
The hipbelt is the workhorse of your backpack, responsible for transferring roughly 80 percent of your pack weight to your legs and hips. A properly fitted hipbelt sits centered over your iliac crest, wraps snugly around your hips, and does not ride up or slip down when you walk. Get the hipbelt right and the rest of the fitting process becomes much simpler.
Where the Hipbelt Should Sit
The center of the hipbelt pad should rest directly on top of your iliac crest, the bony ridge of your hip bones. When you clip the buckle, the padded wings of the hipbelt should cup your hip bones from above and wrap around the sides. The bottom edge of the hipbelt pad should sit about one inch below the top of your hip bones, covering the area where your hips flare outward.
If the hipbelt sits too high, it rests on the soft tissue of your waist and cannot grip anything solid. The pack sags, the weight drops onto your shoulders, and you will feel every ounce on your trapezius muscles. If the hipbelt sits too low, it slides off your hip bones and the pack bounces with every step. Both problems are common complaints on backpacking forums.
How Tight Should the Hipbelt Be?
Pull the hipbelt snug enough that you feel firm pressure on your hip bones, but not so tight that it restricts your breathing or digs painfully into your sides. You should be able to slide two fingers between the belt and your hip when it is properly tightened. If you cannot fit a finger underneath, the belt is too tight and will cause bruising over a long day of hiking.
The belt should feel supportive, like a firm handshake around your hips. When you lean forward or twist side to side, the belt should stay in place on your hip bones rather than rotating or sliding. If the belt rotates when you move, either it is positioned wrong or the pack torso length is incorrect and pulling the whole system out of alignment.
Securing the Hipbelt Stabilizer Straps
Most quality hipbelts include stabilizer straps that connect the belt to the lower part of the pack frame. These straps let you pull the bottom of the pack closer to your body, which keeps the load centered over your hips and prevents the pack from swaying. Tighten these straps until you feel the pack pull snug against your lower back.
Stabilizer straps are especially important when carrying heavier loads above 30 pounds. Without them properly tightened, the bottom of the pack can swing outward, pulling your center of gravity backward and forcing your core muscles to compensate all day. That compensation is a leading cause of the lower back fatigue that many hikers mistakenly blame on the weight of their gear.
Interchangeable Hipbelts and Hip Sizing
Many premium backpack brands offer interchangeable hipbelts in small, medium, and large sizes to accommodate different hip circumferences. The hipbelt needs to match both your torso length and your hip size for a proper fit. A pack with the correct torso length but the wrong hipbelt size will never feel comfortable, no matter how much you adjust the straps.
As a general guideline, the hipbelt should wrap around your hips with the buckle centered and about 3 to 5 inches of webbing extending past the buckle on each side. If the buckle barely reaches or the webbing is maxed out, you need a larger hipbelt. If the belt overlaps itself significantly, you need a smaller one. Brands like Osprey, Gregory, and Hyperlite Mountain Gear all offer swappable hipbelts on many models.
Shoulder Strap Adjustment: Getting the Upper Body Right
Shoulder straps should carry roughly 20 percent of your pack weight, acting as stabilizers that keep the load close to your body rather than bearing the brunt of it. Properly adjusted shoulder straps contour to your shoulders without gaps, extend about an inch past your armpit, and never dig into your collarbones or restrict your arm movement.
How Shoulder Straps Should Sit
The padded portion of each shoulder strap should lie flat against the top of your shoulder and curve down along the front of your chest. The bottom edge of the strap padding should end about one inch below your armpit. If the padding extends further down, the straps are too long for your torso and you need a smaller pack or an adjustable harness moved up.
There should be no gap between the shoulder strap and the top of your shoulder. A gap means the pack torso length is too long and the shoulder harness sits above your shoulders rather than on them. This gap is one of the most common fit problems hikers report, and it causes the pack to pull backward away from the body with every step.
The Shoulder Strap Adjustment Sequence
Always fit your hipbelt first, then your shoulder straps. Tighten the shoulder straps by pulling the webbing downward at a 45-degree angle until you feel the straps make firm contact with the tops of your shoulders. The straps should hold the pack against your back without lifting any weight off your hips.
A simple test: after tightening the shoulder straps, slide your fingers under the straps at your shoulders. You should feel light pressure but not a crushing grip. Then unclip the sternum strap and briefly shrug your shoulders. If the pack lifts noticeably when you shrug, the shoulder straps are carrying too much weight and your hipbelt needs further adjustment.
Signs Your Shoulder Straps Are Wrong
Numbness or tingling in your arms during a hike means your shoulder straps are too tight and compressing nerves near your collarbone. Sore trapezius muscles at the end of a day means your straps are carrying too much load because the hipbelt is not doing its job. Red marks or bruising on top of your shoulders means the padding is insufficient or the strap angle is wrong for your body.
If you feel the shoulder straps pulling backward, away from your body, the pack is too large or the load lifters are not adjusted correctly. The straps should pull the pack toward you, not fight against your posture. This backward pull is a classic symptom that shows up in forum posts from hikers who bought based on height instead of torso length.
Load Lifters and Sternum Strap: Fine-Tuning Your Fit
Load lifters and the sternum strap are the final adjustment tools that transform a decent pack fit into a great one. Load lifters pull the top of the pack toward your shoulders at a 45-degree angle, while the sternum strap connects the two shoulder straps across your chest to prevent them from sliding outward. Together, they stabilize the load and reduce arm fatigue.
How Load Lifters Work
Load lifters are the straps that run from the top of each shoulder strap to the top of the pack frame, typically at an angle between 30 and 60 degrees. Their job is to pull the upper portion of the pack forward and inward, keeping the weight centered over your hips rather than lagging behind your shoulders. The ideal angle is 45 degrees.
When load lifters form a 45-degree angle from the shoulder strap to the pack frame, they provide maximum leverage with minimal effort. An angle steeper than 60 degrees loses effectiveness because the straps pull almost straight up rather than forward. An angle shallower than 30 degrees means the pack is too tall for your torso and the load lifters cannot function as designed.
Adjusting Load Lifters on the Trail
Tighten the load lifters gradually after you have secured the hipbelt and shoulder straps. Pull each one until you feel the top of the pack shift forward and settle closer to your upper back. You should feel the weight distribute more evenly and the backward pull on your shoulders decrease noticeably.
Load lifters are not set-and-forget. As you hike, the pack shifts, straps loosen, and the load settles. Check your load lifters every couple of hours and re-tighten as needed. On flat terrain you can loosen them slightly for comfort. On steep uphill sections, tighten them to pull the load closer and improve your balance. On descents, some hikers prefer slightly looser lifters to let the pack sit lower and improve stability.
Sternum Strap Positioning
The sternum strap connects your two shoulder straps across your chest with a small clip and an adjustable slider. Position the strap about two inches below your collarbone, high enough that it does not compress your ribcage but low enough that it actually holds the shoulder straps in position. The strap should sit comfortably across your upper chest without crossing breast tissue for women.
Tighten the sternum strap just enough to keep the shoulder straps from sliding outward toward your arms. It should not be tight enough to restrict breathing or compress your chest. A common mistake forum hikers warn about is cinching the sternum strap too tight, which restricts deep breathing during exertion and causes premature fatigue on long climbs.
When you breathe deeply with the sternum strap clipped, your chest should expand freely. If you feel resistance, the strap is too tight. Remember that your breathing volume increases significantly on uphill sections, so a strap that feels fine while standing may feel restrictive when you start climbing. Leave a small margin of slack.
Women’s-Specific Backpacks and Body Type Considerations
Women’s-specific backpacks are designed around anatomical differences in torso proportions, shoulder width, hip structure, and chest shape. On average, women have shorter torsos relative to their height, narrower shoulders, wider hips, and different chest contours compared to men. A women’s-specific pack addresses these differences rather than simply shrinking a men’s design.
Anatomical Differences That Affect Pack Fit
Women typically have a shorter torso-to-height ratio than men of the same overall height. A woman who is 5 foot 7 might have the same torso length as a man who is 5 foot 10. This is exactly why measuring torso length matters so much, and why buying a pack based on height alone fails particularly often for women.
Women’s shoulder straps are generally shaped with a narrower spacing and a curved contour that accommodates chest tissue without compressing it. The straps often taper more sharply and use softer padding in the chest contact area. Standard unisex packs tend to have wider, flatter straps that can press uncomfortably on the chest and rub under the arms.
The hipbelt on a women’s-specific pack is typically angled more acutely to follow the curve of female hips, which tend to flare outward more than male hips. The padding is often shaped to cup the iliac crest from a slightly different angle, and the belt itself may be slightly shorter to avoid wrapping too far around the body.
Do You Need a Women’s-Specific Pack?
Not every woman needs a women’s-specific pack, and some men actually fit better in one. The decision should be based on your body measurements, not your gender label. If you have a shorter torso, narrower shoulders, and curvier hips, a women’s-specific design will likely fit better regardless of your gender.
I have fitted packs for women who preferred unisex models because they had broader shoulders, and for men who found women’s-specific packs more comfortable due to shorter torsos. Try on both options and let comfort guide your decision. The best pack for you is the one that fits your body, not the one that matches the label on the tag.
Framed vs Frameless Packs and Fit
Framed packs use an internal frame, usually aluminum stays or a plastic frame sheet, to transfer weight from your shoulders to your hips. They are essential for loads over 25 pounds and for multi-day trips where you carry food, shelter, and sleeping gear. A framed pack depends heavily on correct torso length because the frame must align with your spine for the weight transfer to work.
Frameless packs, popular among ultralight hikers, rely on your rolled sleeping pad for structure. They are lighter and simpler but transfer weight less efficiently to the hips. With a frameless pack, the hipbelt does less work and your shoulders carry a larger share of the load. Frameless packs are more forgiving of slight torso measurement errors because there is no rigid frame to misalign, but they are only practical for loads under 20 to 25 pounds.
Fitting Packs for Unique Body Types
Some bodies do not fit neatly into standard sizing. If you have a very long torso with narrow hips, or a short torso with a large chest, or asymmetrical shoulders, you may struggle to find an off-the-shelf pack that feels right. This is a common frustration expressed in backpacking forums.
For these situations, look for brands that offer modular sizing with separate torso, hipbelt, and shoulder strap sizes. Some manufacturers let you mix and match, for example, a medium torso harness with a large hipbelt. Custom pack makers like ULA Equipment, Zpacks, and Hyperlite Mountain Gear offer more size combinations than mainstream brands. A professional fitting at an outdoor retailer can also help identify which combinations work for your body.
Common Backpack Fit Mistakes and How to Avoid Them
Most backpack fit problems trace back to a handful of preventable mistakes. I have compiled the most frequent complaints from backpacking forums and combined them with fitting experience to create this checklist. Review these before and after you buy a pack.
Mistake 1: Buying based on height instead of torso length. This is the most common error. Height and torso length correlate loosely but not reliably. Always measure your torso.
Mistake 2: Overtightening the shoulder straps. Many hikers crank the shoulder straps tight, thinking tighter means more secure. In reality, overtightened straps lift weight off the hips and dump it onto the shoulders, causing trapezius pain and arm numbness within hours.
Mistake 3: Positioning the hipbelt on the waist. The hipbelt belongs on the iliac crest, not the soft waist above it. A belt on the waist has nothing to grip and the pack sags.
Mistake 4: Ignoring the load lifters. Load lifters are not decorative. Without them adjusted to a 45-degree angle, the top of the pack lags behind your shoulders and throws off your center of gravity.
Mistake 5: Not testing the fit with weight. An empty pack feels fine in any size. Always load 15 to 20 pounds into the pack before evaluating fit, because the true fit only reveals itself under load. Most outdoor stores have weighted bags for this purpose.
Mistake 6: Ignoring a gap between the pack and your back. If there is visible daylight between the pack frame and your spine, the torso length is wrong or the hipbelt is positioned incorrectly. A gap means the pack is not making proper contact and cannot transfer weight efficiently.
FAQs
What size backpack for torso length?
Backpack sizes correspond to torso length ranges: extra small fits under 16 inches, small fits 16 to 18 inches, medium fits 18 to 20 inches, large fits 20 to 22 inches, and extra large fits over 22 inches. Always check the specific manufacturer chart, as sizing varies slightly between brands like Osprey, Gregory, and Deuter.
What is the 20 rule for backpacking?
The 20 rule for backpacking states that your loaded pack should weigh no more than 20 percent of your body weight. For example, a 150-pound hiker should carry no more than 30 pounds. Beginners and those on long-distance trails should aim closer to 15 percent for comfort and injury prevention.
How do I know what size backpack I need?
To find your backpack size, measure your torso length from the C7 vertebra at the base of your neck to the top of your iliac crest hip bones. Match that measurement to a manufacturer sizing chart to determine extra small, small, medium, or large. Then select a hipbelt size based on your hip circumference for a complete fit.
How long is my torso if I am 5 foot 9?
Torso length cannot be determined from height alone, but the average torso length for someone who is 5 foot 9 falls between 18 and 19.5 inches. This typically corresponds to a medium pack size. However, torso proportions vary significantly, so measuring directly from the C7 vertebra to the iliac crest is the only reliable way to determine your size.
Should I size up or down when between pack sizes?
When your torso measurement falls between two pack sizes, size down. A slightly shorter pack rides more comfortably than one that is too long, because an oversized torso length causes the frame to press into the lower back or tailbone. The only exception is when the manufacturer specifically recommends sizing up for that model.
How tight should a backpack hipbelt be?
A backpack hipbelt should be tight enough to feel firm pressure on your hip bones but loose enough to slide two fingers underneath. The belt should grip the iliac crest securely without restricting your breathing or causing pain. If you cannot fit a finger between the belt and your hip, it is too tight and will cause bruising over long hikes.
Conclusion
Fitting a backpack comes down to one measurement and four adjustments. Measure your torso from the C7 vertebra to the iliac crest, match that number to a sizing chart, then dial in the hipbelt, shoulder straps, load lifters, and sternum strap in that order. When all four elements work together, your hips carry 80 percent of the load and your shoulders handle the rest.
Now that you know how to choose backpack torso length and fit before buying, the next step is to try on packs with 15 to 20 pounds loaded inside. An empty pack tells you nothing. Load it, adjust it, walk around the store, and trust what your body tells you. The right pack disappears on your back, and that is exactly how it should feel on the trail.