
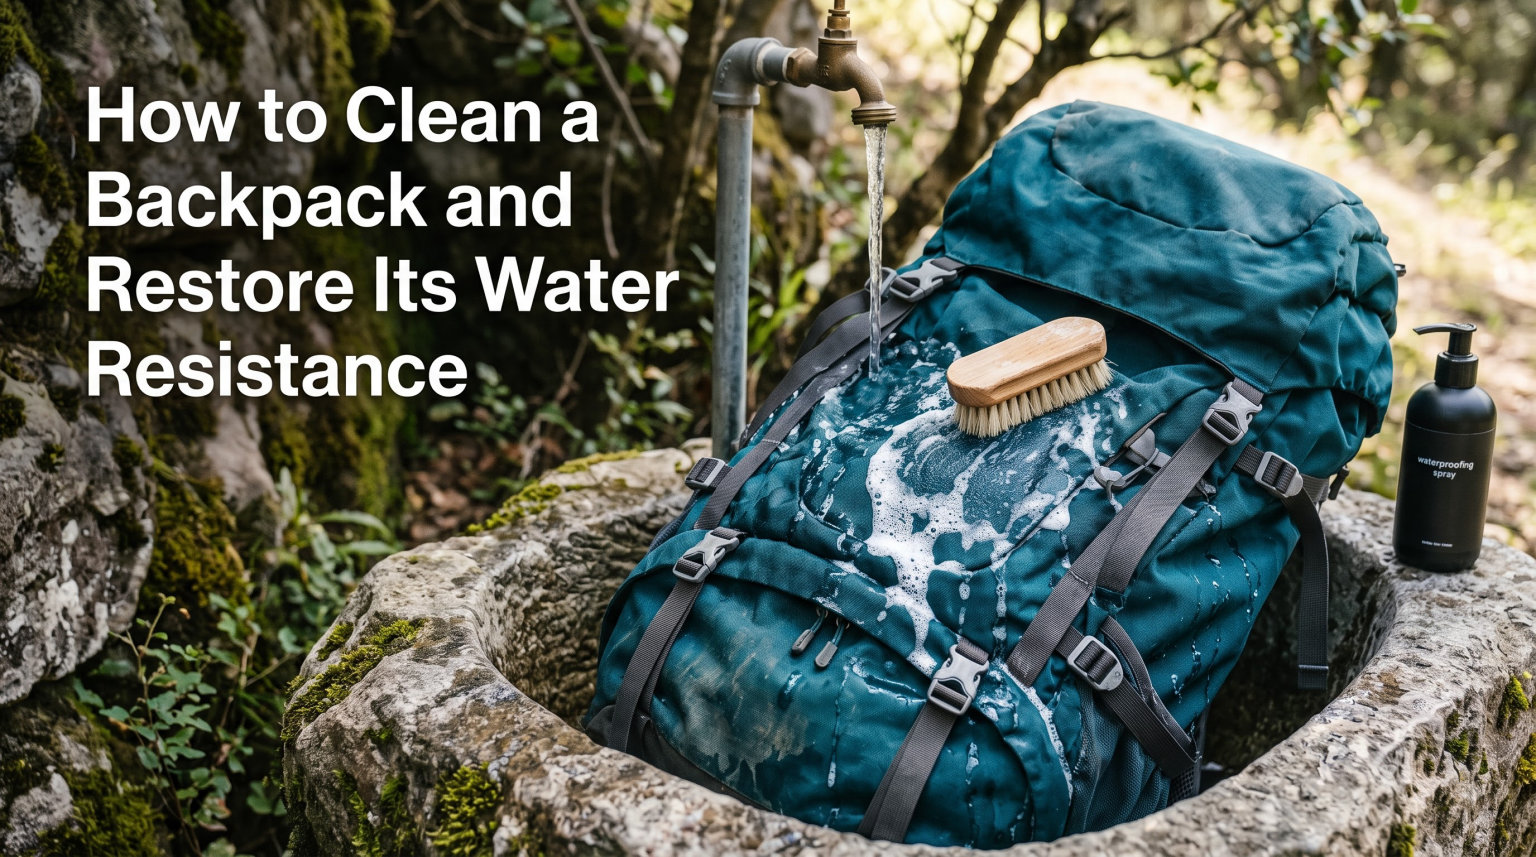
I’ll never forget the morning I opened my favorite hiking pack and found a swampy mess of soggy gear after a surprise downpour. The DWR coating had quietly given up months ago, and I had done nothing about it. That moment sent me down a rabbit hole of testing every cleaning method, soap type, and waterproofing spray I could get my hands on.
After restoring more than a dozen packs over the last three years, I can tell you this: cleaning a backpack and restoring its water resistance is not complicated, but it does require a few specific steps that most guides skip. This guide covers everything I wish someone had told me back then, from the right soap to use, to how to bring a tired DWR coating back to life.
Table of Contents
Why Cleaning and Water Resistance Matter
Backpacks take a beating. Sweat, body oils, trail dust, spilled coffee, and rain all leave traces on the fabric and seams. Over time, that grime breaks down the Durable Water Repellent (DWR) coating that keeps water from soaking into the outer shell. Once that coating fails, the face fabric wets out, water gets heavy, and your gear gets wet.
Regular cleaning does two things at once. It removes the dirt and oils that actively degrade the fabric, and it preps the surface so a new water-repellent treatment can bond properly. Skipping the cleaning step before re-waterproofing is the most common reason treatments fail within weeks. I see this mistake over and over in the hiking forums, where people spray DWR onto a dirty pack and then wonder why rain still soaks through.
I treat every pack I own to a full deep clean at least twice a year, and a quick wipe-down after muddy trips. It adds years to the life of a pack and keeps the contents dry when the weather turns ugly. The cost is about 45 minutes of work and a few dollars in supplies. The payoff is a pack that performs like new and lasts a decade instead of a few seasons.
There is also a health angle. A pack that holds onto sweat, food crumbs, and moisture becomes a breeding ground for bacteria and mold. That can trigger skin irritation, allergic reactions, and unpleasant smells. Keeping your pack clean is part of keeping yourself healthy on the trail and on the commute.
What You Need: Supplies and Tools
You don’t need much to do this right. I keep a small kit in a shoebox in my garage so I am always ready. Here is the exact list I use on every pack.
- A basin, bathtub, or large sink
- Lukewarm water (never hot)
- Mild soap, pH-neutral castile soap, or a technical wash like Nikwax Tech Wash
- A soft-bristled brush or an old toothbrush
- A clean sponge or microfiber cloth
- Baking soda (for odor and stains)
- White vinegar (for stubborn spots and mildew)
- A dry towel
- A drying rack or clean clothesline
- Water-repellent spray or wash-in treatment (Nikwax TX.Direct, Granger’s Performance Repel, or similar)
- Optional: silicone-based zipper lubricant
A quick note on soap. I have tested Dawn dish soap, and yes, it works in a pinch, but technical cleaners like Nikwax Tech Wash are formulated specifically not to leave residues that interfere with DWR coatings. If you have a technical or waterproof pack, the dedicated cleaner is worth the small extra cost.
For the brush, I keep an old soft-bristled toothbrush for zippers, seams, and tight spots, plus a larger nail brush or dish brush for the main panels. Avoid stiff wire brushes or anything abrasive. They can scuff the face fabric and damage coatings. Microfiber cloths work better than cotton for wiping down, since they leave less lint.
What to Avoid
Skip bleach, fabric softeners, harsh detergents, and any cleaning product with solvents. These strip DWR coatings, damage waterproof membranes, and can weaken seam taping. I learned this the hard way when a regular laundry detergent left a 40-liter pack completely wetting out after a single wash.
Avoid anything with brighteners, dyes, or heavy fragrances. These can stain fabric and leave residues that attract dirt. I also skip dryer sheets entirely, since the waxy coating they leave behind clogs fabric weave and ruins water-repellent finishes.
How to Clean a Backpack and Restore Its Water Resistance: Step-by-Step
This is the full process I follow on every pack I own. Plan on 45 minutes of active work plus drying time. The full routine from start to finish takes about three days including drying and curing the DWR treatment, so plan to start it on a Friday if you need the pack ready for a weekend trip.
Step 1: Empty Every Pocket and Shake It Out
Start by removing everything, including those forgotten granola bars from last summer. Open every compartment, shake the pack upside down over a trash can, and tap the bottom to dislodge crumbs, sand, and loose dirt. I do this outside because trail dust gets everywhere.
While you are at it, check every small pocket, the hipbelt pockets, the lid pocket, and any hidden internal sleeves. These are the spots where lost lip balm, loose change, and forgotten snacks tend to hide. Getting all of this out before washing prevents stains from setting into the lining and keeps surprises out of your drain.
Step 2: Spot-Treat Visible Stains First
Mix a paste of baking soda and a little water. Apply it directly to sweat stains on shoulder straps, body-oil marks on the back panel, and any grimy patches. Let it sit for 10 to 15 minutes. For really stubborn spots, dab on a bit of white vinegar before the baking soda. The fizz helps lift the grime out of the fibers.
For ink, food, or mud stains that have set in, a paste of baking soda and a few drops of hydrogen peroxide often does the trick. Test it on a hidden corner first to make sure it does not bleach the fabric. Rinse the spot well before moving on to the full wash.
Step 3: Prep a Lukewarm Bath
Fill a bathtub, sink, or basin with about 6 inches of lukewarm water. Lukewarm means roughly body temperature, so somewhere between 85 and 100 degrees Fahrenheit. Hot water can damage coatings and warp frames. Add your mild soap or technical wash per the bottle directions and swish to mix.
The exact water temperature matters more than most people realize. Water that is too hot can delaminate seam tape, shrink fabric, and strip DWR coatings faster than any detergent. Water that is too cold will not fully dissolve soap and will not loosen oils effectively. Aim for comfortably warm to the touch, not hot.
Step 4: Submerge and Soak
Place the pack in the water and gently push it down so it fills with water and sinks. Let it soak for 20 to 30 minutes. For heavily soiled packs, I have left them soaking overnight with no ill effects. The soak alone dislodges a surprising amount of grime without any scrubbing.
During the soak, gently swish the pack around every 10 minutes or so. This keeps fresh soapy water circulating through all the pockets and seams. If you see a lot of dirt floating in the water after 20 minutes, drain and refill with clean soapy water for a second soak. That second bath often pulls out grime the first one missed.
Step 5: Scrub Gently With a Soft Brush
Working section by section, scrub the exterior with your soft brush or sponge. Use light pressure, especially around zippers, seams, and any coated areas. Pay extra attention to the shoulder straps, hipbelt, and the lower back panel, since these hold the most body oil and sweat. Turn the pack inside out and gently clean the interior lining as well.
Use circular motions rather than back-and-forth scrubbing. Circular motions lift dirt out of the weave without roughing up the surface. Always scrub with the grain of the fabric when you can see it. Going against the grain can pill the surface over time.
Step 6: Drain and Rinse Thoroughly
Drain the soapy water. Refill with clean, cool water and rinse the pack repeatedly until the water runs clear and there are no more soap bubbles. Leftover soap residue attracts dirt and blocks DWR treatments, so be patient with this step. Two or three rinse cycles usually does it.
One trick I use is a final rinse with a small amount of white vinegar added to the water. The vinegar neutralizes any leftover soap and helps kill odor-causing bacteria. It also leaves the fabric feeling softer once dry.
Step 7: Press Out Excess Water
Do not wring the pack. Wringing twists the fabric and can damage seam taping. Instead, gently press the pack with your hands to push water out, then roll it in a dry towel and press firmly. The towel absorbs a surprising amount of moisture and speeds up drying significantly.
For an extra-thorough press, I roll the pack in two dry towels in a row. The first towel pulls out the bulk of the moisture, and the second pulls out what the first one left behind. The pack will still be damp after this, but air drying will be much faster.
Drying Your Backpack the Right Way
Never put a backpack in a dryer. The heat damages fabric, melts coatings, and can warp internal frames. Air drying is the only safe method. Even on a low-heat or air-dry cycle, the tumbling action can be hard on straps, buckles, and frame sheets.
Hang the pack upside down on a clothesline or set it on a drying rack in a well-ventilated area, ideally outdoors in indirect sunlight. Direct sun for long periods can fade fabric and degrade coatings, so a shaded but breezy spot is ideal. Open all compartments so air circulates inside.
Drying time depends on humidity and pack size, but plan on 24 to 48 hours for a full dry. I usually give mine 36 hours to be safe. Packing a damp pack is a fast track to mildew and bad smells, which are far harder to fix than just waiting a day.
If you live in a humid climate, consider setting up a small fan to circulate air across the drying pack. Moving air cuts drying time nearly in half compared to still air. Just point the fan so it does not blow dust onto the wet fabric.
How to Know It Is Fully Dry
Check the back panel, the bottom seams, and the inside of any padded compartments. These areas trap moisture longest. The pack should feel completely dry to the touch, with no cool or damp spots. If you are unsure, give it another 12 hours.
A neat trick is to slip a dry paper towel into a closed pocket or seam. After a few hours, pull it out. If it is still dry, the pack is fully dry inside. If it has any moisture, the pack needs more time on the rack.
Component-Specific Care: Straps, Zippers, Hipbelt, and Gear Loops
The big surfaces get most of the attention, but the small components are what make a pack actually work. A clean pack with gunked-up zippers is still a frustrating pack to use. Spend an extra 10 minutes on these details and the pack will feel like new.
Shoulder Straps and Hipbelt
These absorb the most sweat and body oil. After the main wash, I go back over them with the soft brush and a little extra soap solution. For white residue or salt lines, a baking soda paste works wonders. Let the straps air dry fully extended, not bunched up.
For mesh-covered foam straps, be careful not to tear the mesh with aggressive scrubbing. Use a soft sponge and gentle pressure. If the mesh has retained odor even after washing, sprinkle dry baking soda onto the damp mesh, let it sit for an hour, then rinse.
Zippers
Zippers are the weak link on most packs. Brush them gently with the toothbrush to remove grit from the teeth. Once fully dry, apply a silicone-based lubricant or a beeswax stick to keep them running smoothly. Do not use oil-based lubricants like WD-40. They attract dirt, can stain fabric, and over time degrade zipper coatings. I keep a small tube of Zip Tech in my repair kit for this exact reason.
If a zipper is sticking, work the slider back and forth gently while applying the lubricant. This works the lube into the teeth and usually frees up a stubborn zipper in seconds. If the zipper is missing teeth or the slider is cracked, that is a repair, not a cleaning job. Replace the zipper or take it to a gear repair shop.
Gear Loops and Compression Straps
These webbing sections collect dirt and can become stiff over time. Wipe them down with a soapy cloth during the main wash, then rinse well. For really stiff loops, a gentle scrub with the toothbrush restores flexibility.
Check the stitching on gear loops while you are at it. If you see fraying or loose threads, dab a tiny bit of fabric glue or seam sealant on the spot to prevent further unraveling. Catching these small issues early prevents bigger failures later.
Back Panel and Frame
If your pack has a removable frame sheet or stays, take them out before washing. Wipe the back panel channels with a damp cloth and let everything dry separately. Aluminum stays can develop a white oxide coating if stored damp. Wipe them down with a dry cloth before reassembling.
If the back panel foam has absorbed a lot of sweat, sprinkle baking soda on it while it is still damp. Let it sit for an hour, then vacuum or brush it off. This pulls out odor and oils that ordinary washing cannot reach.
How to Restore Water Resistance on a Backpack
Once the pack is clean and completely dry, you can re-apply water-repellent treatment. There are two main types, and the right choice depends on your pack. Picking the right product matters more than the brand. The wrong product can actually make a pack worse than doing nothing.
Spray-On Treatments
Spray-on DWR treatments like Nikwax TX.Direct Spray-On or Granger’s Performance Repel are the easiest option. They work well on most packs and let you target specific high-wear areas. Lay the pack flat, spray evenly across the outer fabric from about 6 inches away, and wipe off any excess with a clean cloth. Focus on the top of the pack and the shoulders, where rain hits first.
Apply in a well-ventilated area, ideally outdoors. Most treatments have strong fumes and overspray can land on floors, walls, or other gear. Spray in smooth, even passes rather than concentrating in one spot. Two light coats work better than one heavy coat.
Wash-In Treatments
Wash-in treatments like Nikwax TX.Direct Wash-In get applied during a second, gentle wash cycle. They coat every fiber evenly and tend to last a bit longer than sprays. The trade-off is that they also coat the inside lining, which is not always desirable on a pack with a waterproof inner liner.
For wash-in treatments, follow the bottle directions carefully. Too much product leaves a waxy feel, while too little gives weak water repellency. After the treatment cycle, rinse the pack once with clean water to remove excess, then dry as usual.
When to Use Each
I default to spray-on for daypacks, travel packs, and any pack with a coated inner liner. I use wash-in on older packs where I want full fabric saturation, especially on canvas or older nylon without internal membranes. For most modern technical packs, spray-on is the safer and more controlled choice.
How to Test If Your Water Resistance Is Working
This is the step most guides skip. After treatment has dried fully, sprinkle a few drops of water on the outer fabric. If the water beads up and rolls off, your DWR is active. If the water soaks in and darkens the fabric, you need another coat or a different product. I do this test every time I treat a pack, and it takes 10 seconds.
For a more rigorous test, hold the pack under a running shower for 30 seconds. Real-world rain is rarely as gentle as a sprinkling test. If water beads and rolls off during the shower test, the treatment is solid. If the fabric darkens at all, the DWR is not yet up to the task.
Fabric Type Guide: Nylon, Canvas, and Leather
Not all packs are made from the same material, and the cleaning approach changes a bit depending on what you are working with. No top competitor breaks this down, so it is worth covering. Using the wrong technique on the wrong fabric can cause permanent damage.
Ripstop Nylon and Cordura
Most technical and hiking packs use ripstop nylon or Cordura. These synthetic fabrics are durable, lightweight, and respond well to the standard hand-wash process above. Avoid harsh scrubbing, which can fuzz the surface, and stay away from any product containing bleach or solvents.
Ripstop has a visible grid pattern woven into the fabric. If you see the grid starting to fray or pill, the fabric is wearing out. Treat such packs gently and consider retiring them from heavy trail use.
Canvas and Waxed Canvas
Canvas packs, especially heritage-style daypacks and travel bags, need a gentler touch. Use cool water and a very mild soap. Scrubbing too hard can damage the wax coating on waxed canvas. After cleaning and drying, you may need to re-wax the pack with a canvas wax product to restore water resistance. This is different from DWR treatments, and the two are not interchangeable.
For waxed canvas, use a soft cloth rather than a brush. The goal is to clean without removing the wax. After drying, melt a small amount of canvas wax into the fabric with a hair dryer on low heat. Work in small sections and buff with a clean cloth as you go.
Leather and Leather-Backed Packs
If your pack has leather trim or a leather bottom, treat those areas separately. Wipe leather with a damp cloth and a small amount of saddle soap, then condition with a leather conditioner once dry. Never soak leather in water, as it can stiffen, crack, and discolor.
Leather benefits from conditioning every 6 months or so, even if it has not been cleaned. A good leather conditioner keeps the hide supple and adds a small amount of water resistance. Avoid petroleum-based conditioners on modern leather, since they can break down adhesives used in pack construction.
PVC and TPU Coated Packs
Fully waterproof roll-top or welded-seam packs are easier to maintain. Wipe the exterior with a damp cloth and mild soap, rinse, and air dry. These packs do not need DWR treatments because the waterproofing is built into the material. Just check the seams periodically for wear.
For TPU-coated packs, avoid any cleaner that contains alcohol or acetone. These chemicals can cloud and weaken the TPU film. Plain soap and water is the safest option.
Odor Elimination Techniques
Bad smells are one of the most common backpack complaints on Reddit and hiking forums, and they usually come from a combination of sweat, body oils, and mildew from incomplete drying. Here is the routine I use when a pack starts to smell off. These methods are also useful as preventive care every few months.
The Baking Soda Soak
After the regular wash, fill the basin with fresh lukewarm water and add half a cup of baking soda. Submerge the pack and let it soak overnight. Baking soda neutralizes acidic odors rather than just masking them.
For really stubborn smells, add a quarter cup of salt to the baking soda soak. Salt helps draw out moisture and odors from deep in the foam and padding. After the soak, rinse the pack twice with clean water to remove all residues.
The Vinegar Rinse
Add a half cup of white vinegar to the rinse water. Vinegar kills odor-causing bacteria and helps remove any leftover soap residue. The smell dissipates as the pack dries. I know vinegar smells strong while you are using it, but it does not leave a lasting scent.
For a stronger treatment, mix equal parts white vinegar and water in a spray bottle. Mist the inside lining and let it air dry. This is especially helpful for the lid pocket and hipbelt pockets, where smells tend to concentrate.
Sun and Air
After cleaning, hang the pack outside in indirect sunlight for a few hours. UV light is a natural deodorizer and helps kill bacteria. Just avoid prolonged direct sun on fabric. Indirect light through a window is fine, but direct outdoor sun can fade colors over time.
Activated Charcoal Storage
When storing the pack between uses, tuck a small cloth bag of activated charcoal inside. It absorbs moisture and odor over time. I keep one in every pack I store for more than a week. You can buy activated charcoal pouches designed for shoes and gear, or make your own by filling a small cotton bag with aquarium-grade charcoal.
Freezer Trick for Persistent Smells
For smells that resist every other method, seal the pack in a large plastic bag and place it in the freezer for 24 to 48 hours. The extreme cold kills odor-causing bacteria. After removing from the freezer, let the pack come to room temperature before opening the bag. This prevents condensation from re-wetting the fabric.
Prevention Tips and Seasonal Maintenance
Prevention is easier than restoration. A few habits will keep your pack cleaner, drier, and longer-lasting. These small habits add up to years of extra service life and far less time spent on deep cleaning.
Use a Pack Liner
A simple trash compactor bag or a purpose-made pack liner inside your pack keeps contents dry even if the outer fabric wets out. This is the single most effective thing you can do to protect your gear. Pack liners also keep food smells and crumbs from soaking into the inner lining.
Wipe Down After Muddy Trips
Do not wait for the big seasonal clean. After a muddy hike or a dusty commute, take five minutes to wipe down the exterior with a damp cloth. Letting dirt sit on fabric is what breaks down DWR coatings fastest. Mud left to dry becomes bonded to the fabric and much harder to remove later.
Re-Treat DWR Every 6 to 12 Months
Depending on use, plan on re-applying water-repellent treatment every 6 to 12 months. Heavy users may need it more often. A quick water-bead test tells you when it is time. Some users prefer a calendar reminder every six months so they do not forget.
Store Unstuffed and Open
Do not store a packed bag in a closet. Compressed fabric does not breathe, and trapped moisture leads to mildew. Store the pack loosely stuffed with paper or open, in a dry place. I stuff mine with clean pillowcases or old t-shirts to help it keep its shape without compressing the foam.
Can You Wash a Backpack in the Washing Machine?
I get this question a lot. The short answer is no, not if you care about the pack. Machine washing, even on gentle, can damage frames, snag fabric on zippers, and strip DWR coatings. Hand washing is safer, faster, and more thorough for most packs. The only exception is a small, simple daypack with no frame, and even then I would still hand wash.
The agitation in a washing machine can also work loose the stitching on stress points, and the spin cycle can leave deep wrinkles in coated fabric that never fully come out. The few minutes you save by using a machine are not worth the risk.
Seasonal Cleaning Schedule
I follow a simple schedule that keeps every pack in rotation without becoming a chore. After every wet or muddy trip, I do a quick wipe-down and air dry. Once a season, I do a spot treatment on straps and zippers. Twice a year, in spring and fall, I do the full deep clean and re-treat DWR. This rhythm matches how I use my packs and keeps maintenance manageable.
FAQ
Can you make a backpack water resistant?
Yes. Start by cleaning the pack with a mild soap and lukewarm water to remove dirt and oils, then apply a DWR spray-on or wash-in treatment once it is fully dry. Spray-on products like Nikwax TX.Direct or Granger’s Performance Repel are the easiest options for most packs. Test the result by sprinkling water on the fabric – if it beads up and rolls off, the treatment is working.
How to clean a water resistant backpack?
Empty all pockets, shake out crumbs, and spot-treat stains with a baking soda paste. Submerge the pack in lukewarm water with a mild soap or technical wash for 20 to 30 minutes. Gently scrub with a soft brush, focusing on straps and the back panel. Rinse thoroughly until the water runs clear, then press out excess water with a towel and air dry for 24 to 48 hours.
How to waterproof an old backpack?
Deep clean the pack first to remove all dirt and oils, then let it dry completely. Apply a spray-on DWR treatment evenly across the outer fabric, or use a wash-in treatment during a gentle second wash. Let the treatment cure fully before using the pack. Reapply every 6 to 12 months, or whenever water stops beading on the surface.
What is the best waterproofing spray for backpacks?
Nikwax TX.Direct Spray-On and Granger’s Performance Repel Plus are the two most popular and reliable options. Both restore DWR coatings without damaging technical fabrics. For waxed canvas packs, use a dedicated canvas wax instead. Avoid silicone-heavy household sprays, which can interfere with breathability on technical packs.
Can you use Dawn dish soap to clean a backpack?
Yes, Dawn dish soap works in a pinch and is safe for most pack fabrics. Use a small amount in lukewarm water and rinse very thoroughly, since residue left behind can attract dirt and block DWR treatments. For technical or waterproof packs, a dedicated cleaner like Nikwax Tech Wash is a better choice because it is formulated not to leave residues.
How to recoat the inside of a backpack?
Most modern packs have a waterproof inner liner that does not need recoating. If the inside is just a fabric lining, you can use a wash-in DWR treatment during a gentle soak. For fully waterproof packs with TPU or PVC coatings, the inside cannot be recoated at home – if the coating fails, the pack usually needs professional repair or replacement.
Final Thoughts on How to Clean a Backpack and Restore Its Water Resistance
Knowing how to clean a backpack and restore its water resistance is one of those small skills that pays off for years. The whole process takes less than an hour of active work, and it can double the usable life of a good pack while keeping your gear dry when it counts.
Stick to mild soap, lukewarm water, gentle scrubbing, full air drying, and a quality DWR treatment reapplied every few months. Skip the washing machine, avoid harsh detergents, and remember the water-bead test after every treatment. Those habits alone will keep any pack ready for the next trail, commute, or trip.
If you have a pack that has been neglected for a while, today is a great day to give it a proper clean. You will be surprised how much better it looks, smells, and performs once the grime is gone and the DWR coating is fresh.