
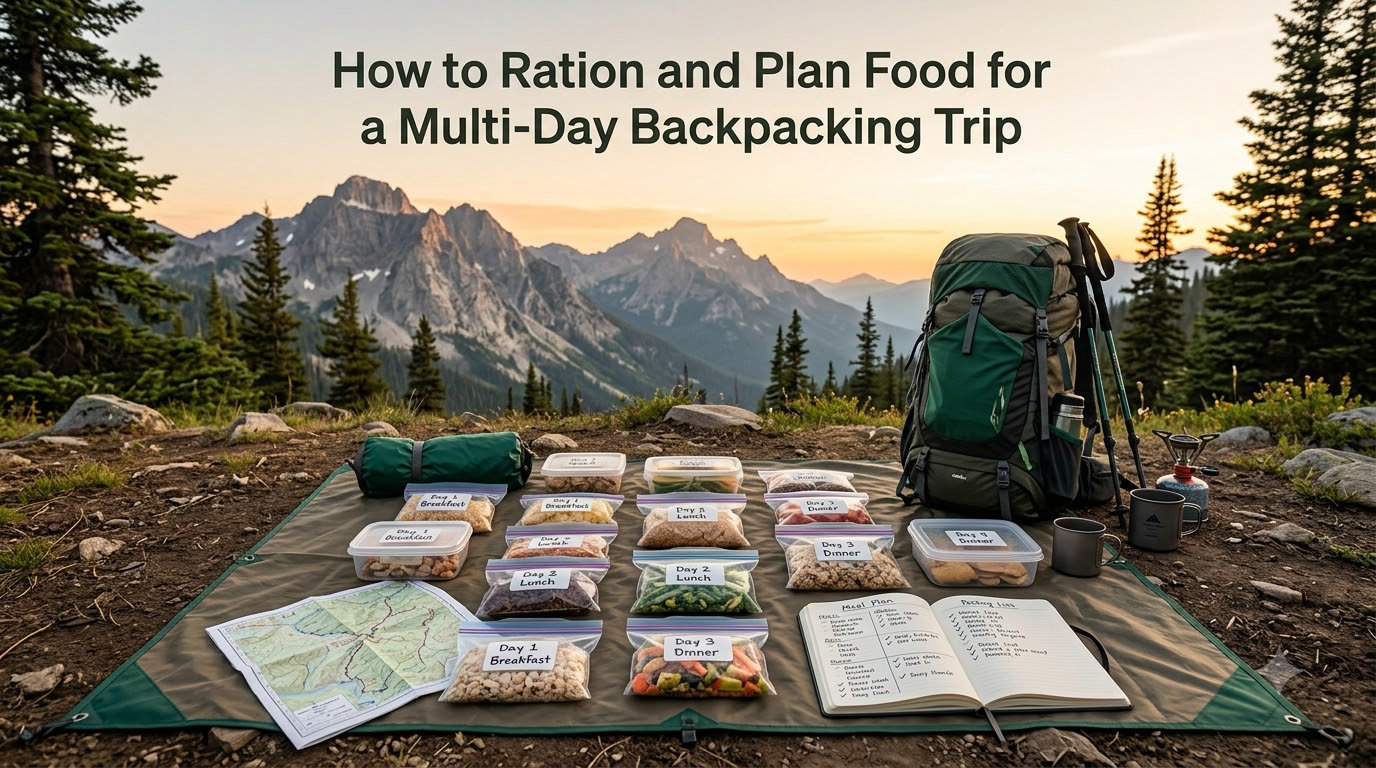
Backpacking meal planning used to stress me out more than the actual hiking. I would stare at a pile of gear in my living room, trying to guess how much food to bring, and either haul a 12-pound food bag up a mountain or end up starving by day two. After a few seasons of trial and error (including one embarrassing trip where I packed an entire share-size bag of M&Ms as a “calorie reserve”), I finally built a system that works for any multi-day hiking trip. This guide walks through how to ration and plan food for a multi-day backpacking trip the same way I do now, so you can skip the rookie mistakes and head straight to the trail with confidence.
If you have ever overpacked your fears, hated the texture of freeze-dried meals, or wondered whether you really need a stove, you are in the right place. In the next few thousand words I will cover daily calorie needs, food types, a step-by-step rationing process, meal timing, the daily bag system, camp kitchen gear, at-home meal testing, and what to do with food waste at the end. I will also answer the seven most common questions backpackers ask about trail food.
Table of Contents
How to Ration and Plan Food for a Multi-Day Backpacking Trip: Daily Calorie Needs
The single biggest mistake I see new backpackers make is underestimating how many calories they burn on the trail. Hiking 8 to 15 miles a day with a 30-pound pack burns between 3,000 and 5,000 calories depending on terrain, altitude, and body weight. If you bring 2,000 calories’ worth of food, you will lose energy, lose weight, and lose your mind by day three. Every solid backpacking food list starts with a calorie target, not a recipe.
For most adult backpackers on moderate terrain, I recommend targeting between 3,000 and 3,500 calories per day as a baseline. For steep, high-altitude, or longer-mileage days, plan for 3,500 to 4,500 calories. Ultralight thru-hikers and folks pushing big elevation gains sometimes push toward 5,000 calories on heavy days. The exact number depends on your metabolism, but erring on the higher side is safer than running short.
Caloric Density: The Secret Number That Drives Every Choice
Caloric density means calories per ounce of food, and it is the single most useful concept for backpacking calorie needs. A Snickers bar has about 135 calories per ounce, while a cucumber has around 5 calories per ounce. On the trail, every ounce matters because you carry it for hours. Aim for foods that deliver at least 100 calories per ounce whenever possible, and shoot for 125+ for your main fuel sources. This one shift will cut your food weight without cutting your energy.
Here is a quick reference for common trail foods:
Peanut butter: ~165 calories per ounce (winner)
Hard cheese (cheddar): ~115 calories per ounce
Trail mix with nuts: ~165 calories per ounce
Energy bar (typical): ~125 calories per ounce
Freeze-dried meal: ~110 calories per ounce
White rice (cooked at home): ~35 calories per ounce
Fresh apple: ~15 calories per ounce (avoid for multi-day)
Notice how calorie-dense foods are also shelf-stable and pack tightly. That is not a coincidence. The best backpacking food list is mostly made up of nuts, nut butters, hard cheese, cured meats, dried fruit, chocolate, instant potatoes, olive oil, powdered milk, and dehydrated or freeze-dried entrees. Water-heavy fresh fruit, vegetables, and bread are luxury items you either skip or eat only on day one.
Types of Backpacking Food: Freeze-Dried vs DIY Grocery Store Meals
There are two main paths to filling your food bag: commercial freeze-dried meals (Mountain House, Backpacker’s Pantry, AlpineAire) or DIY meals you build from grocery store ingredients. Both work. Both have trade-offs. The right answer depends on your budget, your taste preferences, and how much prep time you have before the trip.
Freeze-Dried Meals: The Convenient Choice
Freeze-dried backpacking meals have come a long way in the past decade. Modern options offer reasonable taste, long shelf life, and dead-simple prep: boil water, pour it in, wait 10 minutes, eat. The biggest advantage is speed and simplicity, especially after a long day when you do not want to think. For beginner backpackers, freeze-dried meals are a great way to learn your baseline calorie needs without committing to a full DIY prep weekend.
The downsides are real, though. Most freeze-dried entrees deliver around 500 to 800 calories per pouch, which is not enough for a full dinner on a heavy day. The taste is fine but rarely exciting, and the sodium content can leave you thirsty on hot trips. Cost is the other major factor: at $7 to $12 per meal, a five-day trip can easily run $100+ just for dinners.
DIY Grocery Store Meals: Cheaper and Often Tastier
The DIY approach uses shelf-stable grocery items like instant ramen, couscous, instant mashed potatoes, dehydrated beans, powdered cheese, tuna packets, summer sausage, tortillas, and olive oil packets. It is cheaper, more customizable, and usually tastier once you dial in your favorites. Many experienced backpackers I know keep a “resupply box” of these ingredients at home and refill it after every trip.
Going DIY does mean more planning, more measuring, and more cleanup. You will want to pre-portion meals into ziplock bags at home, label them, and pack exactly what you need. Cold soaking is also worth considering: many foods like ramen, couscous, instant rice, and refried beans can rehydrate in cold water in a jar inside your pack while you hike, eliminating the need for a stove entirely. I cold-soaked couscous with tuna on a Colorado Trail section and never looked back.
Calorie Comparison Table: Common Backpacking Foods
Here is a side-by-side comparison of calorie density across the most popular options for trail nutrition. Use this when building your multi-day hiking food plan.
| Food Type | Calories per Ounce | Prep Required | Best For |
|---|---|---|---|
| Peanut butter (tube) | 165 | None | Snacks, calorie boosts |
| Hard cheese / summer sausage | 115-140 | None | Lunch, snacks |
| Nuts and trail mix | 160-175 | None | Snacks, calorie boosts |
| Energy bars | 115-140 | None | Quick fuel |
| Freeze-dried meal pouch | 100-120 | Boil water | Dinner |
| Instant ramen / couscous | 130-140 | Boil or cold soak | Dinner, lunch |
| Instant mashed potatoes | 110 | Boil water | Side dish |
| Tortillas | 95 | None | Lunch wrap base |
| Chocolate (dark) | 150 | None | Snack, morale boost |
| Olive oil packets | 240 | None | Add calories to any meal |
Step-by-Step Rationing Process for Multi-Day Backpacking Trips
This is the exact process I use for every trip from a quick overnight to a 10-day section hike. Follow these four steps and you will end up with a food bag that is right-sized, well-organized, and almost impossible to lose track of on the trail.
Step 1: Estimate Total Days and Total Calories
Start by writing down the exact number of days you will be out, including any travel or zero days where you might eat in town. Multiply that by your daily calorie target. For a four-day trip at 3,500 calories per day, you need 14,000 total calories in your pack. This single number is the foundation of your entire backpacking meal planning process.
Step 2: Build Your Daily Meal Framework
Divide each day’s calories into four buckets: breakfast (around 600 to 800 calories), lunch (around 700 to 900 calories), dinner (around 800 to 1,000 calories), and snacks (around 800 to 1,200 calories split into five or six small portions). The snack bucket is where most beginners under-plan. Snacking every two hours while hiking keeps blood sugar stable and energy consistent, which is why experienced hikers focus so heavily on calorie-dense snacks like trail mix, nut butter packets, cheese, and energy bars.
Step 3: Convert Calories to Weight and Pack Size
Once you have a daily menu, weigh everything on a kitchen scale and add up the totals. For a 3,500-calorie day, expect around 1.5 to 2 pounds of food. For a 7-day trip, your food bag will weigh roughly 12 to 15 pounds before the bag itself. This is normal and unavoidable unless you are pushing ultralight backpacking food choices to the extreme. Adjust your menu if you find yourself over budget on weight, and remember that olive oil packets and butter packets are a cheap way to add calories without adding weight.
Step 4: Pre-Port and Label Every Meal
Pre-portioning is what separates a good trip from a frustrating one. Put each day’s breakfast, lunch, dinner, and snacks into a separate gallon ziplock or a small dry bag. Label them by day and meal (Day 2 Lunch, Day 3 Dinner, etc.). When you finish a meal, put the day’s trash into the empty bag and store it in your bear canister or hang system. This approach keeps your food organized, makes resupply at trail towns easier, and eliminates the “what do I have left to eat” scavenger hunt at camp.
Meal Timing Strategy: Three Meals Plus Snacks Every Two Hours
Trail nutrition is not just about total calories, it is about when those calories arrive in your body. Eating three big meals a day works at home but is the wrong strategy on the trail because your body is constantly burning fuel as you climb. The pattern experienced backpackers use is three meals plus small snacks every two hours while hiking. This keeps blood sugar stable, prevents the bonk (that mid-afternoon crash that turns easy miles into death marches), and reduces post-meal digestive sluggishness.
A typical hiking day might look like this:
6:30 AM – Breakfast at camp (oatmeal with peanut butter, coffee, 700 cal)
8:00 AM – Trail snack 1 (trail mix, 250 cal)
10:00 AM – Trail snack 2 (energy bar, 250 cal)
12:30 PM – Lunch on the trail (tortilla wrap with tuna and cheese, 800 cal)
2:30 PM – Trail snack 3 (chocolate, 200 cal)
5:00 PM – Trail snack 4 or arrive at camp (200 cal)
7:00 PM – Dinner (couscous with salmon, 900 cal)
8:30 PM – Dessert (hot cocoa, 200 cal)
Notice that you are eating almost constantly during the day. The total lands around 3,500 calories without feeling like a single huge meal. This is also why calorie-dense snacks matter: you cannot carry enough food to snack every two hours if each snack is only 50 calories. Aim for 200 to 300 calories per snack.
The Daily Bag System: How to Pack Food for Backpacking Trips
Now that you have your daily menus planned, you need to pack them in a way that keeps your food dry, organized, and safe from critters. The daily bag system is the gold standard for backcountry food planning because it removes friction from every meal.
One Gallon Bag Per Day
Put each day’s worth of food into its own gallon ziplock bag. Label the bag clearly with a Sharpie: “Day 2 – Sat.” Inside that bag, you can use smaller snack bags to separate your snacks by hour if you want to go further. At the end of each day, you will have an empty bag to repack trash. This is much cleaner than digging through a single giant food sack at every meal.
Outer Bag or Ursack for the Whole Food Load
Put all your daily bags inside one larger dry bag, stuff sack, or Ursack. In bear country, this outer bag needs to be stored properly at night. You have three main options:
Bear canister – Required in many national parks and high-use wilderness areas. Heavy (around 2 to 3 pounds empty) but virtually bear-proof.
Ursack or similar bear bag – Lighter than a canister, holds more food, and works in most national forests. Check local regulations, as some parks do not allow them.
Bear hang – The classic PCT method. Requires a rope, a stuff sack, and a suitable tree. Free but takes practice and only works in areas where the technique is legal.
Sleep with your food stored properly, your cooking gear (pots, utensils, stove) stored with your food (because of smell), and your toiletries (toothpaste, sunscreen, soap) stored separately or with food depending on bear activity. Do not keep snacks in your tent unless you are in an area with no bear history. The few ounces of convenience are not worth the risk.
Camp Kitchen Gear Essentials and Testing Meals Before You Go
You do not need a fancy stove or special cooking gear to eat well on the trail, but a few small items make a huge difference. Here is the minimalist kit I carry on most trips:
Lightweight stove – Pocket Rocket, BRS-3000T, or similar (~3 oz)
Fuel canister – 100g canister lasts 4 to 6 days for two people
Pot – 0.9L titanium or aluminum (~4 oz)
Long-handled spoon – Reaches the bottom of pouches
Lighter and backup fire starter
Small cup or mug – For coffee, hot drinks, cold soaking
Bandana or small towel – For cleanup
Biodegradable soap – Optional, for cookware
Total weight: under 12 ounces for the cook kit. If you are not bringing a stove at all, replace the stove and pot with a wide-mouth 16-oz jar for cold soaking. Many thru-hike food plans now revolve around cold-soaked couscous, ramen, and refried beans, which need nothing more than a jar and a long wait.
Test Every Meal at Home Before Your Trip
This is the single most valuable tip in the entire guide. Cook every meal you plan to bring in your kitchen first. Eat it. See if you like the texture, the salt level, and the portion size. I learned the hard way that some “delicious looking” dehydrated chili was actually inedible after the third bite. If you would not happily eat it at home, you will definitely not want to eat it on a rainy day at 9,000 feet.
Testing also reveals prep surprises. Couscous might cook in 5 minutes on the stove but takes 90 minutes to cold soak. Some freeze-dried meals need 15 minutes instead of the listed 10. The more you know before you are hungry and exhausted, the better.
Adjusting Portions Based on Your First Trip
No matter how well you plan, your first multi-day trip will teach you things spreadsheets cannot predict. Maybe you eat more than expected on big climb days, or less than expected in cold rain. After every trip, take 10 minutes to write down what you actually ate versus what you packed. Use those notes to dial in your next ration. This feedback loop is how experienced backpackers get their food weight down to 1.5 pounds per day while still arriving at camp full and energized.
Sample 3-Day Meal Plan at 3,500 Calories Per Day
Here is a complete plan for a three-day trip in moderate terrain. Copy and adapt it to your tastes:
Day 1
Breakfast: Instant oatmeal with peanut butter and raisins, coffee (700 cal)
Trail snacks: Trail mix, energy bar, cheese stick (700 cal)
Lunch: Tortilla with summer sausage and hard cheese (800 cal)
Dinner: Instant ramen with tuna packet and olive oil packet (900 cal)
Evening: Hot cocoa (200 cal)
Day 2
Breakfast: Couscous with powdered milk and honey (700 cal)
Trail snacks: Mixed nuts, chocolate, jerky (700 cal)
Lunch: Tortilla with peanut butter and honey (800 cal)
Dinner: Instant mashed potatoes with butter packet and summer sausage (900 cal)
Evening: Tea and a Snickers (200 cal)
Day 3
Breakfast: Instant grits with cheese packet (700 cal)
Trail snacks: Trail mix, energy bar, gummy candy (700 cal)
Lunch: Tortilla with tuna and olive oil (800 cal)
Dinner (in town!): Burger and fries (unlimited calories)
Total food weight for three days: roughly 5 pounds plus your bear storage. Adjust portions for your own appetite and the difficulty of your specific route.
Spreadsheet Planning for Longer Trips
For trips longer than five days, or for thru-hike food planning, a simple spreadsheet saves hours of math. I track five columns: meal name, calories, calories per ounce, weight in ounces, and notes. Once your spreadsheet is built, you can sort by calories per ounce to find your worst offenders, replace them, and instantly see the impact on total weight. Many ultralight backpackers use this exact method to cut food weight below 1.5 pounds per day without sacrificing calories.
Spreadsheets also make resupply point planning easier. For a two-week trip with resupplies every four days, you can build four separate meal plans, mail them to yourself (or shop at the next town), and stop carrying the food you have already eaten.
Adjusting Rations Mid-Trip Based on Appetite
One of the biggest content gaps in most guides is what to do when your appetite changes. Cold rain might kill your hunger for the first two days. A big climb day might leave you starving by 4 PM. The fix is to design your ration with built-in flexibility: pack one or two “extra” calorie-dense items like an extra Snickers bar, a packet of olive oil, or a small jar of peanut butter. If you are not hungry, leave them in the bear can for day four or a snack emergency. If you are ravenous, pour the olive oil into your ramen and add an extra 240 calories to dinner.
This buffer system is the secret to consistent energy on long-distance trails. Hikers who pack exactly their calculated calories always end up either starving or wasting food. A small flexible surplus keeps both problems at bay.
Cold Weather Backpacking Nutrition
When temperatures drop below freezing, your body burns significantly more calories just to stay warm. Plan for 4,000 to 5,000 calories per day in cold weather, and lean heavily on fats because they deliver more than twice the calories per gram of carbohydrates or protein. Olive oil packets, butter packets, cheese, sausage, and nut butters become even more important. Hot meals also matter more: a warm dinner before bed helps your body maintain core temperature overnight and dramatically improves sleep quality.
Leave No Trace Food Waste Handling
Pack out everything you pack in. Used ziplocks, freeze-dried meal pouches, tuna cans, citrus peels, and even “biodegradable” food scraps need to leave the wilderness with you. Wildlife habituation to human food is one of the biggest threats to backcountry ecosystems, and it starts with careless waste. Pack a dedicated trash bag, squeeze every bit of air out of used pouches to save space, and never bury food scraps. In bear country, double-bag your trash and store it with your food in the bear can or hang.
FAQs
How do you pack enough food for multi-day hikes?
Start by calculating your daily calorie target (typically 3,000 to 4,500 calories depending on exertion), multiply by the number of days, and divide that total into three meals plus snacks every two hours. Pre-portion each day into a labeled ziplock bag, pack all daily bags into one bear-safe container, and verify the total weight on a kitchen scale before leaving home.
How to pack food for backpacking?
Use one gallon ziplock bag per day, labeled with the day and meal contents. Place all daily bags inside a larger dry bag, stuff sack, or Ursack. Store the entire food load in a bear canister, bear hang, or Ursack at night. Keep all scented items (food, toothpaste, sunscreen, soap) away from your sleeping area to avoid attracting wildlife.
How much food should I bring for a 1-night backpacking trip?
For a single overnight trip, plan 3,000 to 3,500 calories per day. Pack three meals (breakfast, lunch, dinner) plus snack portions for the trail. For most adults this totals 1.5 to 2 pounds of food, which fits comfortably in a small dry bag along with your bear storage. Add 200 to 400 extra calories as a safety buffer in case your hike takes longer than expected.
Do I need a fancy stove or special cooking gear?
No. A simple canister stove like the BRS-3000T or Pocket Rocket weighs about 3 ounces, costs under $30, and boils water in under 4 minutes. For ultralight setups, you can skip a stove entirely and cold soak couscous, ramen, or refried beans in a wide-mouth jar while you hike. Either approach delivers hot, satisfying meals without significant pack weight.
Do I have to use freeze-dried meals?
No. Freeze-dried meals are convenient but not required. DIY meals built from grocery store ingredients like instant ramen, couscous, instant mashed potatoes, tortillas, peanut butter, tuna packets, and summer sausage are cheaper, often tastier, and easier to customize. Many experienced backpackers use a mix: freeze-dried for one or two dinners and DIY for everything else.
What if I pack too much food or don’t eat it all?
Pack a small flexible surplus (200 to 400 extra calories per day in items like olive oil packets, candy bars, or extra nut butter). If you are not hungry, save them for emergencies. If you are starving, add them to your dinners. Unused food at the end of a trip can usually be donated to a trail angel, shared with fellow hikers, or stored at home for your next trip rather than wasted.
How should I pack out trash?
Pack out absolutely everything: used ziplocks, freeze-dried pouches, tuna cans, citrus peels, and any food scraps. Squeeze air out of used pouches to save space and double-bag in a dedicated trash bag. Store trash with your food in your bear canister or hang at night to avoid habituating wildlife to human food smells. Never bury food scraps and never burn wrappers in a campfire.
Final Thoughts on Planning Food for Your Next Trip
Knowing how to ration and plan food for a multi-day backpacking trip is one of those skills that pays off on every single trip you take. Start with a realistic calorie target, build a menu around calorie-dense foods, pre-portion into daily bags, test your meals at home, and stay flexible with a small surplus. Whether you go full DIY, full freeze-dried, or mix the two, the goal is the same: arrive at camp fed, energized, and excited to do it again tomorrow.
Take notes after your next trip, refine your ration numbers, and build a “greatest hits” meal plan you can deploy anytime. Once you have done it two or three times, the planning process takes less than an hour and your trail experience improves dramatically. That is the deal: a little planning time at home for a lot more comfort on the mountain.
1 thought on “How to Ration and Plan Food for a Multi-Day Backpacking Trip (September 2026)”