
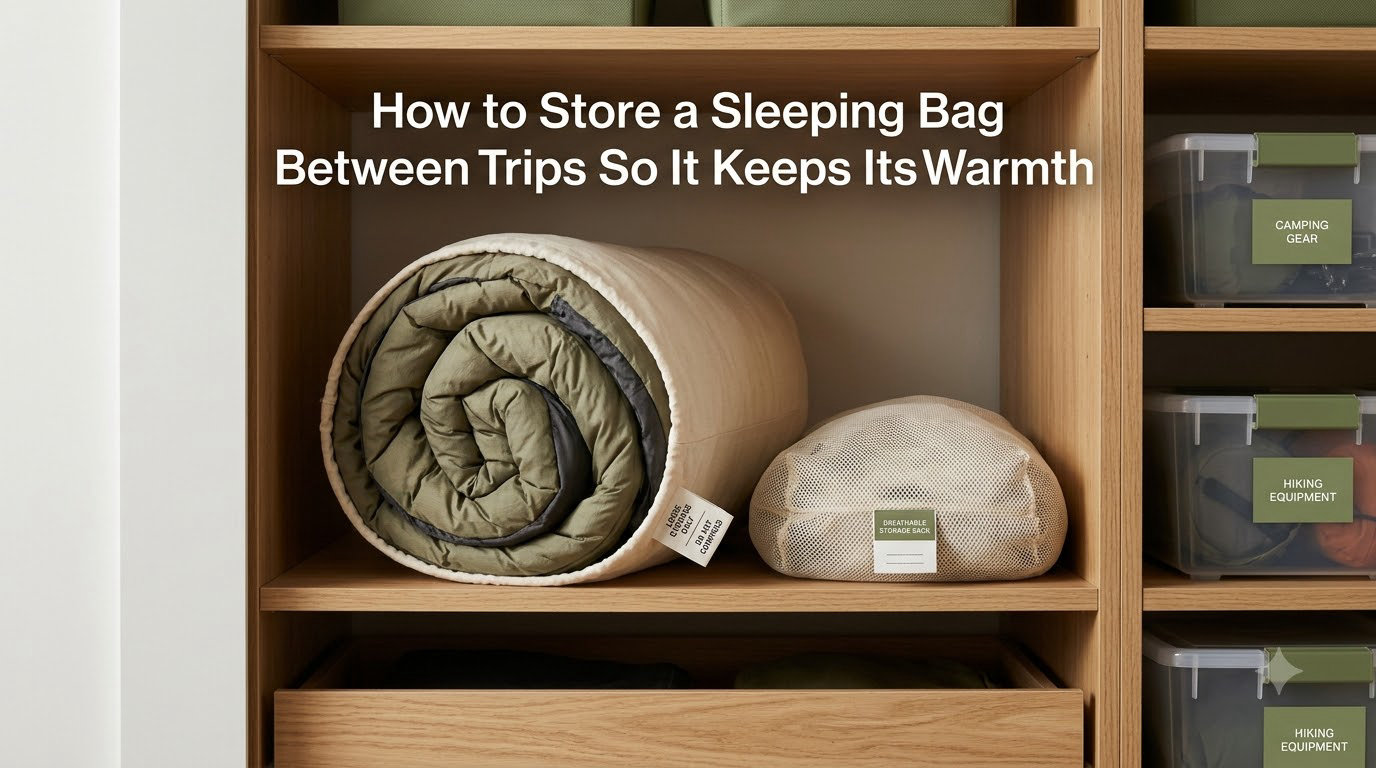
Most people shove their sleeping bag back into its compression sack after a trip and shove it in a closet. I did that for years until I noticed my $350 down bag barely kept me warm at 45°F anymore. Learning how to store a sleeping bag between trips properly changed everything. After 12 years of backcountry camping and testing gear in everything from desert winters to damp Pacific Northwest summers, I have learned what works and what destroys a bag’s insulation. This guide shares exactly what I do, why compression is your enemy, and how to keep your bag lofted and warm for many seasons.
The answer is simpler than you might think: keep your bag uncompressed, in a breathable container, in a cool and dry place. The rest of this article explains the why, the how, and the small details that matter.
Table of Contents
Why Compression Kills Loft in Your Sleeping Bag
Loft is the fluff that traps warm air. Every sleeping bag works the same basic way: tiny fibers (either down clusters or synthetic fill) create millions of tiny air pockets that hold heat next to your body. When you compress those fibers for weeks or months, they slowly lose the ability to spring back.
I saw this happen to a friend’s 800-fill down bag that lived in a compression sack for three years. When he finally pulled it out for a winter trip, it felt flat. The down clusters had bonded together from constant pressure. There was no rescuing it without sending it to a professional re-baffling service.
Synthetic fill handles compression slightly better, but it also degrades. The plastic-based fibers develop memory loss over time. The general rule from outdoor gear experts: avoid keeping any sleeping bag compressed for longer than a few days at a stretch.
Humidity makes compression damage worse. A damp bag stuffed in a tight sack can develop mold, mildew, and clumping in under a week. We will cover moisture management in detail below.
Step-by-Step: How to Store a Sleeping Bag Between Trips
Here is the exact routine I follow after every trip. Total time investment: about 15 minutes of active work plus drying time. Skipping any of these steps shortens the life of your bag, so I treat them as a non-negotiable checklist.
Step 1: Air Out the Bag Immediately After the Trip
Fully unzip the bag and drape it over a chair, clothesline, or porch railing for 6 to 8 hours. Direct sunlight is okay in moderation, but shade is better since UV can weaken shell fabric over time. This step lets body oils, sweat, and ambient moisture evaporate. Do not skip it, even if the bag feels dry to the touch.
Step 2: Spot Clean and Wash If Needed
If the bag has visible dirt or smells off, hand wash it in a bathtub with a down-safe or synth-safe cleaner. I personally use Nikwax Tech Wash for both bag types. Use cool water and gentle squeezing motions. Never twist or wring the bag, since that can damage baffles and tear internal stitching.
For a deeper clean, a front-loading washing machine on gentle cycle works well. Top-loaders with agitators can damage baffles and shred delicate shell fabric. Add a few clean tennis balls to the dryer on low heat to break up clumps during drying.
Step 3: Make Sure the Bag Is Fully Dry Before Storage
A damp bag stored even loosely can develop mildew within days. I run mine through one full dryer cycle on low heat after washing, even if the air-drying felt complete. Down takes longer to dry than synthetic, sometimes two to three dryer cycles. Be patient here. Rushing this step is the most common cause of musty sleeping bags.
Step 4: Transfer to a Breathable Storage Container
Move the bag out of its compression stuff sack. Use one of the following instead:
The large cotton or mesh storage sack that came with the bag
An old pillowcase (clean, breathable, free option)
A mesh laundry bag from the laundry aisle
A large cotton duvet cover stored loosely
A breathable canvas tote with the top left open
The material matters. Cotton and mesh let air circulate. Plastic does not. I keep three pillowcases on hand specifically for this purpose. They cost nothing and work great for long-term storage. Many backpackers on forums also swear by clear plastic zipper pouches from old pillow or comforter packaging, though cotton and mesh remain the safest choices.
Step 5: Store Loosely in a Cool, Dry Location
Lay the bag flat on a closet shelf, drape it over a wide padded hanger, or hang it from a hook in a dry closet. Avoid anywhere with temperature swings, moisture, or pests. The bag should have room to maintain its natural loft without pressure points.
If space is tight, fold the bag loosely into thirds rather than stuffing it. A loose fold creates far less compression than cramming it into a limited space.
Down vs Synthetic Sleeping Bag Storage Differences
The two main insulation types need slightly different approaches. Most of the steps above apply to both, but here are the differences I have learned to respect over many seasons of testing.
Down bags are more sensitive to moisture. Down clusters clump when wet and lose loft fast. If you live in a humid climate or store your bag in a basement or garage, consider adding a silica gel packet inside the storage container. I learned this the hard way after a musty smell took weeks to remove from a bag stored in a leaky closet.
Down also benefits from being fluffed periodically. Every two months I unfold my down bag, shake it gently, and refold it loosely. This redistributes the down clusters and prevents any one section from being compressed for too long. Synthetic fill bounces back faster and does not need this as much, but it does not hurt.
Synthetic bags tolerate compression better than down, but they still lose loft over years. They handle humidity more gracefully. They also dry much faster. If you camp in wet conditions often, a quality synthetic bag stored properly can outlast a down bag stored carelessly.
| Factor | Down Sleeping Bag | Synthetic Sleeping Bag |
|---|---|---|
| Humidity sensitivity | High | Moderate |
| Compression tolerance | Low | Moderate |
| Drying time | Long | Short |
| Loft recovery | Slower | Faster |
| Periodic fluffing needed | Yes | Optional |
| Typical lifespan with care | 10 to 20 years | 5 to 10 years |
Best Storage Location: Where to Keep Your Sleeping Bag
Where you store the bag matters as much as how. The ideal spot is cool, dry, dark, and out of the way. Most homes have only a few locations that fit all four criteria.
A closet shelf in a climate-controlled room is the gold standard. I keep mine on the top shelf of a hall closet in a mesh laundry bag. The temperature stays steady year-round, and no sunlight hits the bag.
Under the bed works if your bedroom is climate-controlled. Just avoid putting the bag in a sealed plastic bin under there, since that traps any residual moisture. Keep it in the breathable sack and slide it under the bed.
A garage can work in dry climates. I tested this during a year in New Mexico where humidity hovered around 15%. The bag stayed fine. A garage in Florida or the Pacific Northwest is a different story. Constant humidity above 60% will introduce moisture problems fast.
A basement is usually a bad idea. Even finished basements tend to be damper than the rest of the house. A damp basement is the fastest path to a musty, mildew-covered sleeping bag. If your basement is your only option, invest in a dehumidifier and check the bag monthly.
A storage unit without climate control is risky. The temperature swings alone can stress baffles and shell fabric. If you must use one, put the bag in the best container you can and check on it monthly for moisture or pests.
Climate-Specific Storage Tips
Climate changes everything about sleeping bag storage. Here is what I have learned living in four different regions.
In humid coastal climates (think the Pacific Northwest, Southeast US, or tropical regions), moisture is the constant enemy. Use a dehumidifier near your storage area if possible. Add silica gel packets inside the storage sack. Check the bag every 4 to 6 weeks instead of every few months.
In dry desert climates (the Southwest US, parts of Australia, or high-altitude regions), humidity is rarely the problem. Static electricity and dust become bigger concerns. A breathable cotton sack keeps dust off without trapping moisture. A light shake every few months removes any settled particles.
In cold winter climates with central heating, the air indoors gets very dry. This is actually good for sleeping bag storage. The main concern is keeping the bag away from direct heat sources like radiators or heating vents, which can dry out shell fabric and weaken stitching over time.
Storage Solutions for Small Spaces and Apartments
Not everyone has a spare closet shelf. Here are approaches that work when space is tight.
Use the space under your bed. A breathable cotton sack tucked under a bed keeps the bag out of sight and still allows airflow. Just slide it out every two months for a quick fluff check.
Hang it from a hook on the back of a door. A wide padded hanger or a dedicated sleeping bag hanger keeps the bag vertical and uncompressed. This works in studio apartments where closet space is limited.
Store it on top of a wardrobe or high shelf. Out of sight, out of the way, and the elevation keeps it away from floor moisture. Just make sure the shelf can handle the weight of a damp bag if you forget to dry it fully.
For households with multiple sleeping bags, stack them loosely in a large breathable cotton or canvas duffel. A big cotton duffel with the top rolled closed (not sealed) works well for storing two or three bags at once. Avoid stacking them in tight compression.
Quick-Reference Storage Checklist
Print this out or save it on your phone before you pack up after your next trip.
Air out the bag for 6 to 8 hours before doing anything else
Spot clean visible dirt; wash only if really needed
Confirm the bag is 100% dry before storage
Move out of the compression stuff sack
Use a cotton sack, mesh bag, or pillowcase
Store in a cool, dry, dark location
Lay flat or hang loosely; never folded tightly
Check on the bag every 2 to 3 months
Fluff down bags during each check
Add silica gel in humid climates
Common Sleeping Bag Storage Mistakes to Avoid
Most sleeping bag damage I have seen came from one of these five errors. Avoid them and your bag will last far longer than the warranty period.
Storing in the compression sack. The stuff sack you used to cram the bag into your backpack is not for storage. Its only job is transport. Using it for long-term storage is the number one killer of sleeping bag loft, and it is the mistake I see most often on camping forums.
Putting a damp bag away. Even slightly damp bags grow mildew in closed containers. When in doubt, give it another hour of air time or run it through a low-heat dryer cycle.
Folding too tightly. Even in a breathable container, folding a bag into a tight cube creates compression points. Drape it instead of folding, or fold loosely if you must.
Storing in a plastic bin or sealed bag. Plastic traps moisture. No exceptions. If you need pest protection, use a fabric container and add cedar blocks nearby instead.
Ignoring the bag for years. Sleeping bags benefit from occasional attention. A 60-second check every few months catches problems early, especially in humid environments.
Signs Your Sleeping Bag Has Lost Loft Permanently
Not every warm night lost means permanent damage. Here is how to tell if your bag has real issues versus normal wear.
Lay the bag out fully and look at the baffles. If you see flat spots that do not puff up after a shake, those areas have lost fill or the down has clumped. A single small flat spot is not a crisis. Multiple flat baffles across the bag signal real damage.
Compare the bag’s loft to when it was new. Down bags should be visibly thick. A bag that feels thin even after shaking may have shifted fill. Some brands offer re-baffling or re-filling services that can restore a mid-life bag.
Check for cold spots when sleeping. If you feel a chilly seam line or specific area during a cool night, the fill has likely thinned or migrated there. A good shake and re-lofting can sometimes redistribute fill.
Smell the bag. A musty or sour smell means mildew is starting. Surface mildew can sometimes be washed out with a proper cleaning cycle. Deep mildew that has penetrated the fill usually means replacement time.
Look for actual feather or fiber escaping through the shell. A few escaped fibers are normal. Constant shedding means the shell fabric or seams have failed, and the bag will continue to lose insulation over time.
FAQs: Sleeping Bag Storage Questions Answered
How to store a sleeping bag when not in use?
Keep the bag uncompressed in a breathable container such as a mesh laundry bag, cotton storage sack, or clean pillowcase. Store it in a cool, dry, dark location like a closet shelf. Always air the bag out for 6 to 8 hours before putting it away so any moisture evaporates completely.
Can you store a sleeping bag in the garage?
Yes, but only in a dry climate where humidity stays below 50%. In humid regions, garages introduce too much moisture and cause mildew. A climate-controlled closet indoors is always the safer choice. If garage storage is your only option, add silica gel packets and check the bag every month.
Should you keep a sleeping bag compressed?
No. Long-term compression flattens insulation fibers and permanently reduces loft. Use the compression stuff sack only during transport, then transfer the bag to a loose, breathable container for storage. Even a few weeks of compression can start to affect performance.
How to store down vs synthetic sleeping bag?
Both types need loose, breathable storage in a cool dry place. Down is more sensitive to moisture and benefits from periodic fluffing every two months. Synthetic handles humidity better and recovers loft faster but still degrades under compression over time.
What happens if you compress a sleeping bag long term?
Insulation fibers slowly lose their ability to spring back. Down clusters bond together and synthetic fibers develop memory. Over months this becomes permanent, leaving the bag thin and cold even after shaking and airing. Prevention is far easier than repair.
Final Thoughts on Sleeping Bag Storage
Knowing how to store a sleeping bag between trips is the single biggest factor in how long it lasts and how warm it stays. A few minutes of care after each trip saves you from a cold night years later and saves you from replacing an expensive bag that should have lasted a decade.
The short version is easy to remember: air it out, dry it fully, keep it uncompressed, store it in breathable fabric, and put it somewhere cool and dry. That is the entire routine. Treat your sleeping bag well and it will return the favor on every cold night in the backcountry for many seasons to come.
Start with your next trip. After you unpack, take an extra 15 minutes to follow the steps above. Your future self, hiking into a freezing campsite with a toasty warm bag, will thank you.